Table of Contents
Visual Examples of Response Types

There are several base controls built into ChekRite. You can also create your own custom controls. The base controls can not be edited by you but if you need to make a system-wide change to a base control, your ChekRite Customer Support Representative can do this for you. You are free to modify any custom controls you create yourself.
Here are visual examples of the base response types as they appear on the ChekRite iPad app. The iPhone versions are very similar just on the smaller screen.
Pass / Fail
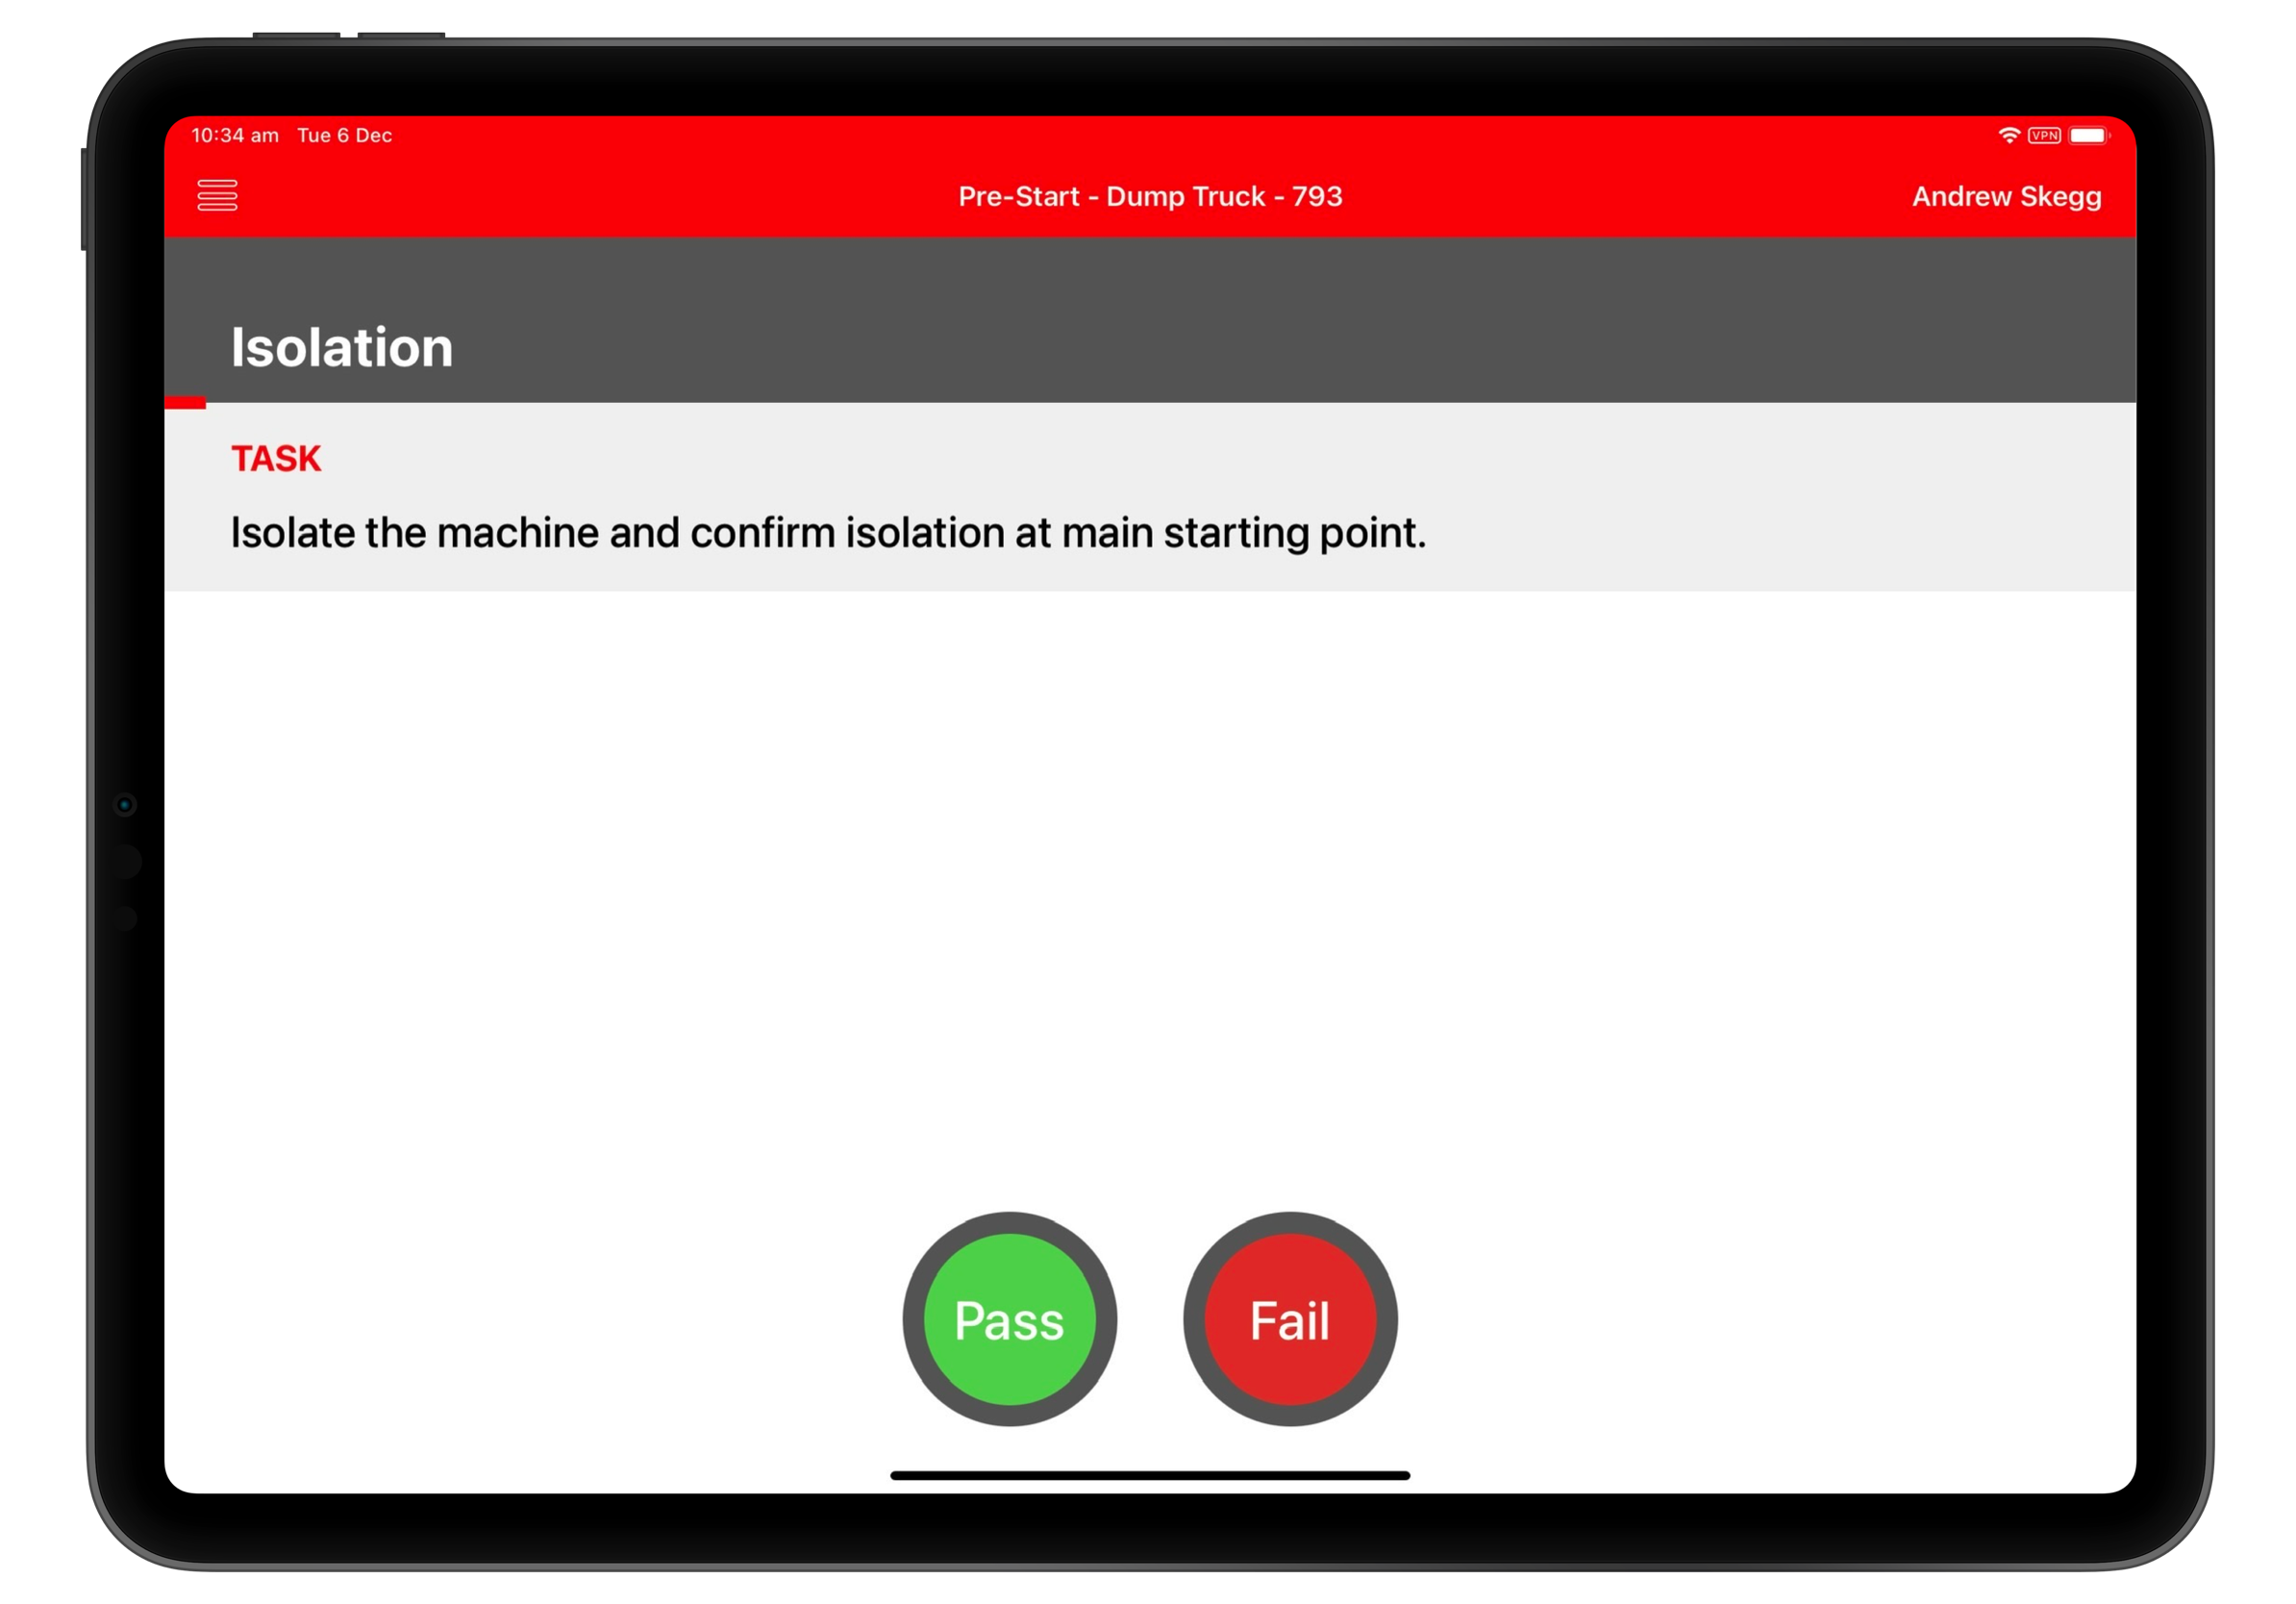
This is the most commonly used response type in ChekRite, designed to determine whether an item meets the required standards. It's used when a clear binary outcome (pass or fail) is necessary for evaluation.
Pass / Fail / Fix
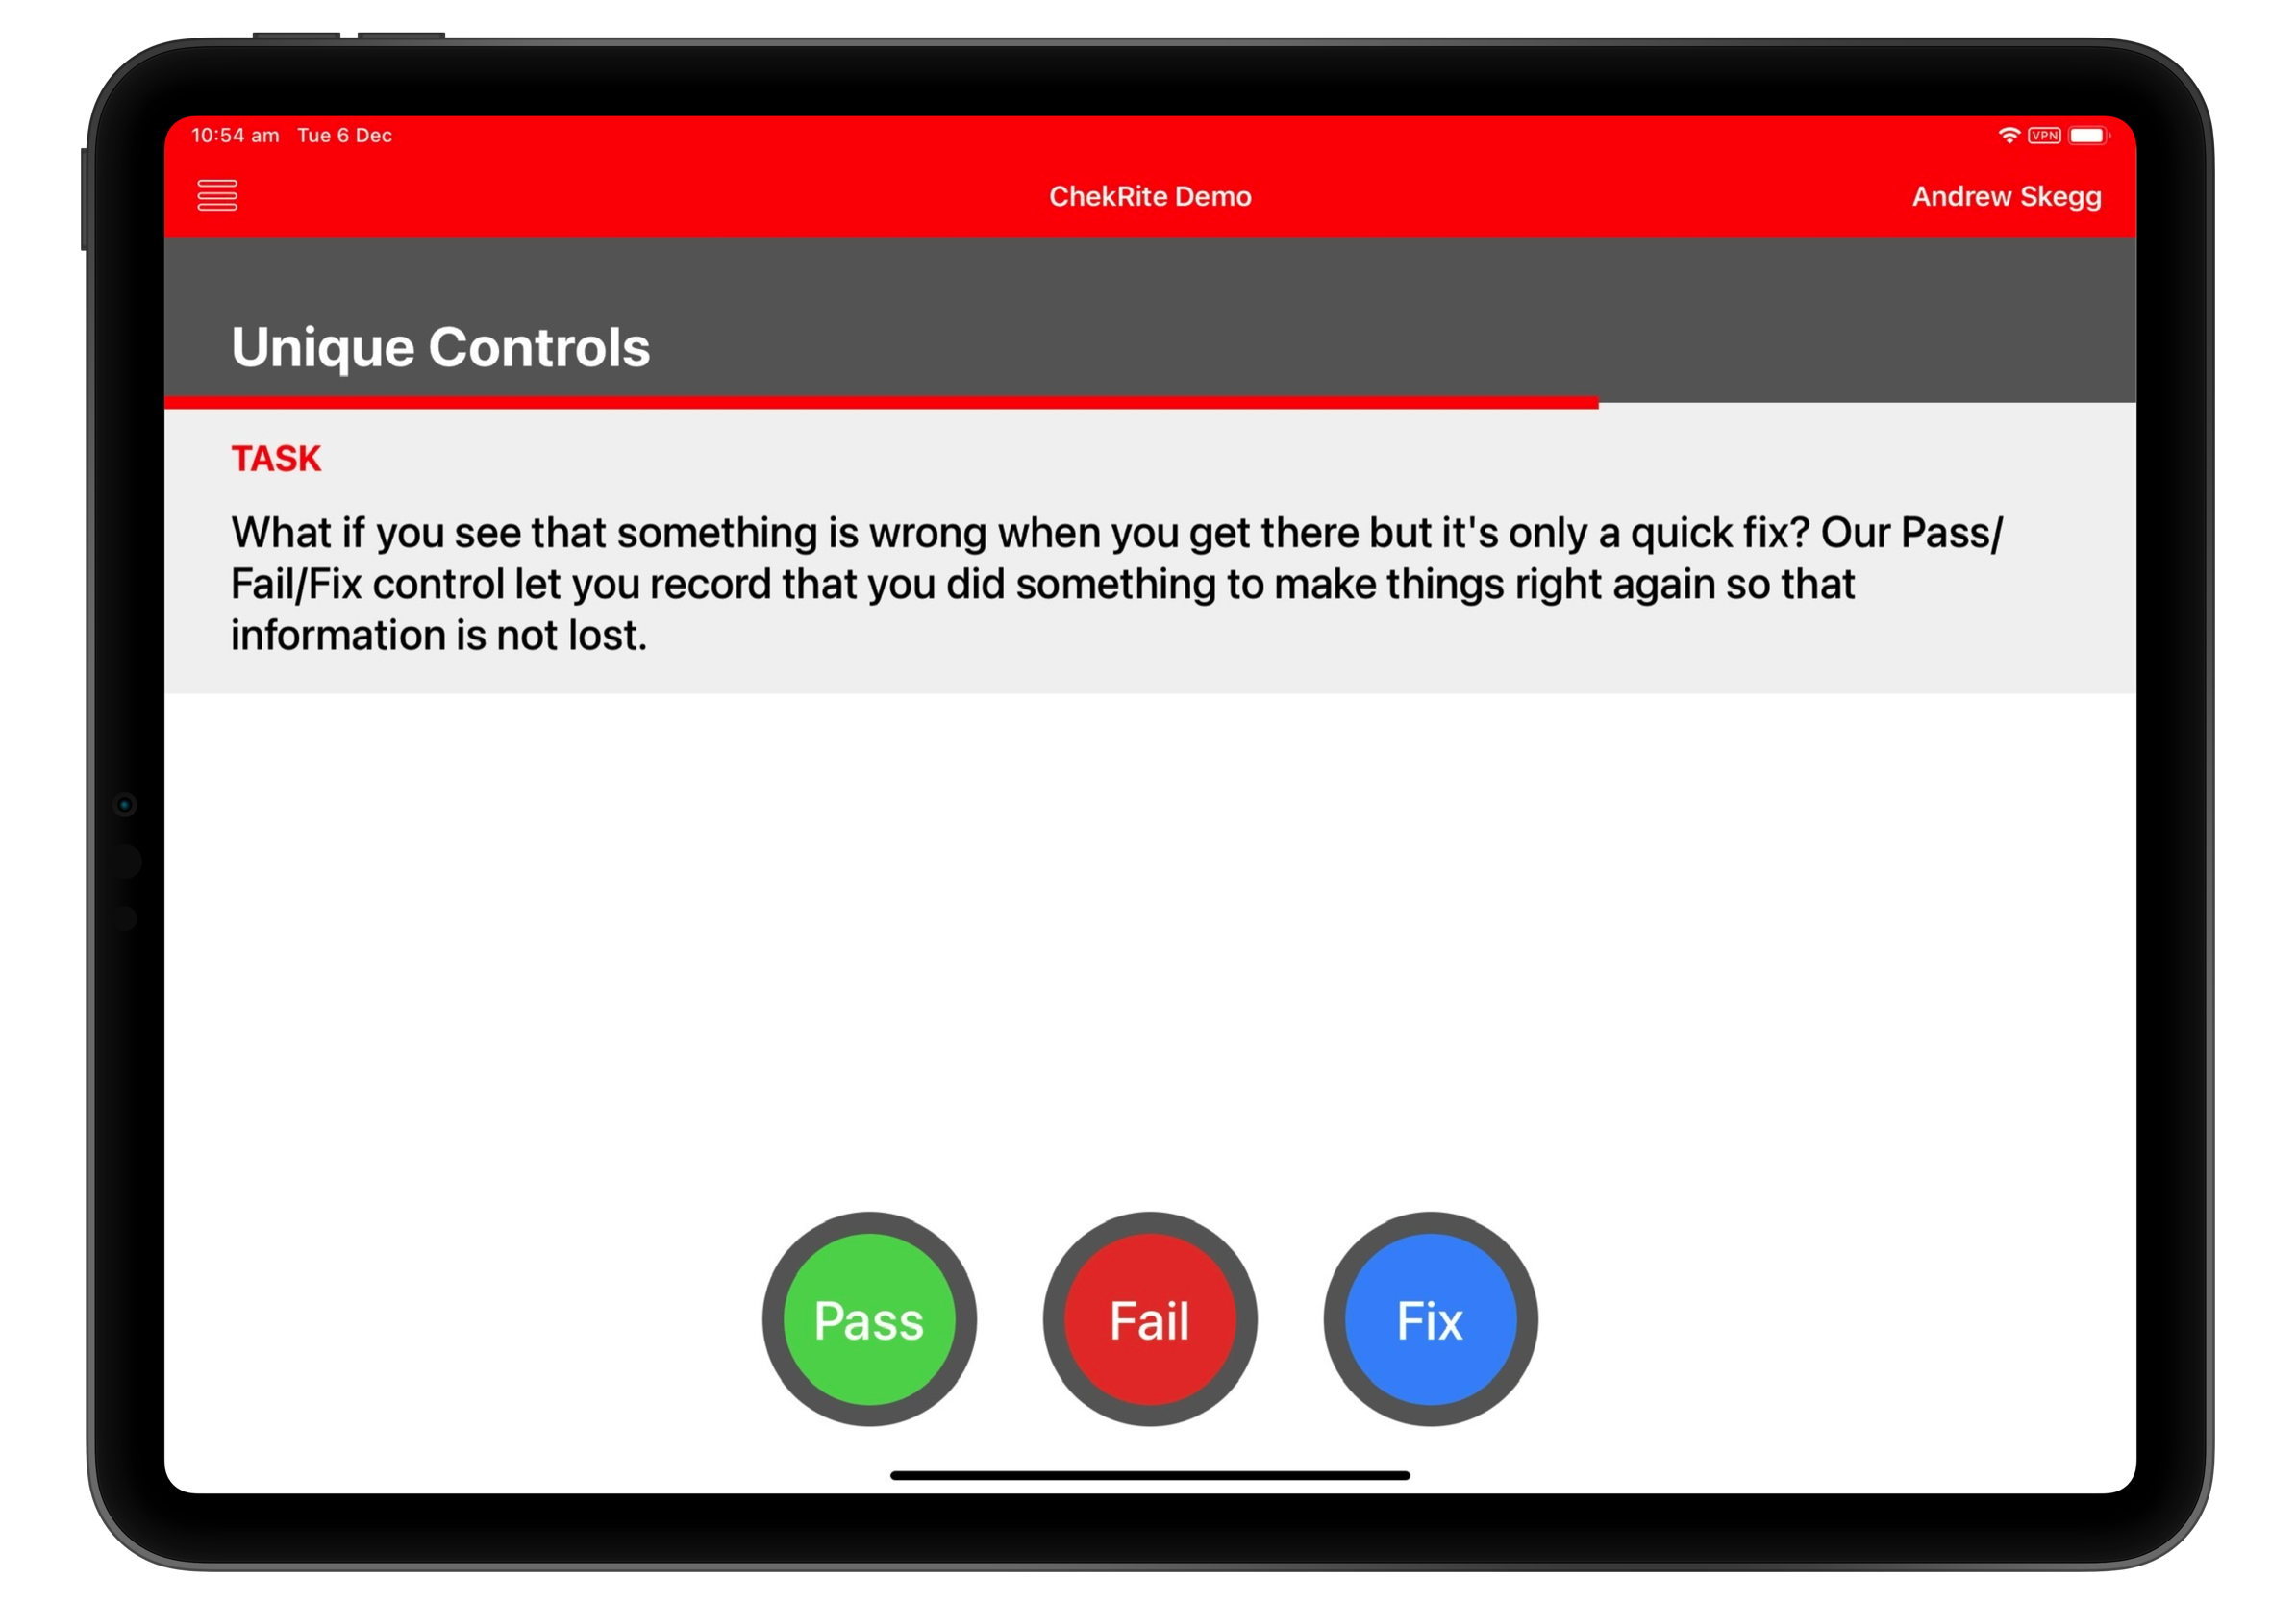
An extension of the Pass/Fail response type, Pass/Fail/Fix introduces a third state, "Fix," which is ideal for situations where an item initially fails but can be easily corrected. This option allows users to record that an item has been brought into compliance after an initial failure, providing a more nuanced assessment outcome.
Pass / Fail / Caution
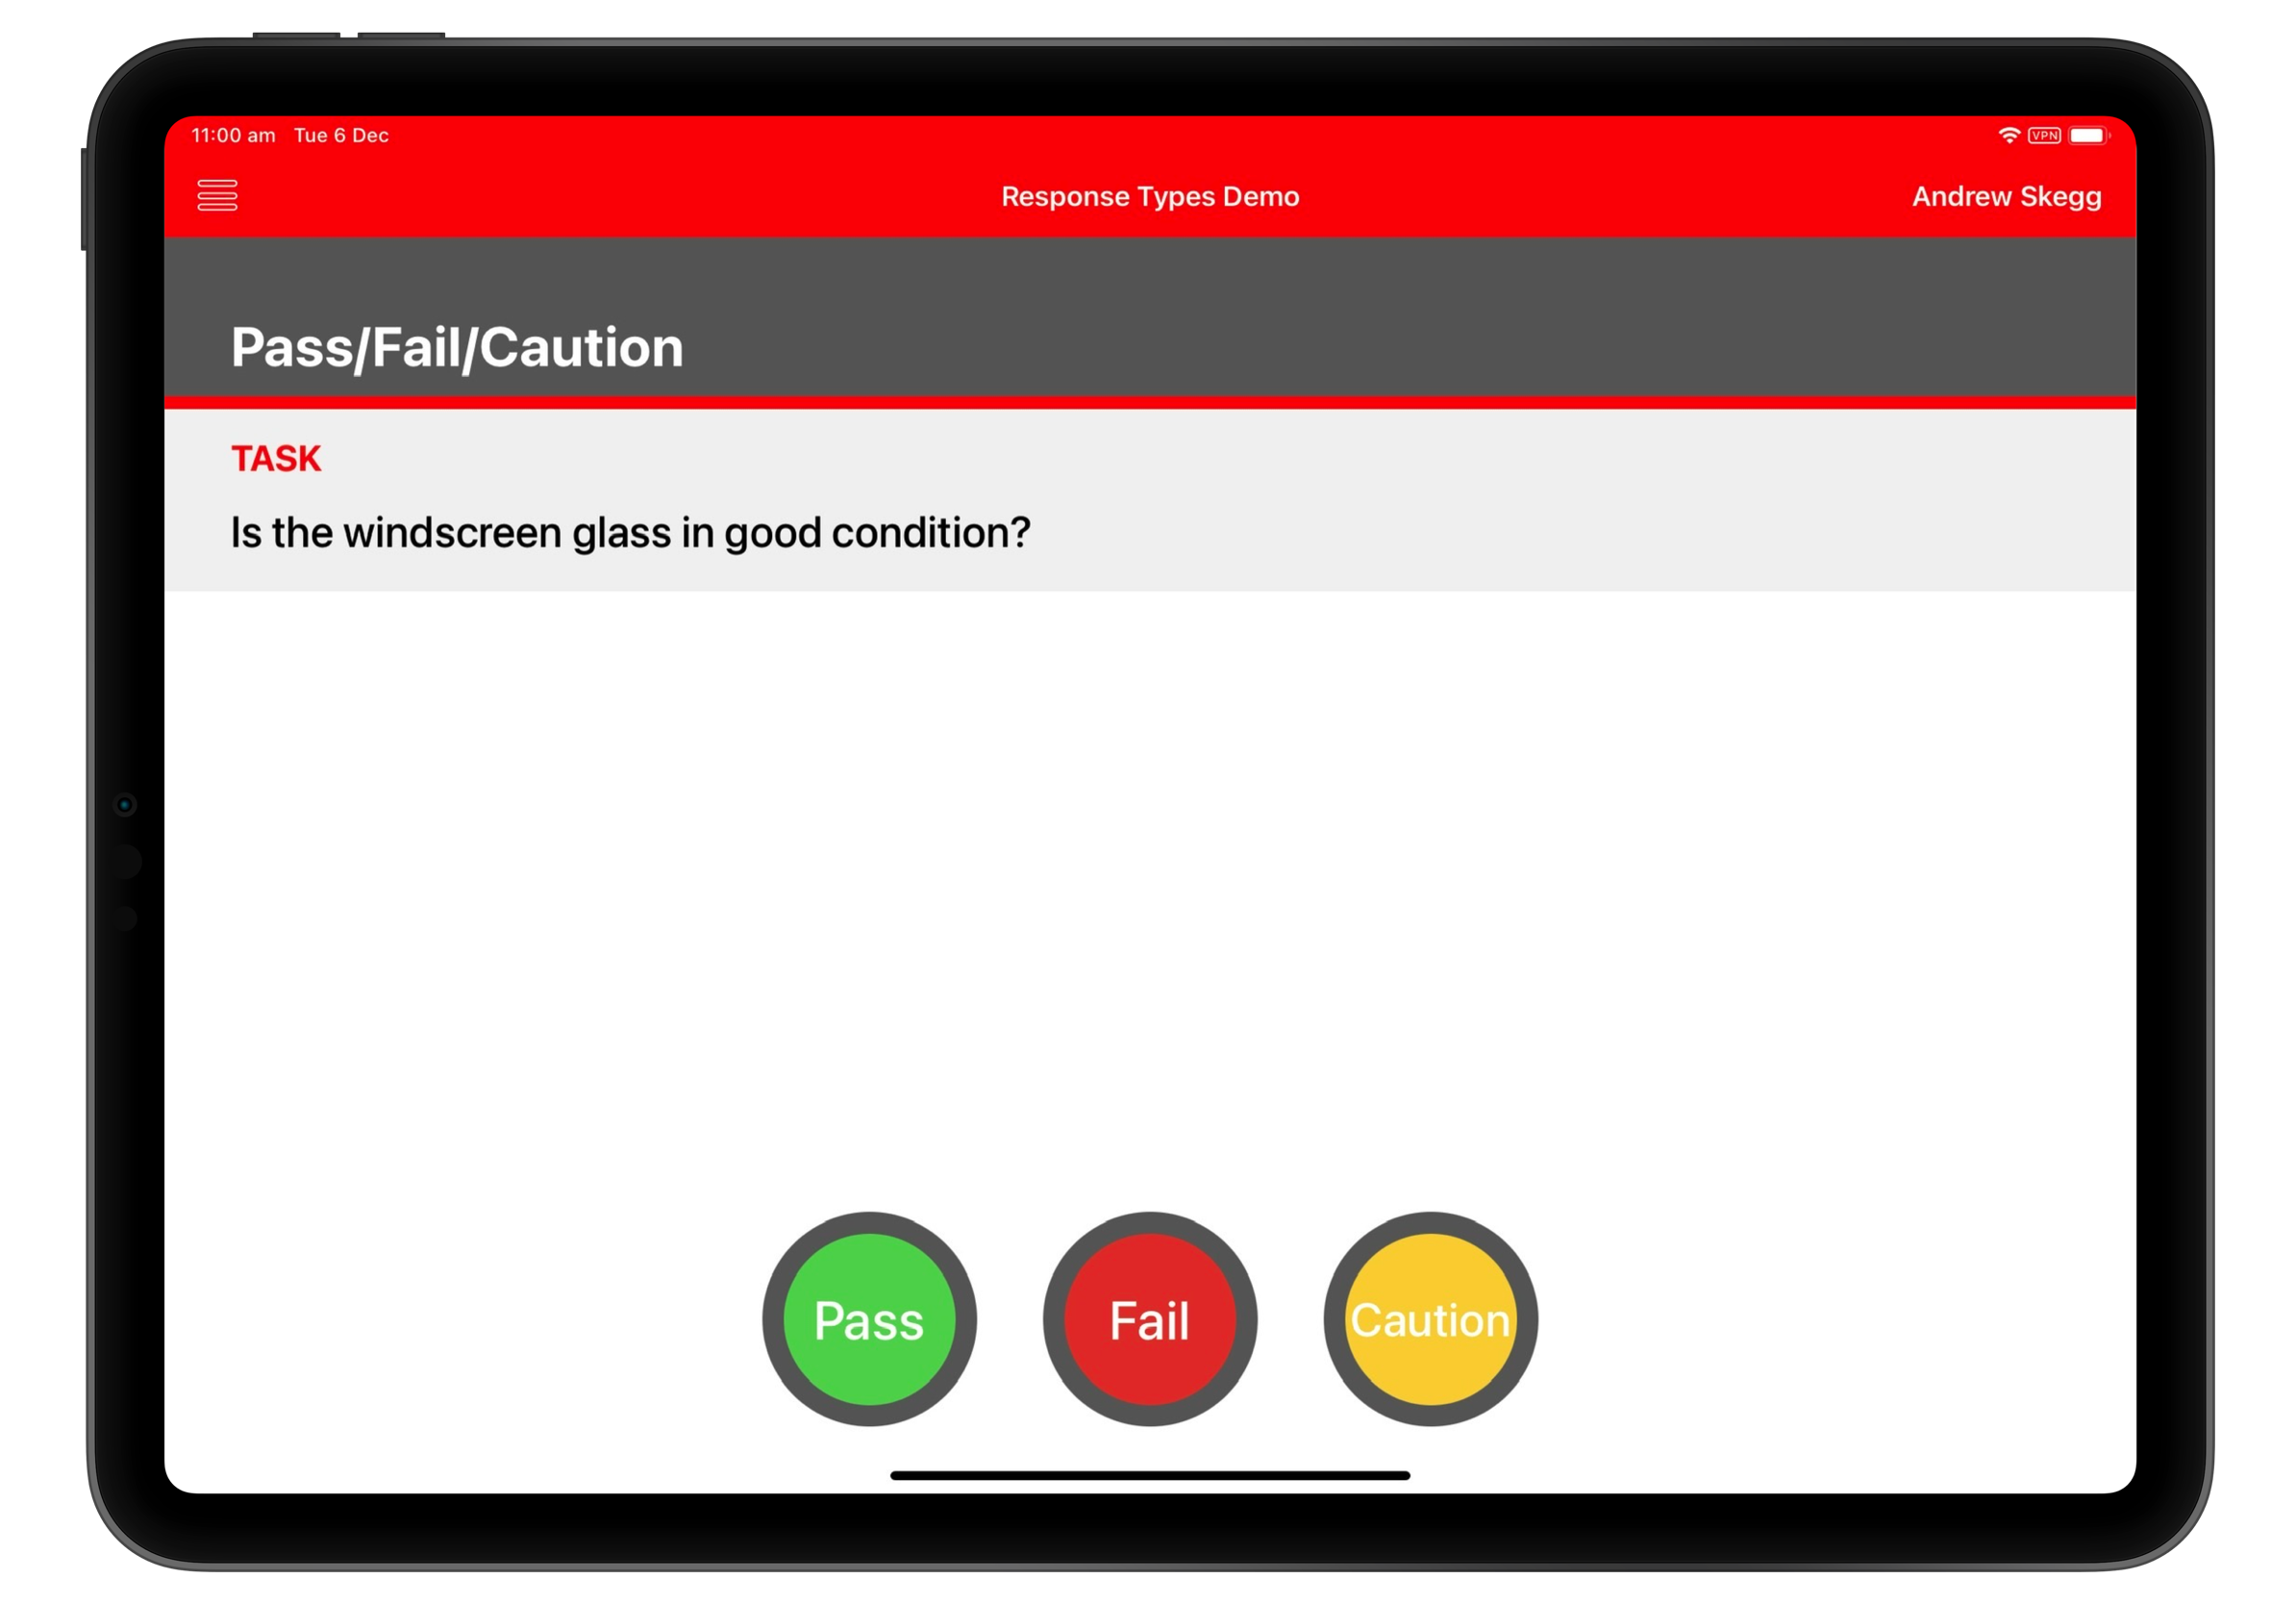
This response type is used when, in addition to a pass or fail outcome, there's a need to indicate caution. It's particularly useful for highlighting potential risks or areas that require special attention, even if the overall assessment results in a pass.
Yes / No
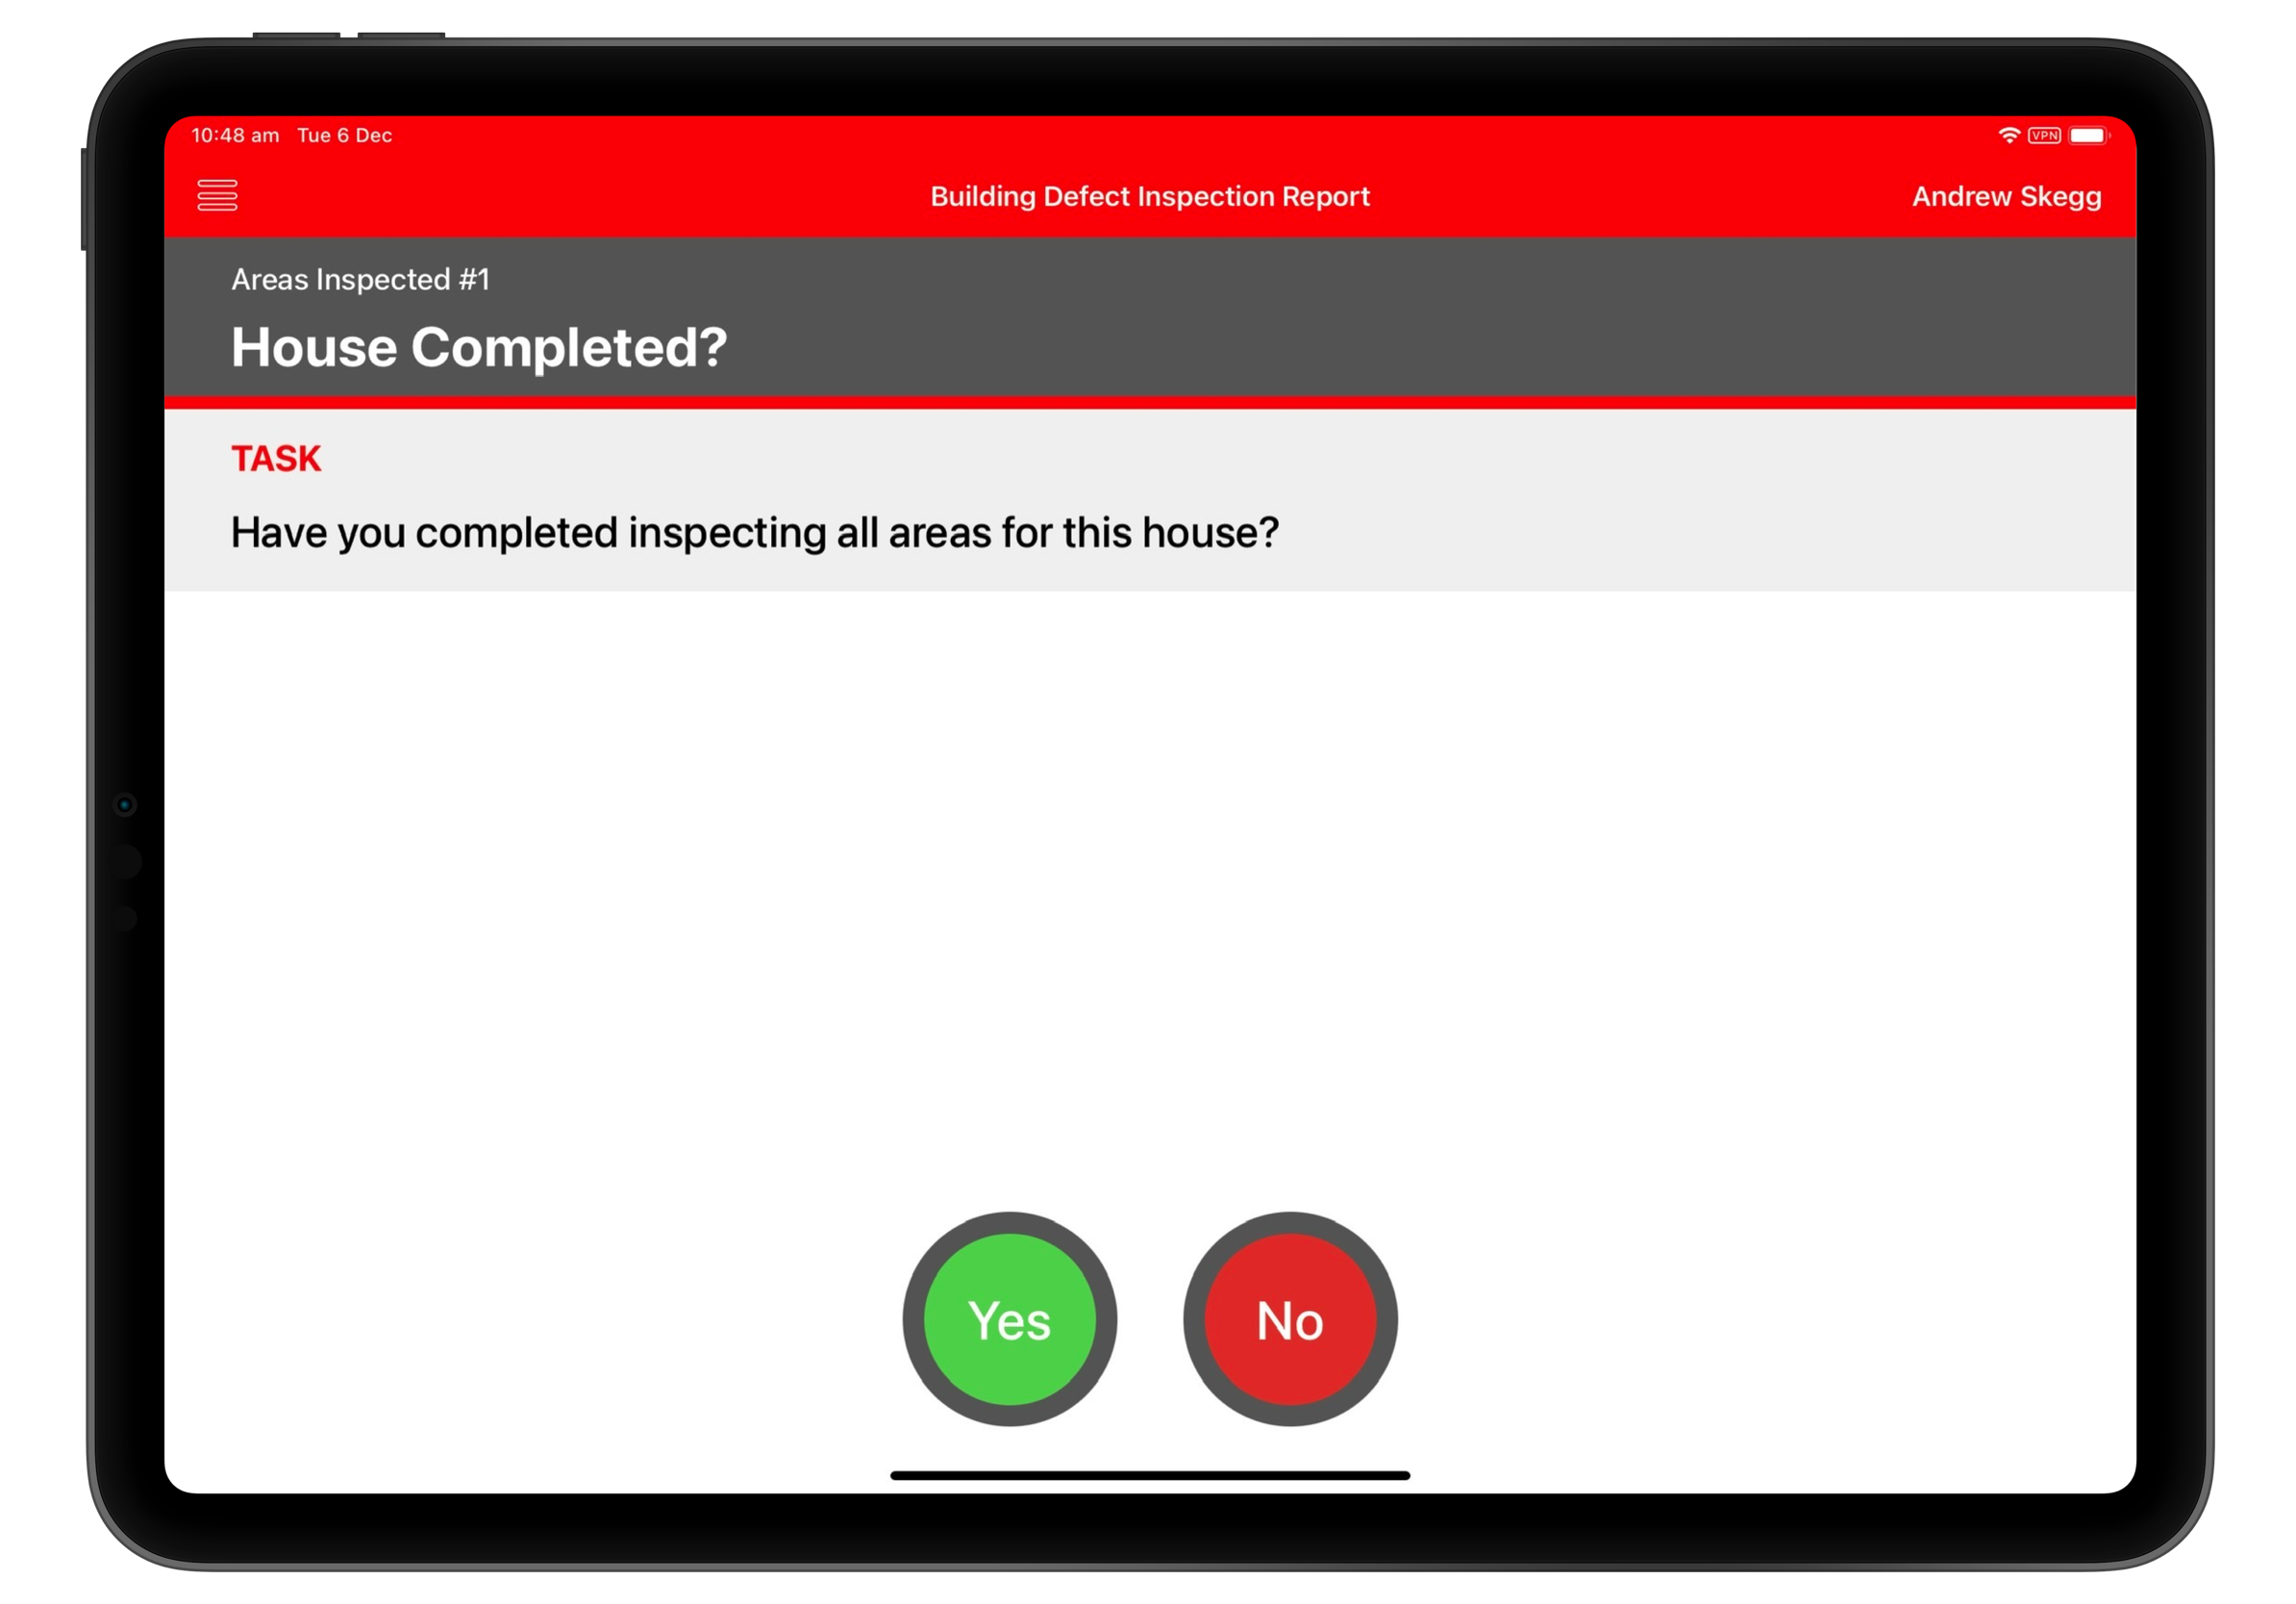
This response type is used for straightforward confirmation questions, such as "Is everything okay?" where Yes is typically the positive or desired answer, and No indicates a problem. It’s easy to understand but relies heavily on how the question is worded.
No / Yes
Functionally similar to Yes/No, but with the options reversed. It’s typically used when the question is phrased to identify problems, such as "Are there any issues?" where Yes signals a negative condition and No indicates everything is fine.
On / Off

This response type is typically used for equipment states, switches, or settings, where On is the expected or compliant state. For example, "Is the beacon light switched on?" where On is the desired answer and Off indicates a problem.
Off / On
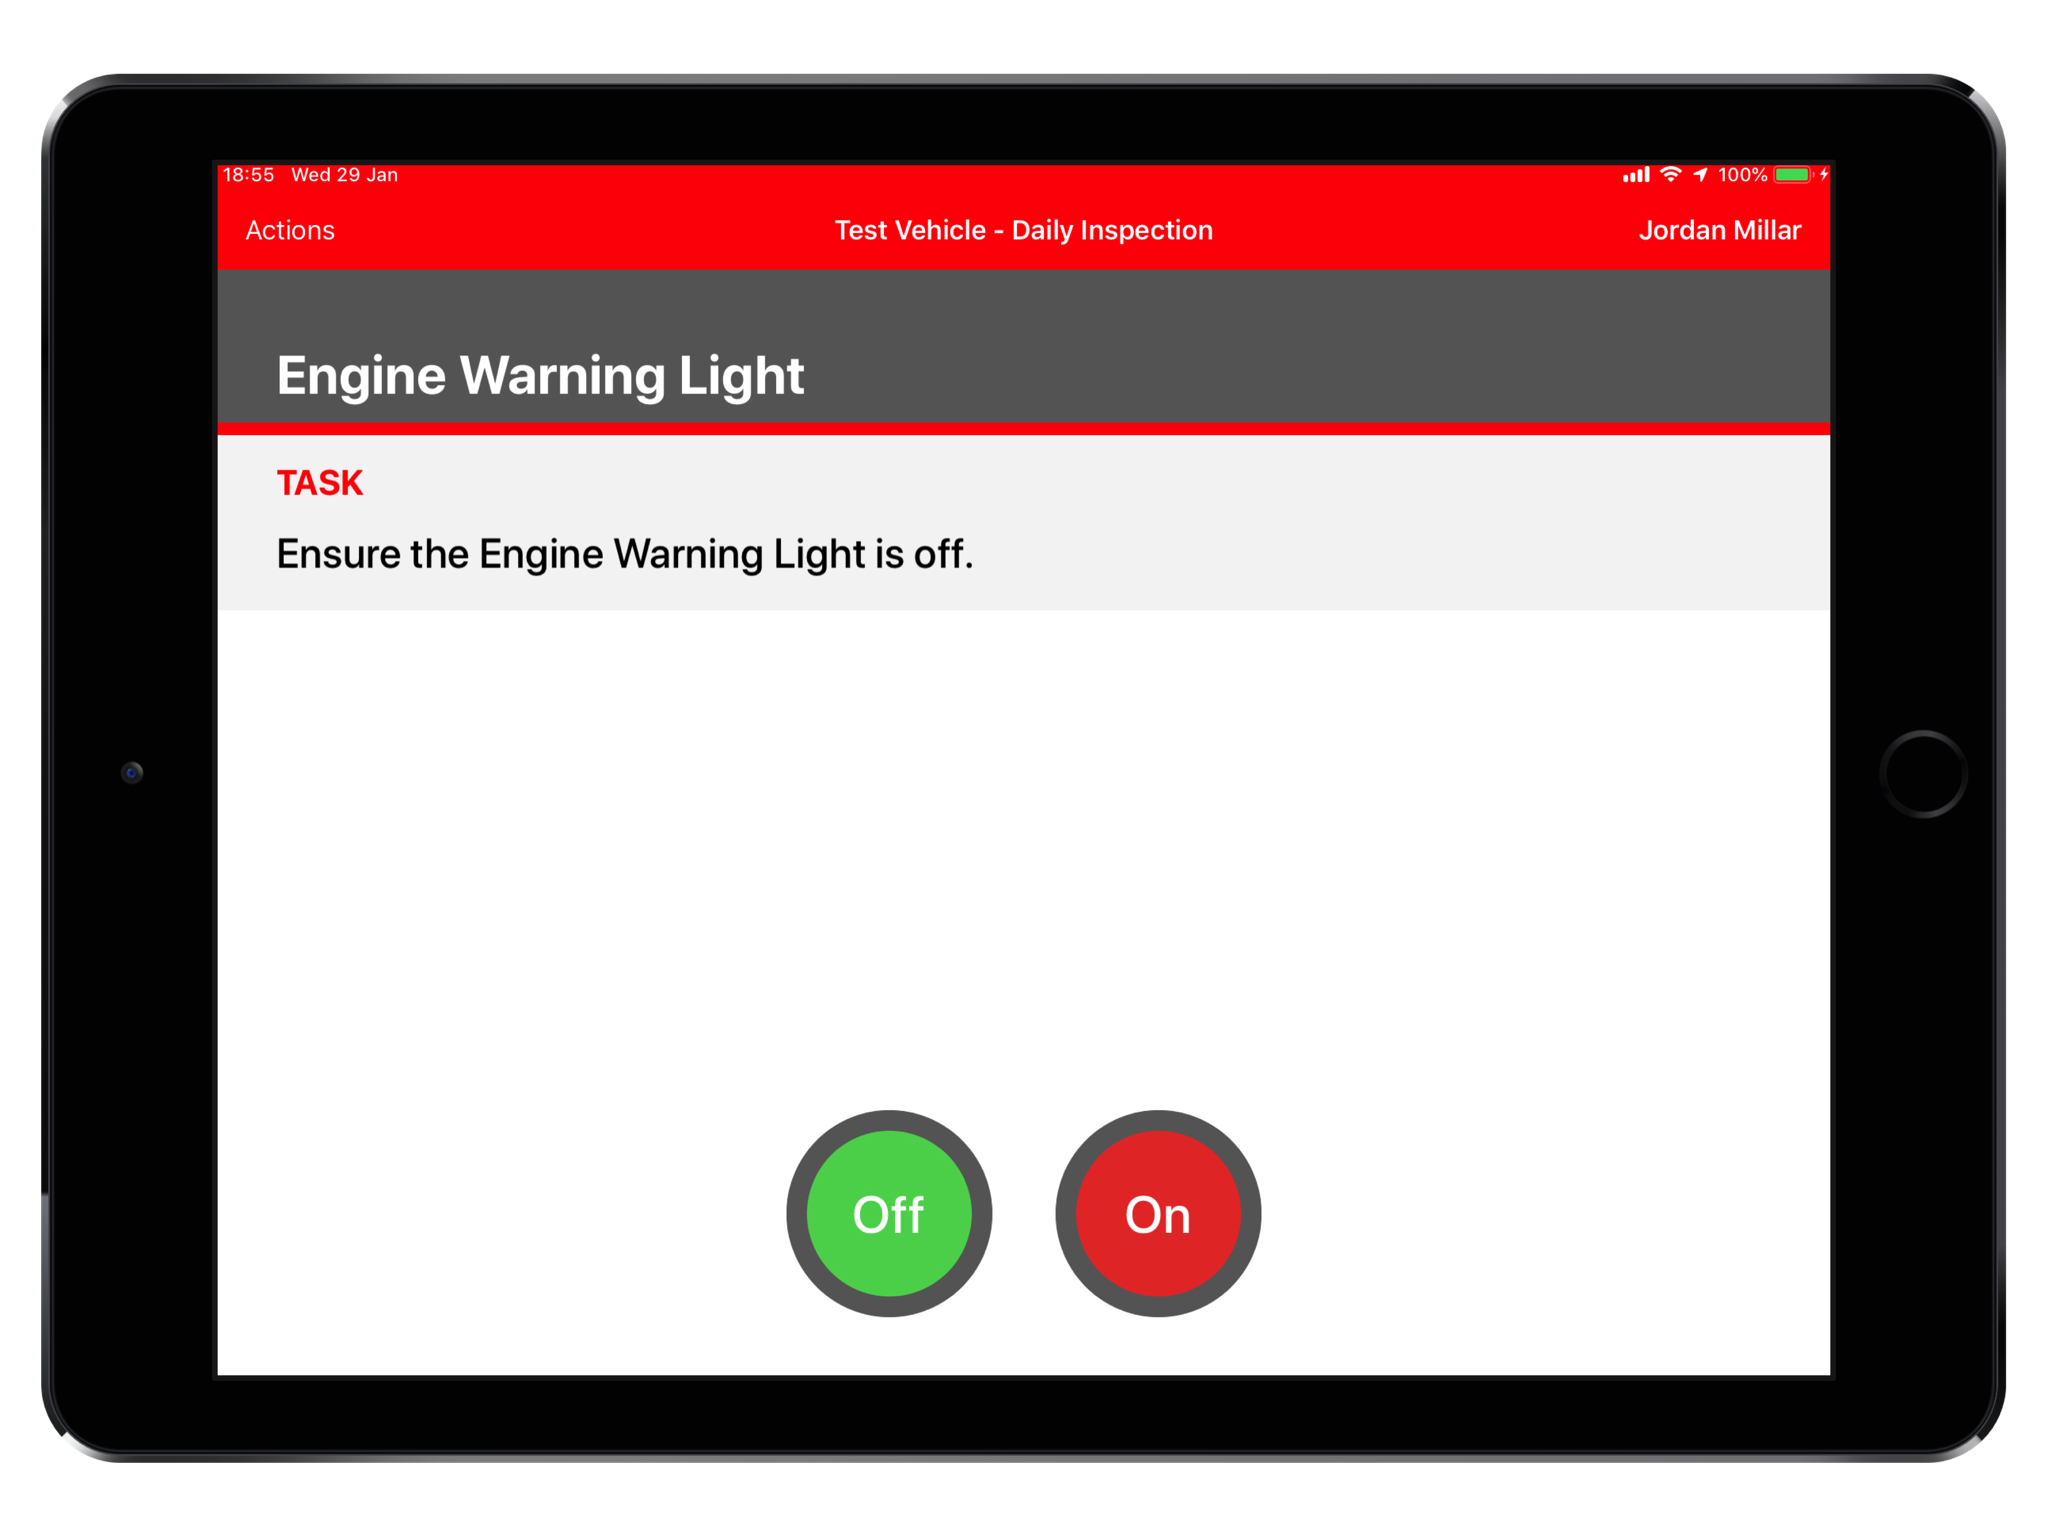
This version simply reverses the order, and is more suitable for questions where Off is the expected response. For example, "Check the engine warning light" where Off is the correct state and On could signal a fault.
Step
This response type is used to guide users through a process without requiring an assessment or decision. On screen, it appears as a single Next button. It’s designed to confirm that a specific action or instruction has been completed before proceeding. There’s no right or wrong answer—just a simple progression. If additional input (like a photo or comment) is required at that step, the app will prompt the user accordingly.
No-State Gauge
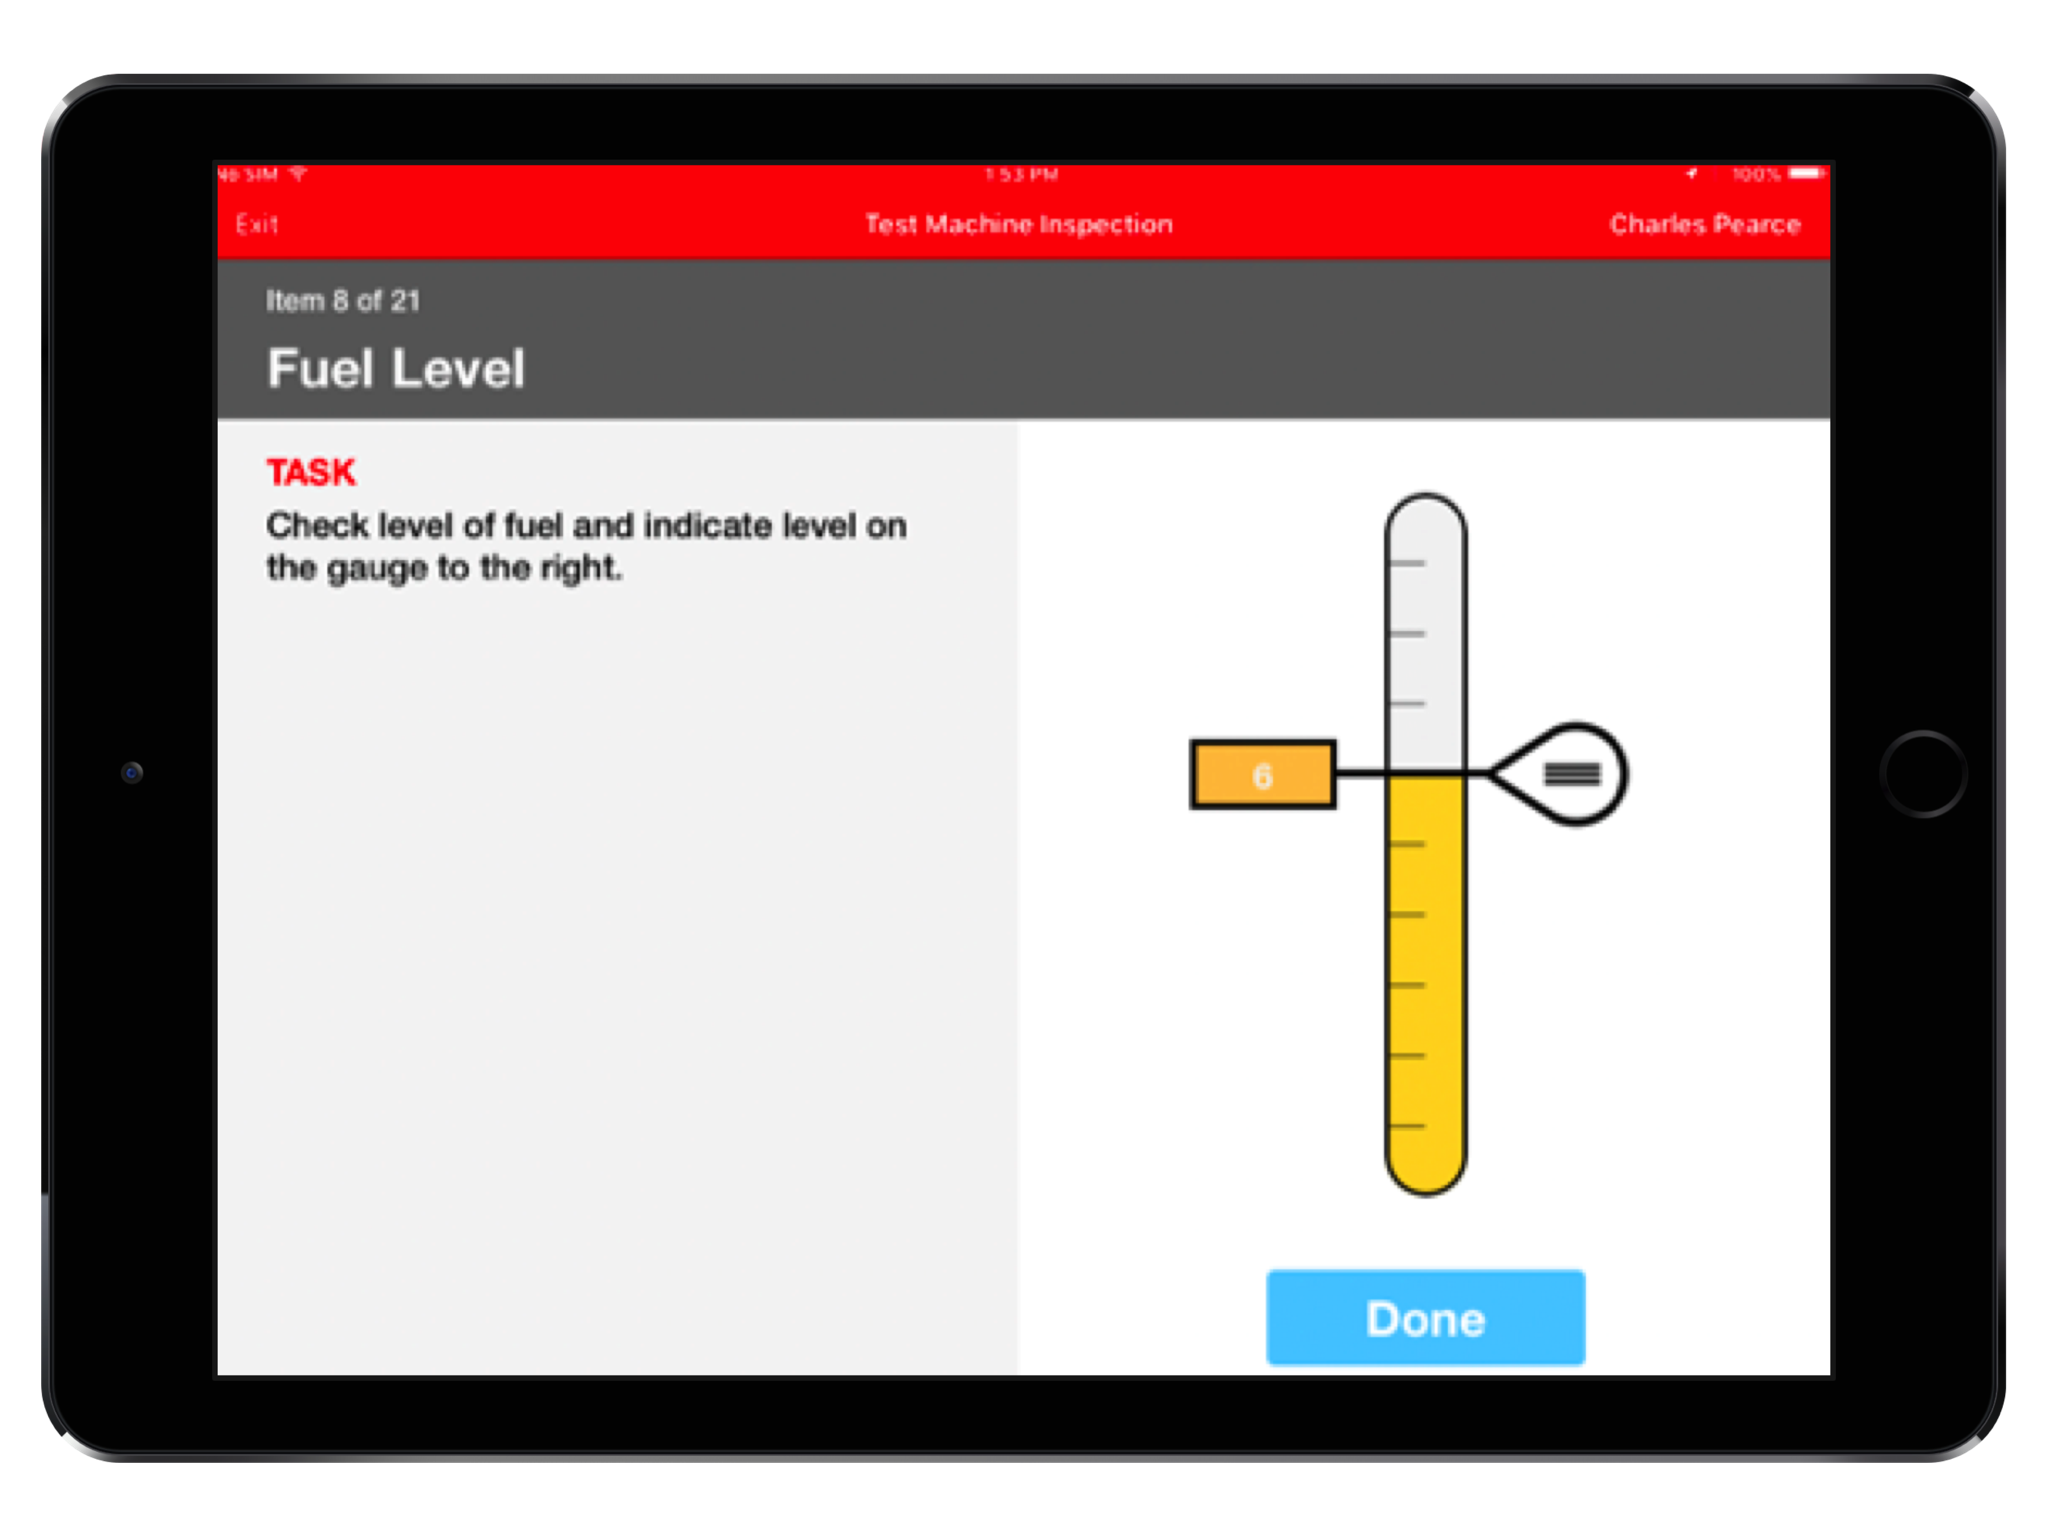
This gauge has no colour bands or predefined pass/fail ranges. It’s ideal when you just need to capture a value, such as fuel level or pressure, without implying whether it’s good or bad. It simply records the indicated level for reference or analysis.
2-State Gauge
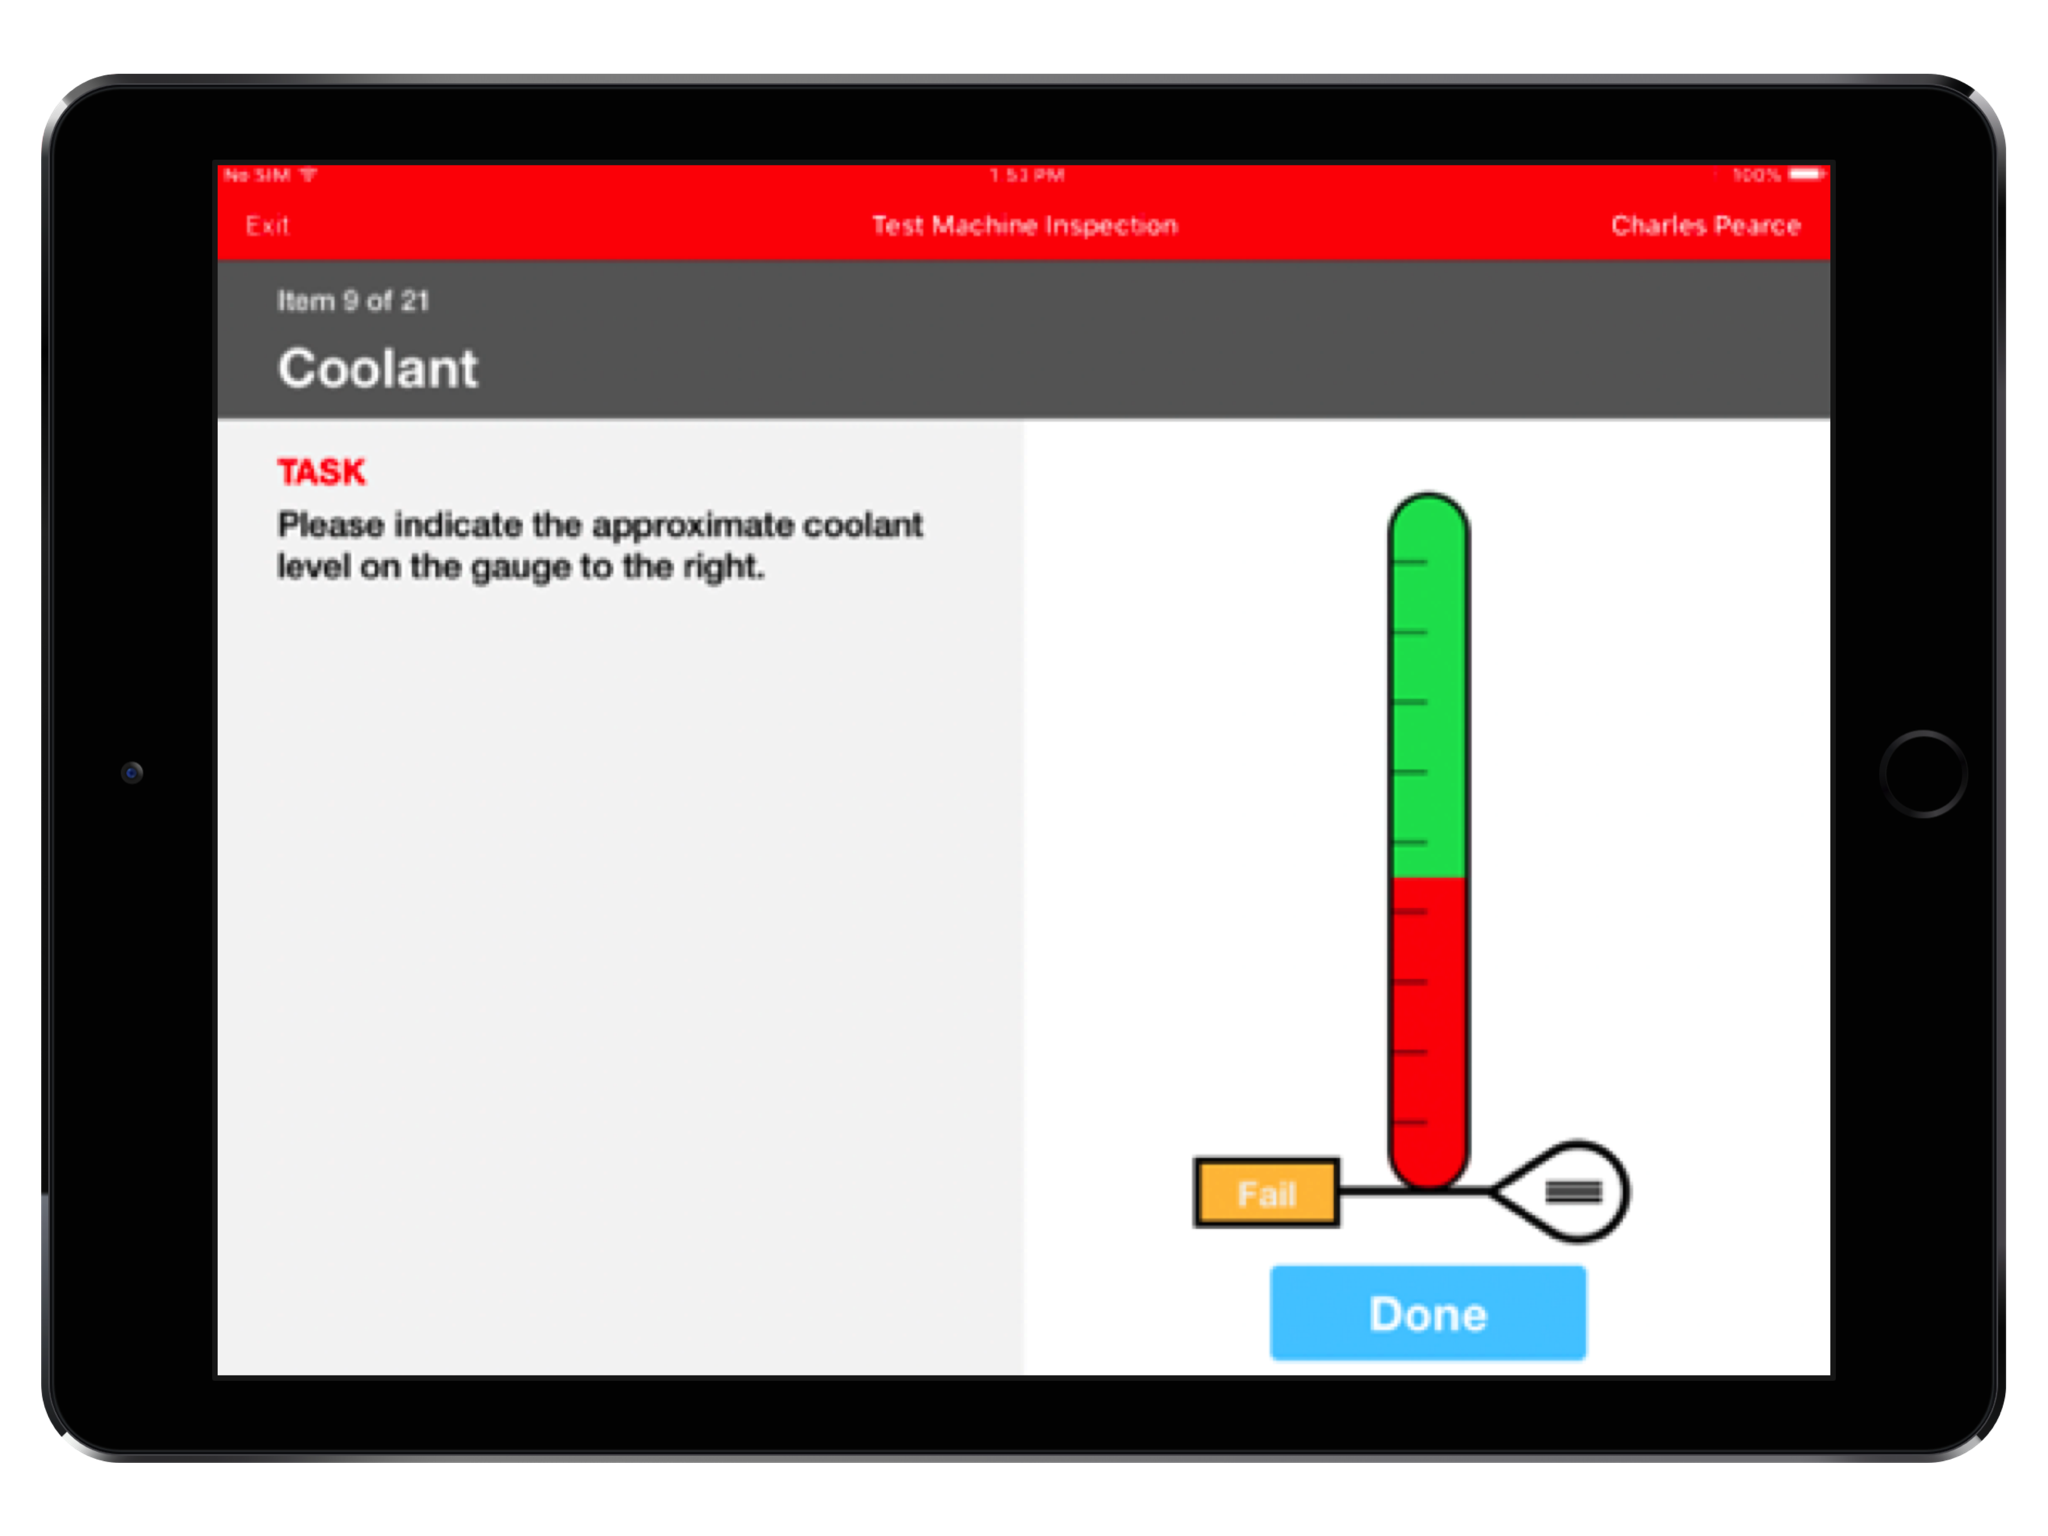
Coloured red at the bottom and green at the top, this gauge is used when a minimum acceptable level must be met. For example, fluid checks where low levels indicate a fail (red), but anything above the threshold is acceptable (green). There's no maximum—just a single fail zone and a pass zone.
3-State Gauge
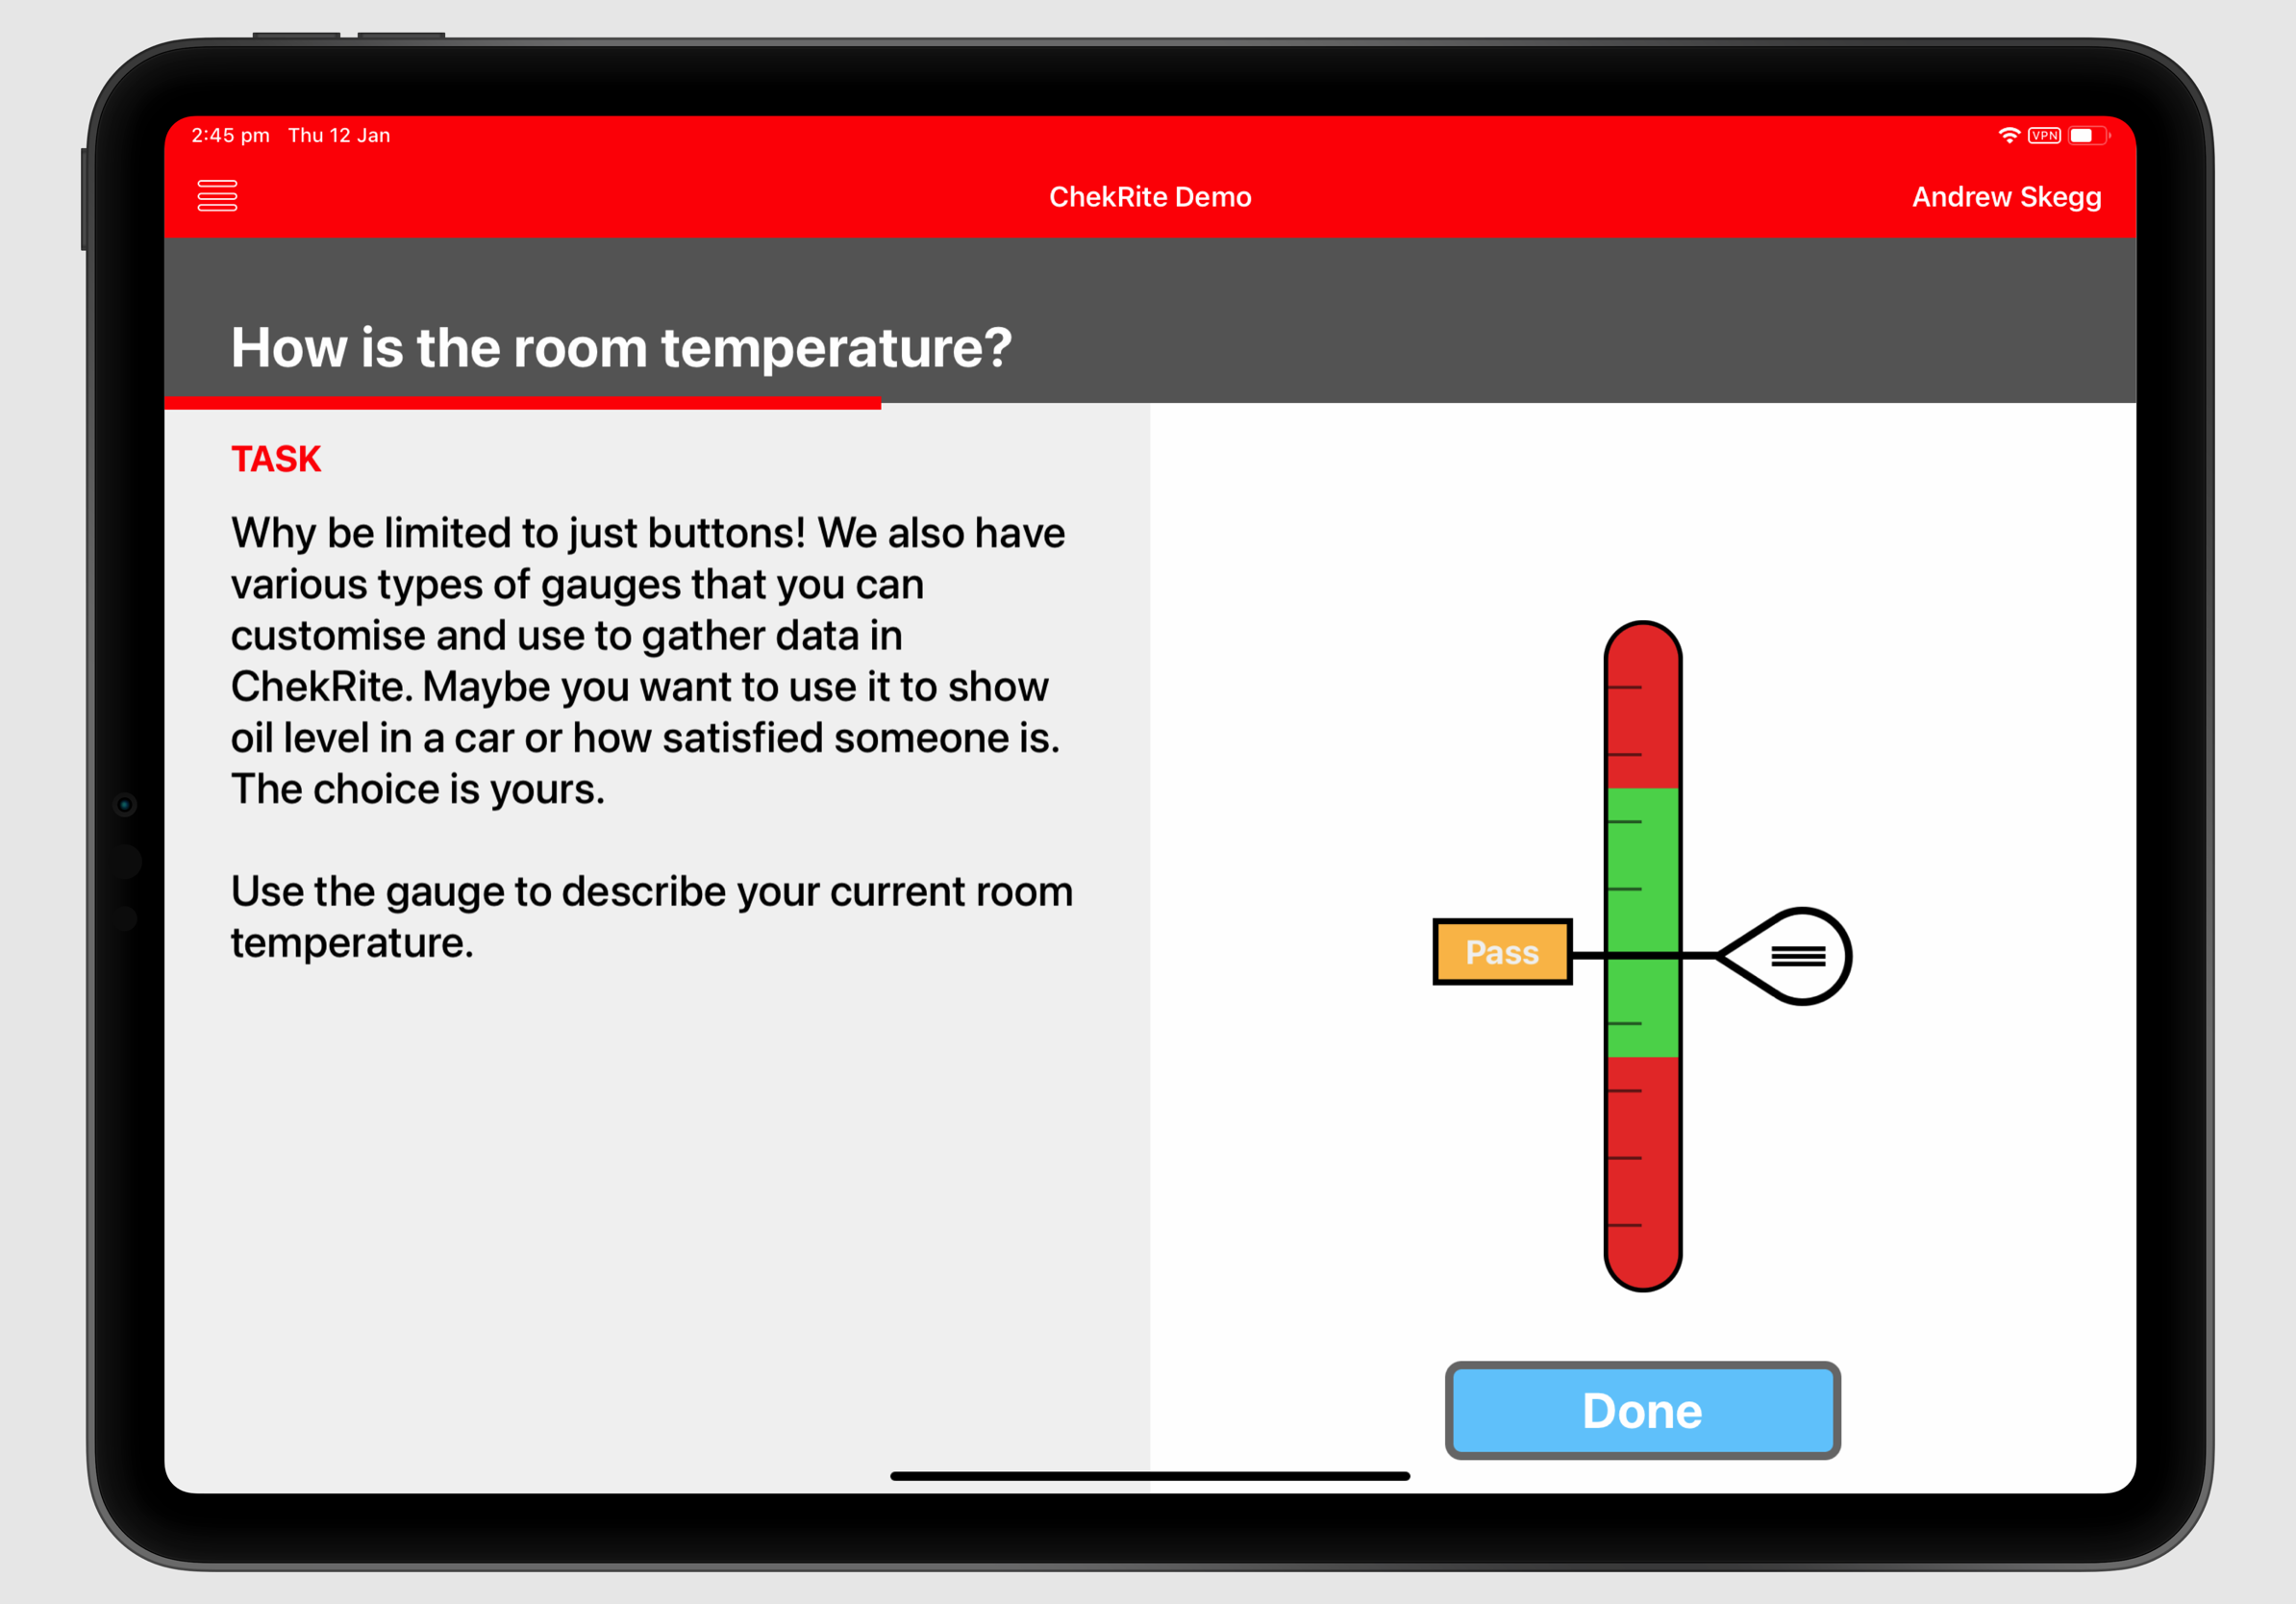
This gauge introduces both low (red) and high (red) warning zones, with an acceptable range (green) in the middle. It's used when too little or too much of something is undesirable—for instance, temperature or pressure—where only a specific range is considered safe.
Signature
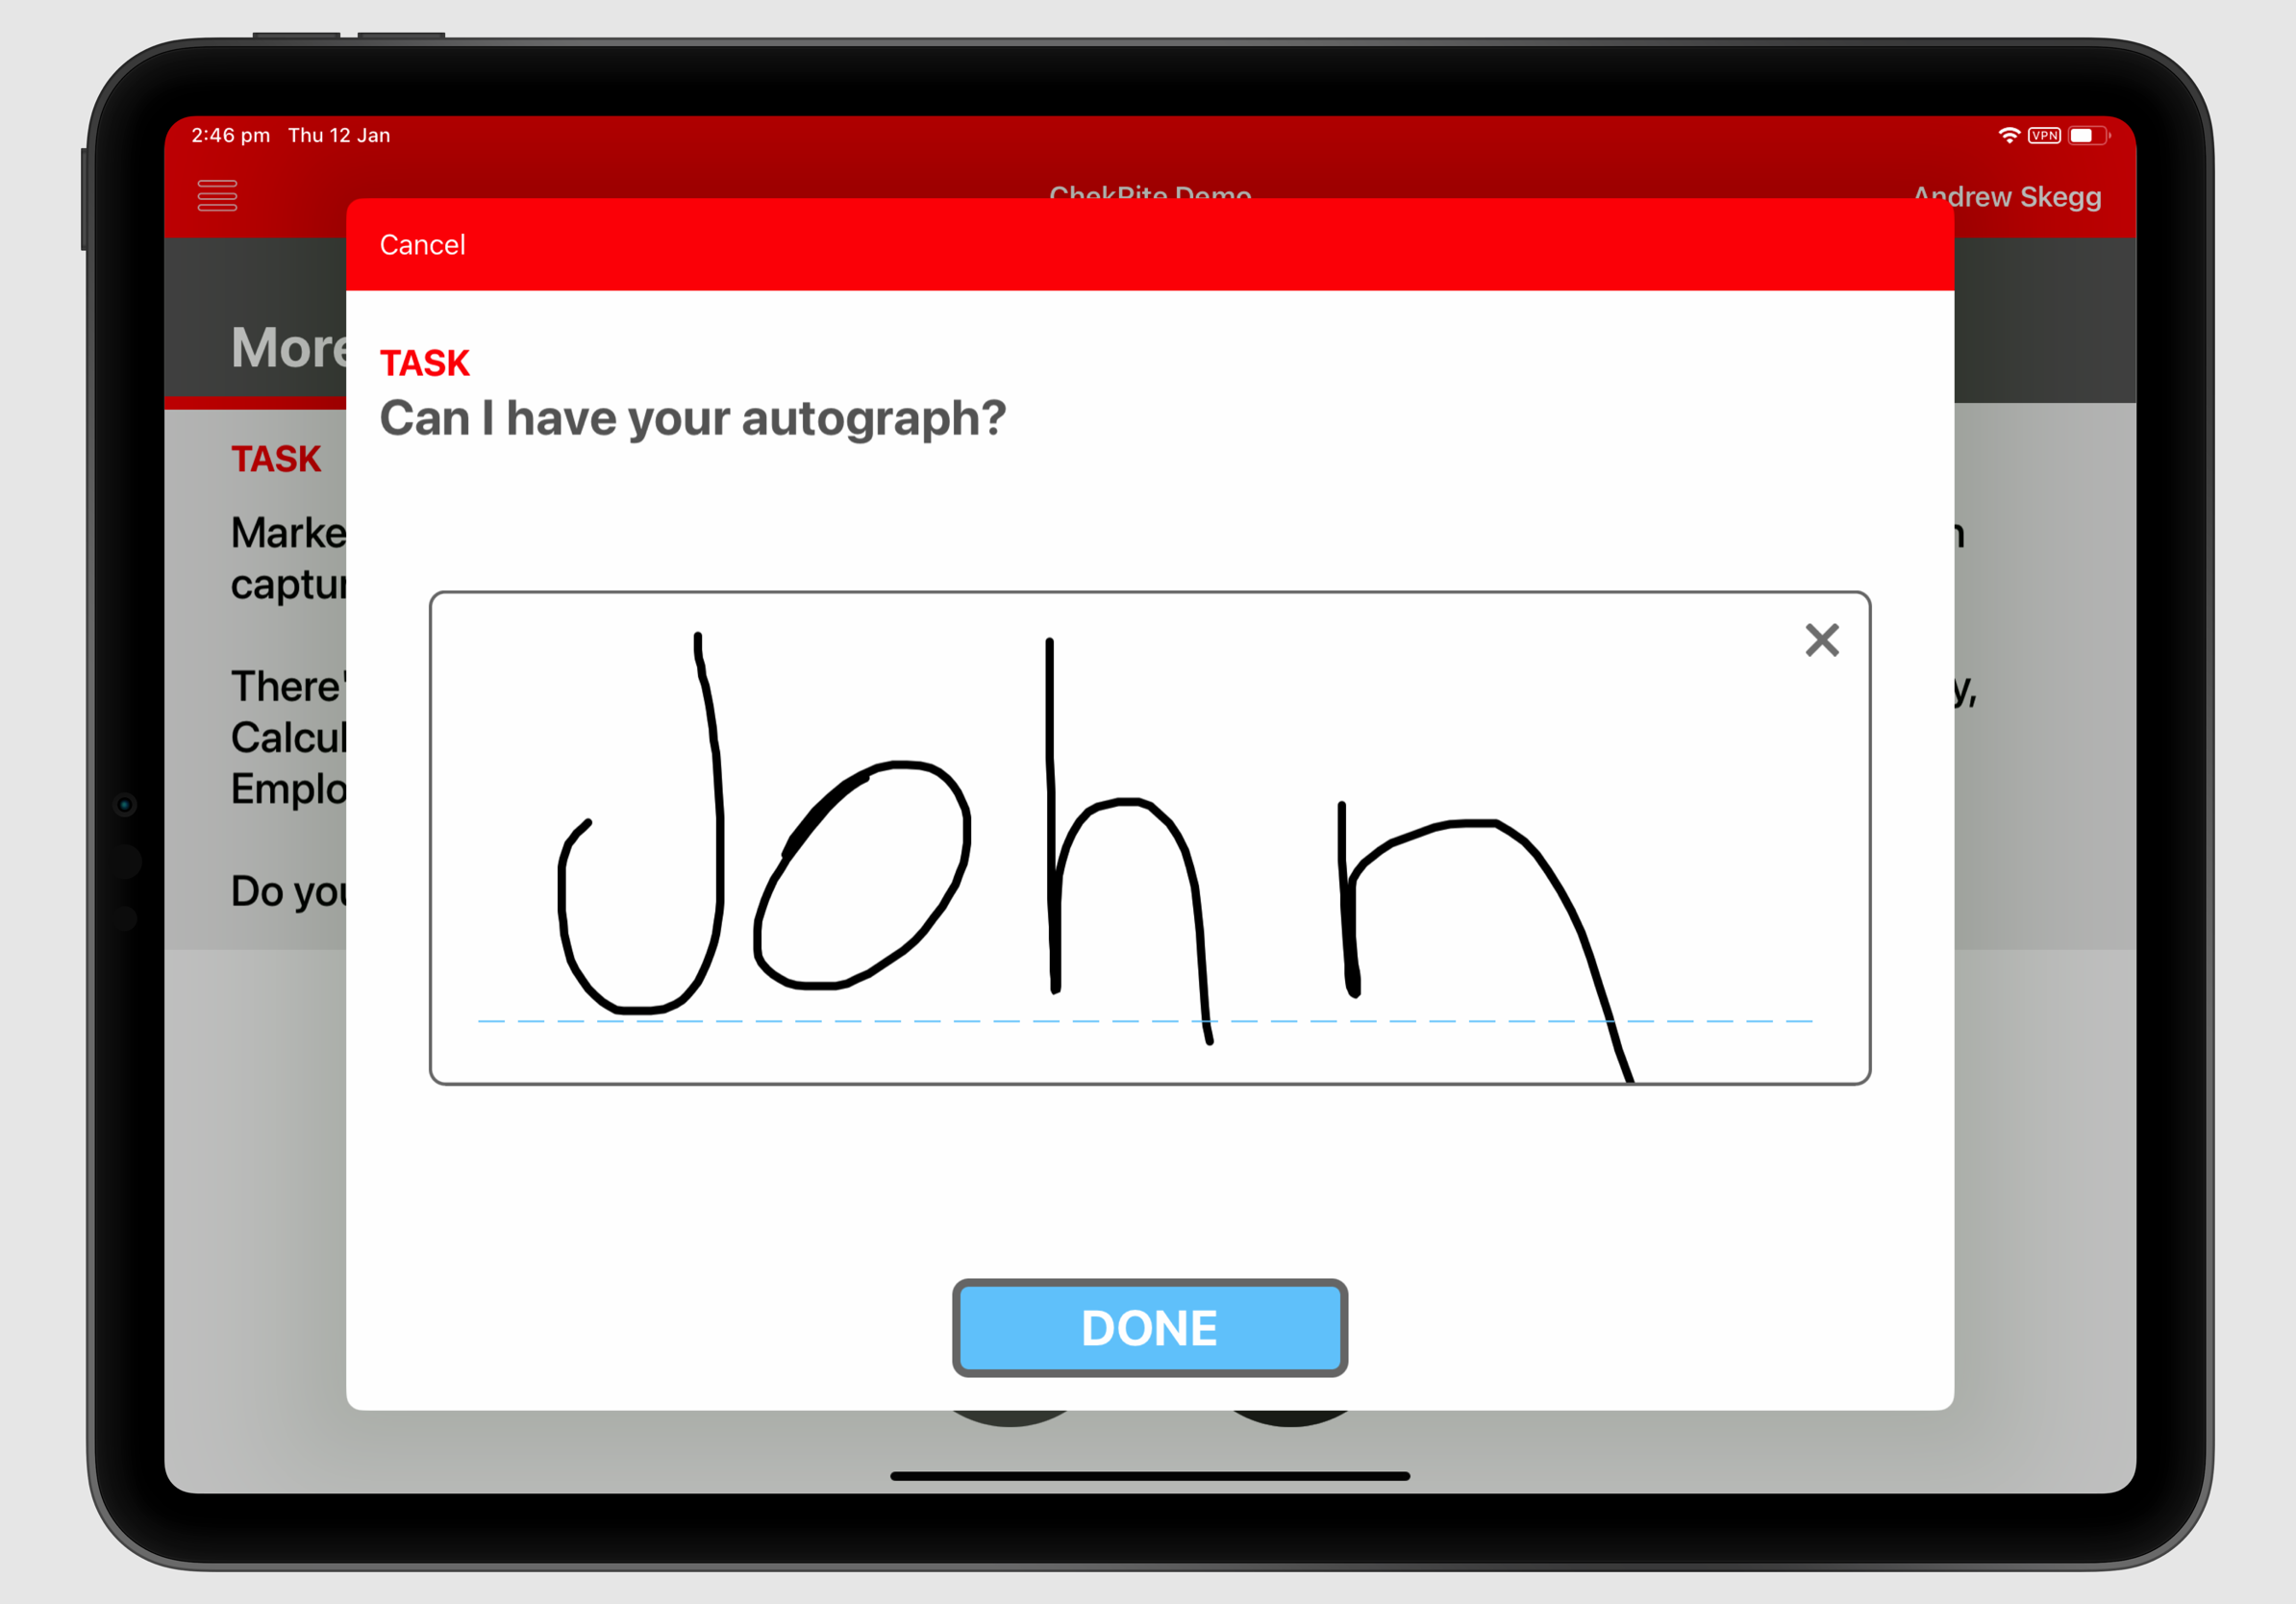
This response type captures a handwritten signature directly on the screen. It’s typically used to confirm acknowledgment, authorisation, or verification by the person completing the checklist or another responsible party. There’s no evaluation or pass/fail logic—just a digital record of the person’s signature captured at that point in the process.
Hour Meter
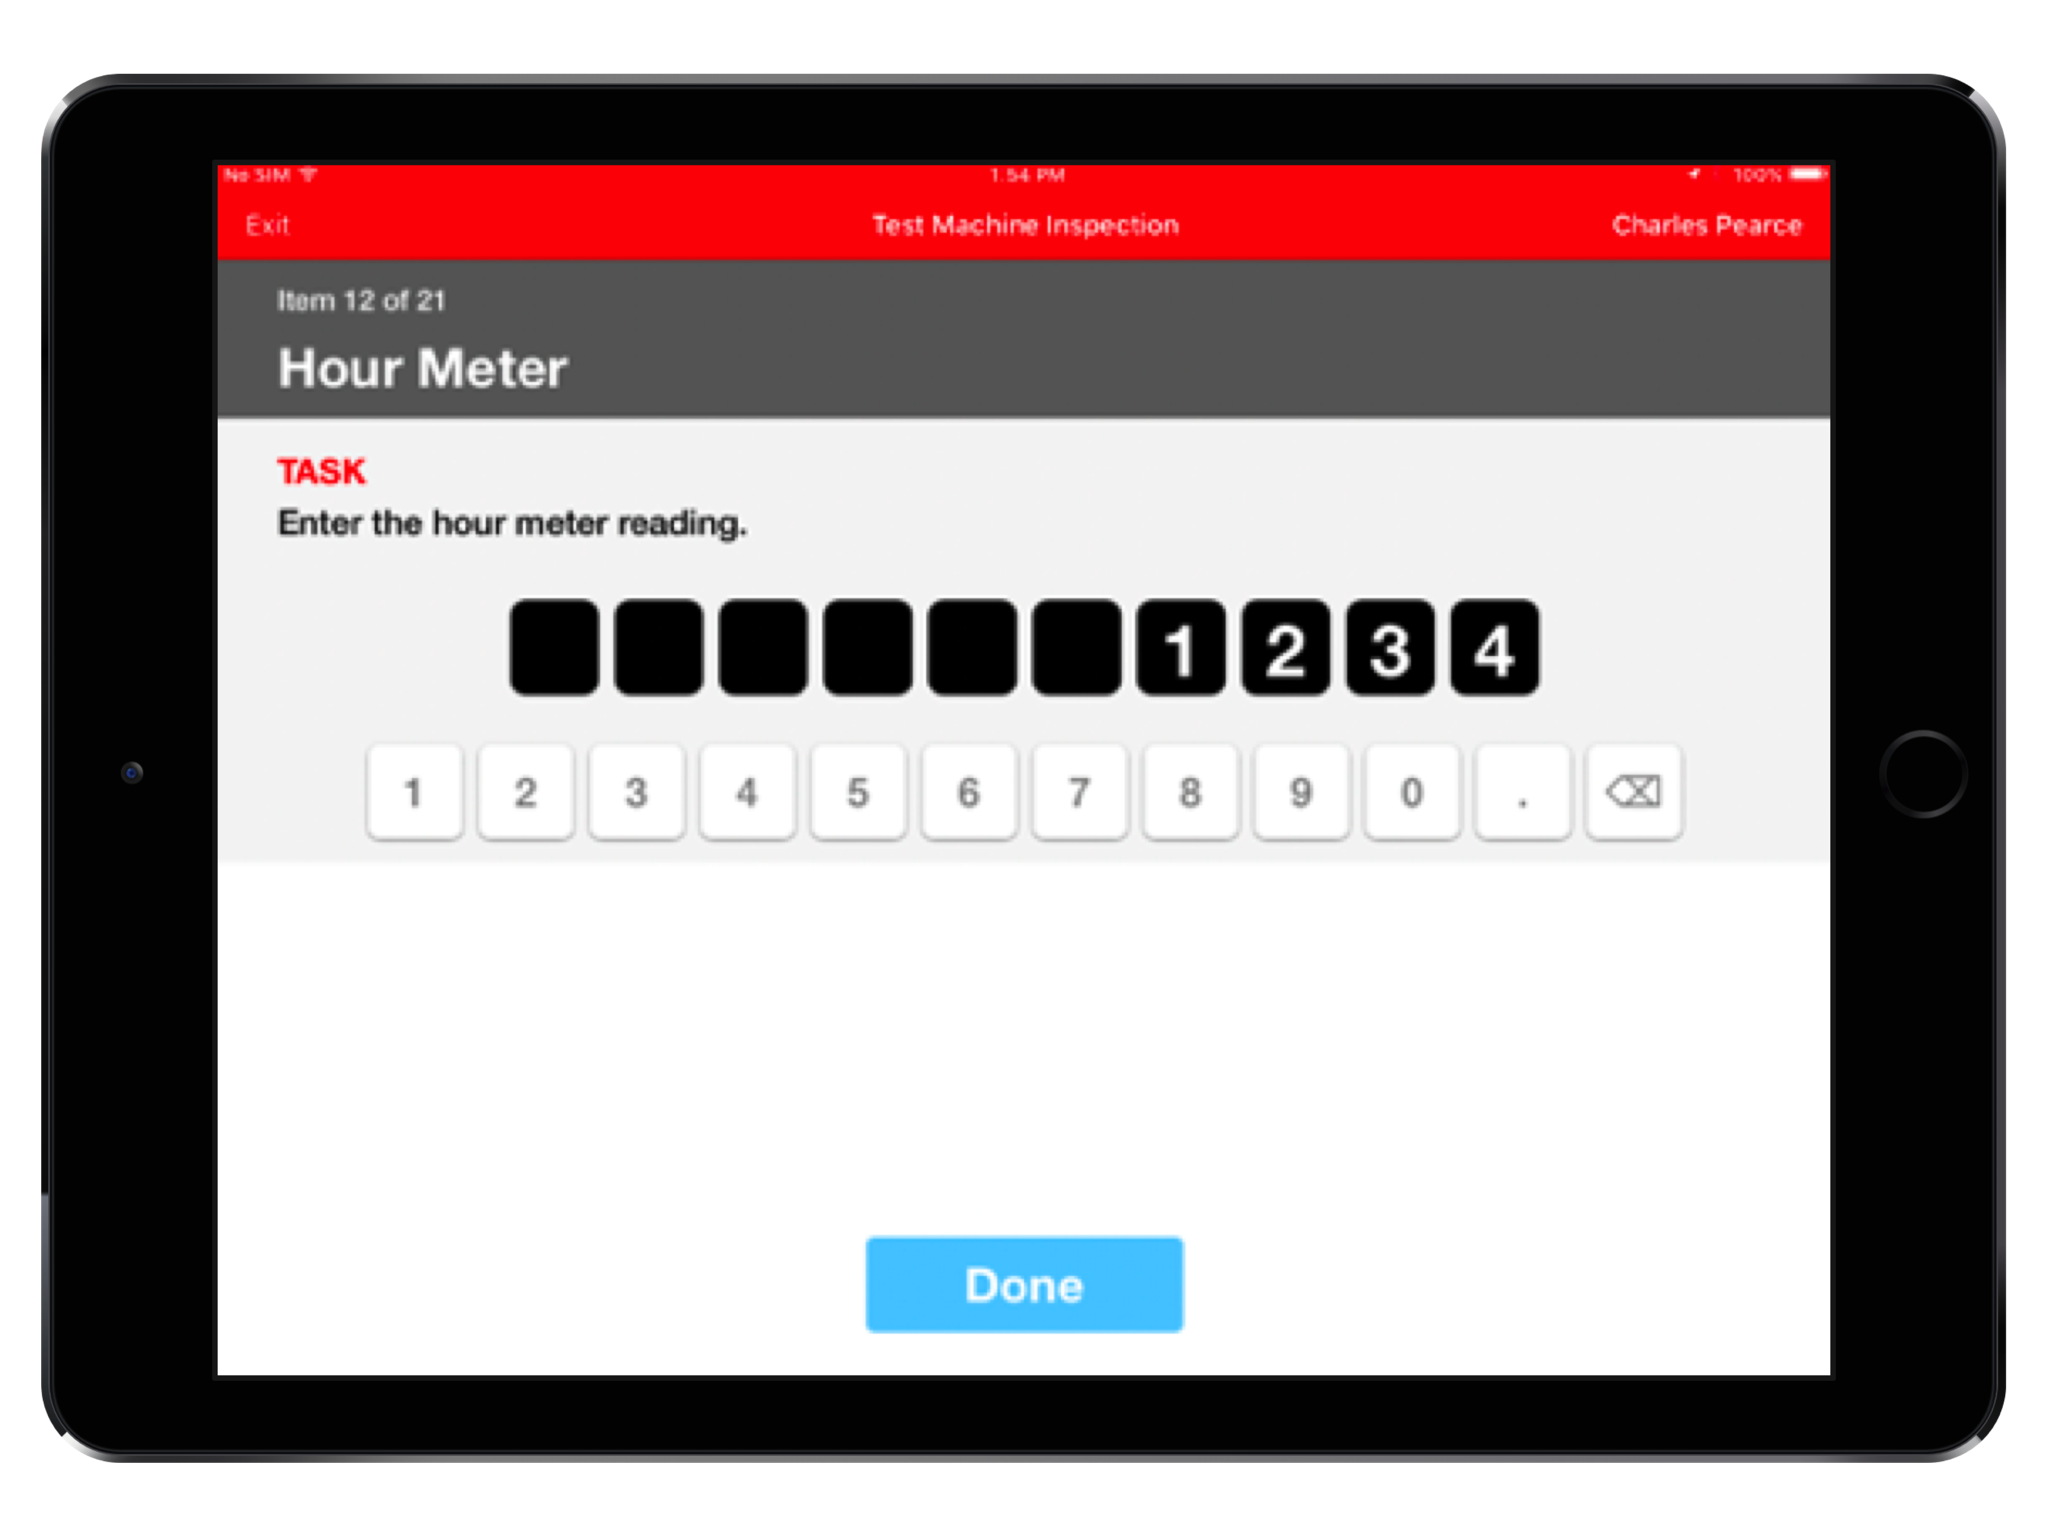
When entering an hour meter reading the system will check to ensure that the entered reading is not less than the previously entered value and not greater than the number of hours that have passed since the last value was entered (if one exists).
Odometer
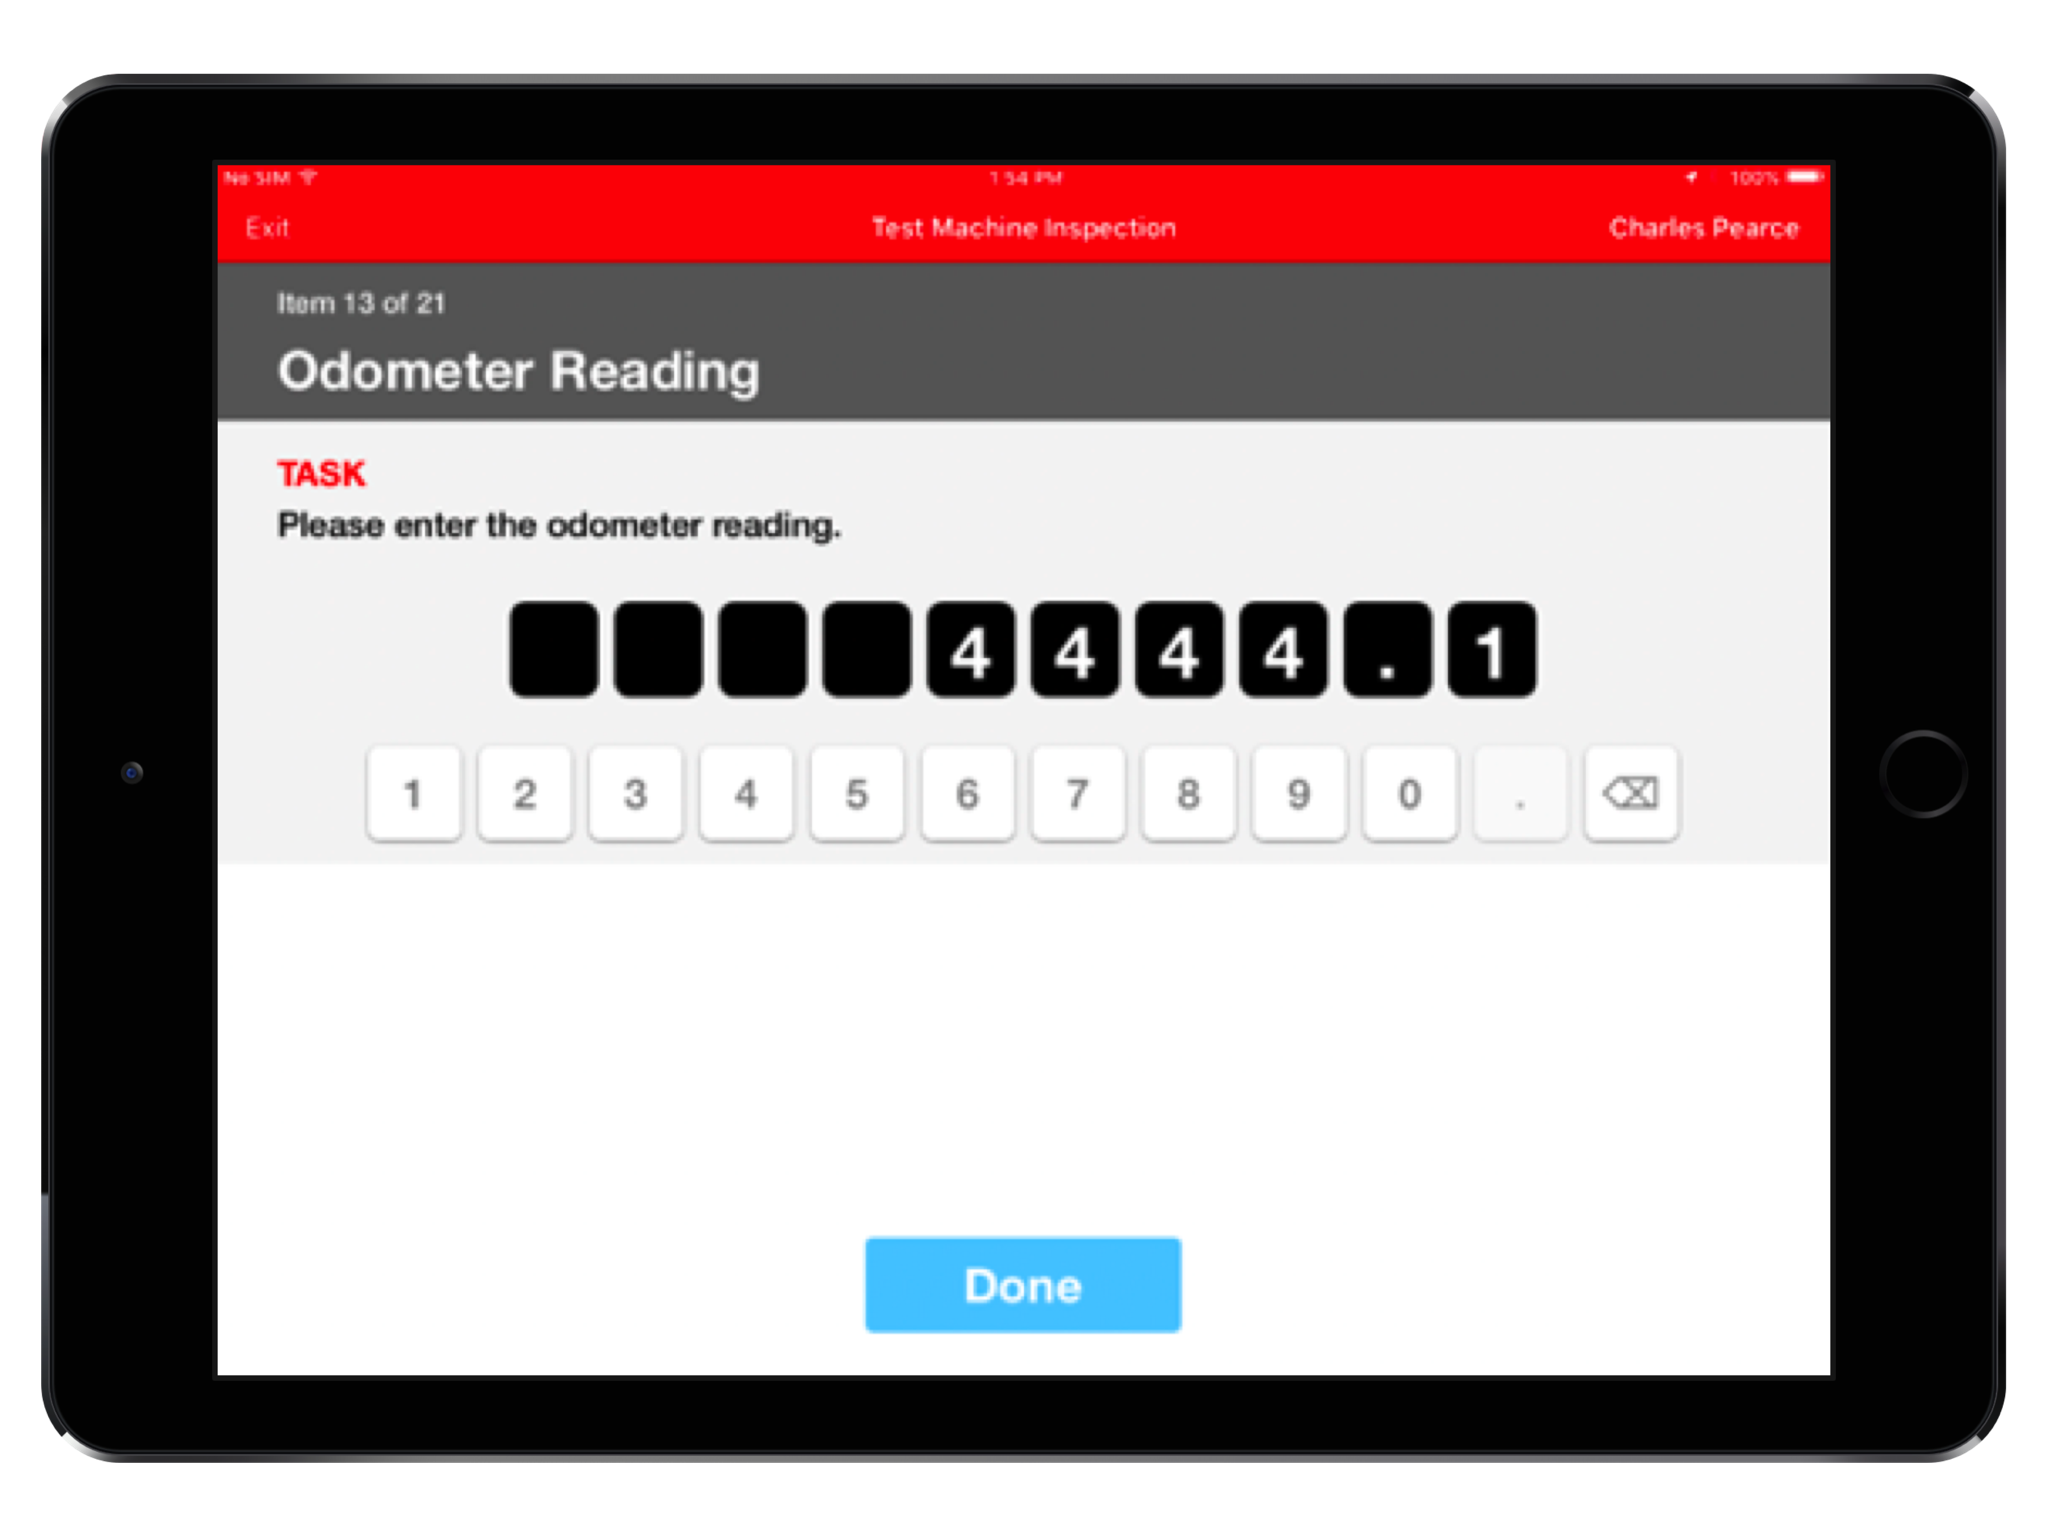
When entering an odometer reading the system will check to ensure that the entered reading is not less than the previously entered value (if one exists).
Touch Point
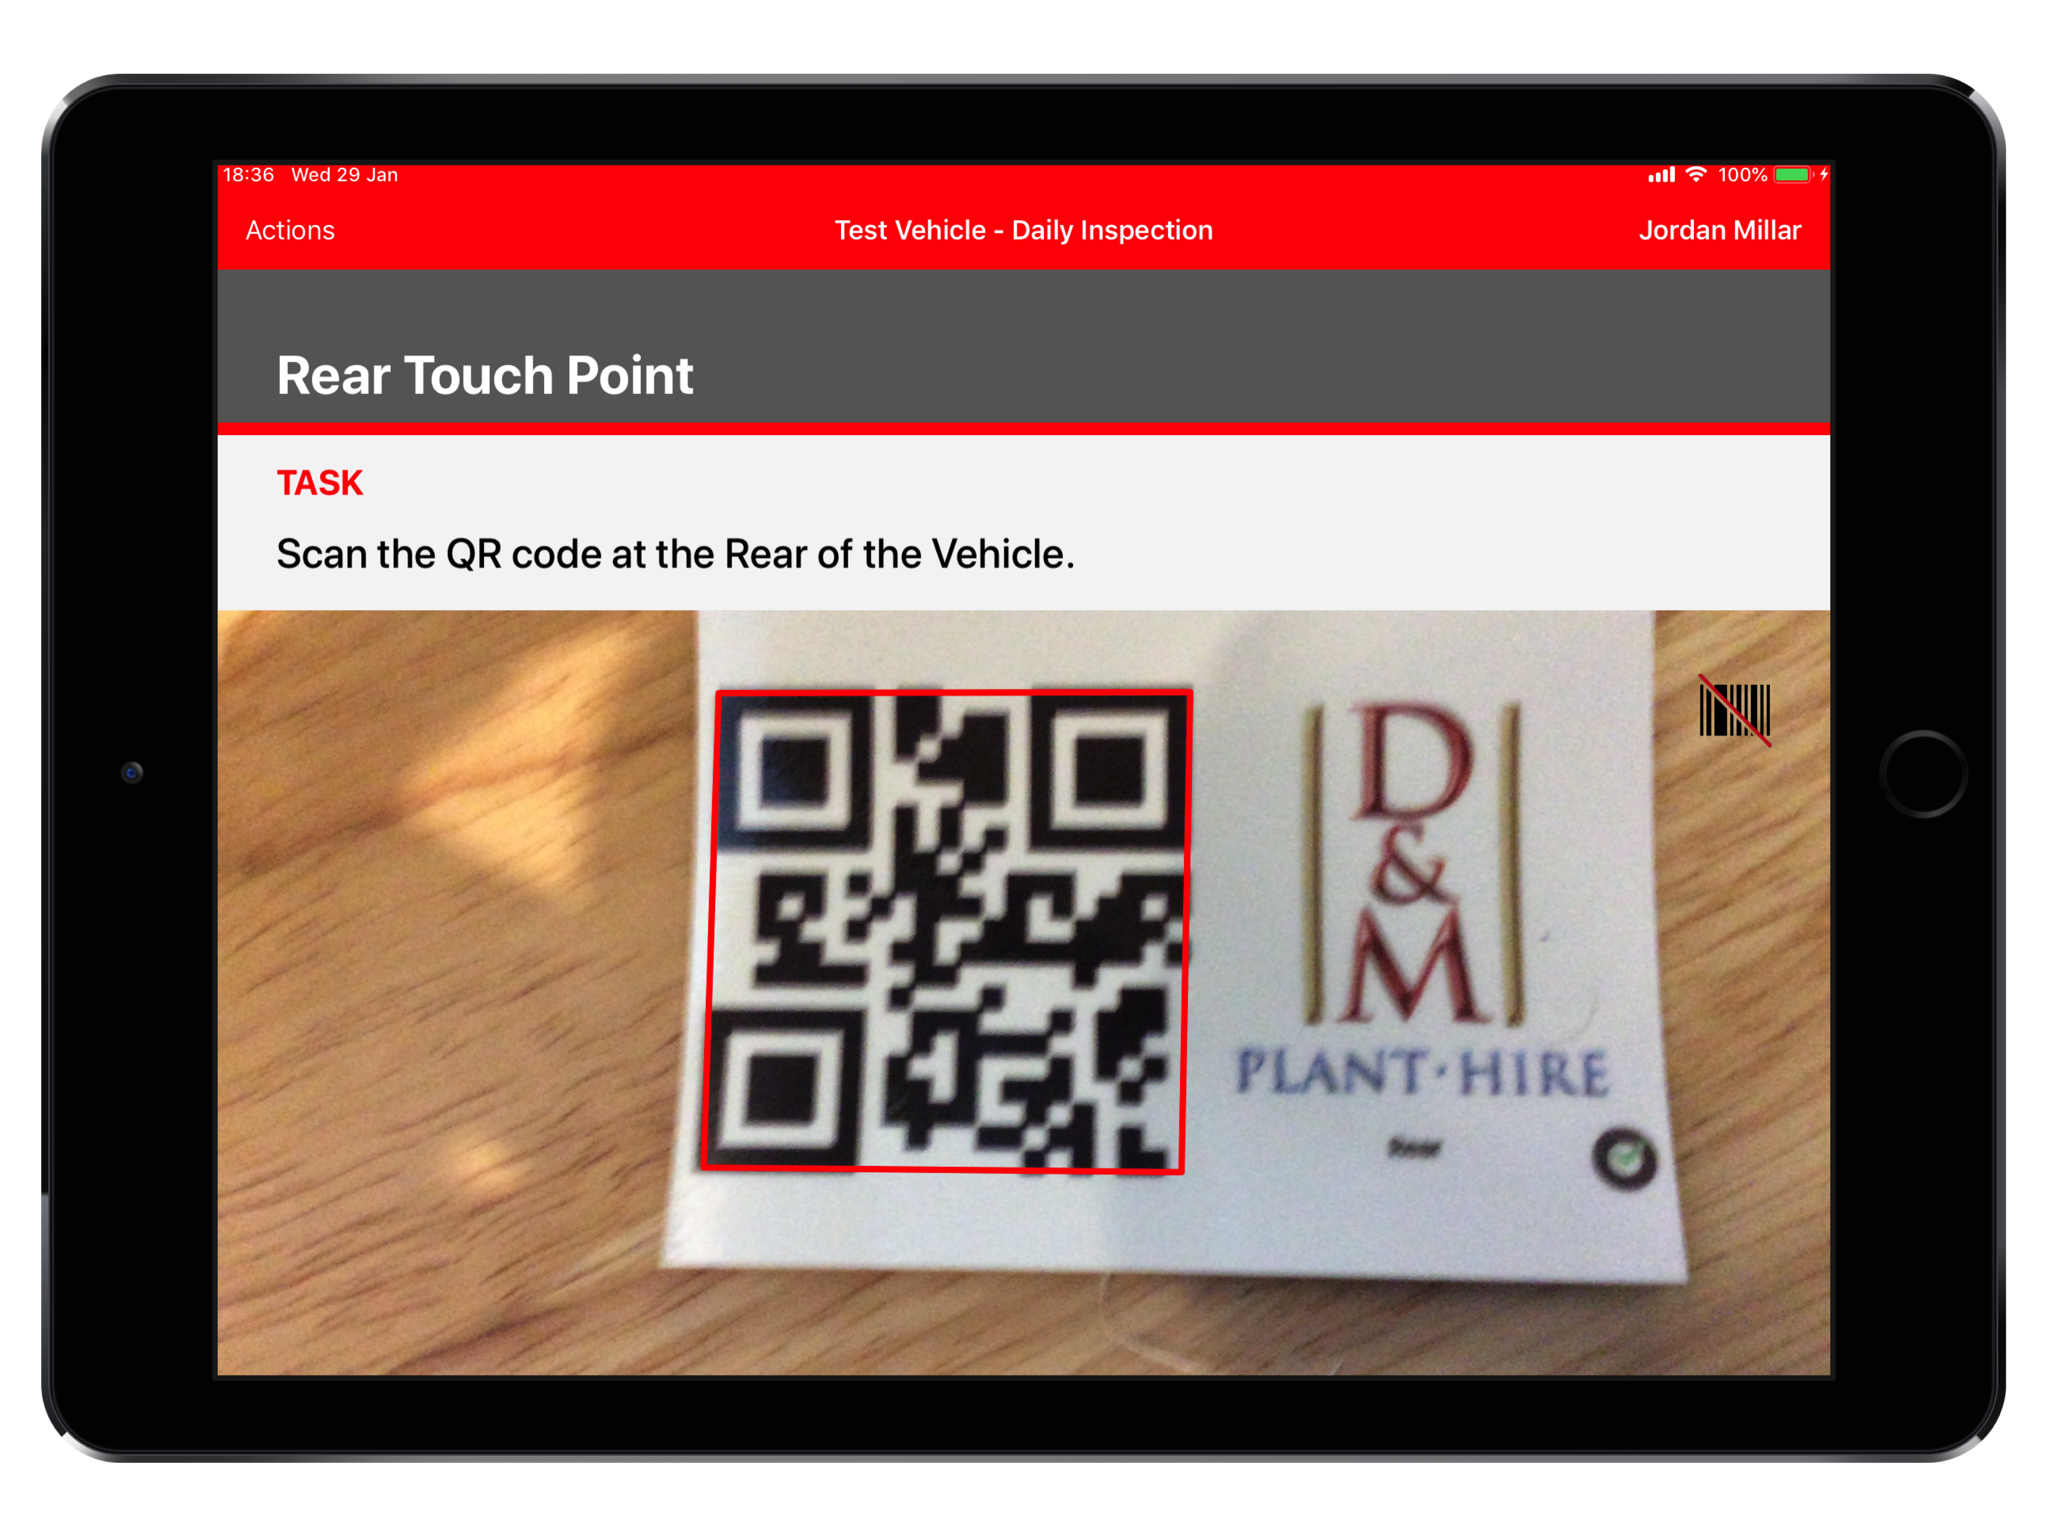
Touchpoint is a unique response type that uses QR code scanning to verify a user's physical presence at a specific location during an inspection. It’s designed to reduce "tick and flick" behaviour by ensuring that users actually go to the places they're supposed to inspect.
For example, QR codes (touchpoints) can be placed on all sides of a vehicle or under the bonnet. When prompted, the user must scan the QR code at that location to proceed. If the code isn’t scanned, the item must be marked as Fail, with a recorded fail reason (e.g. “QR code missing or damaged”).
Touchpoint is especially useful in safety-critical inspections, reinforcing that steps aren't skipped and that inspections are being performed as intended—on site, hands-on, and in person.
Quiz
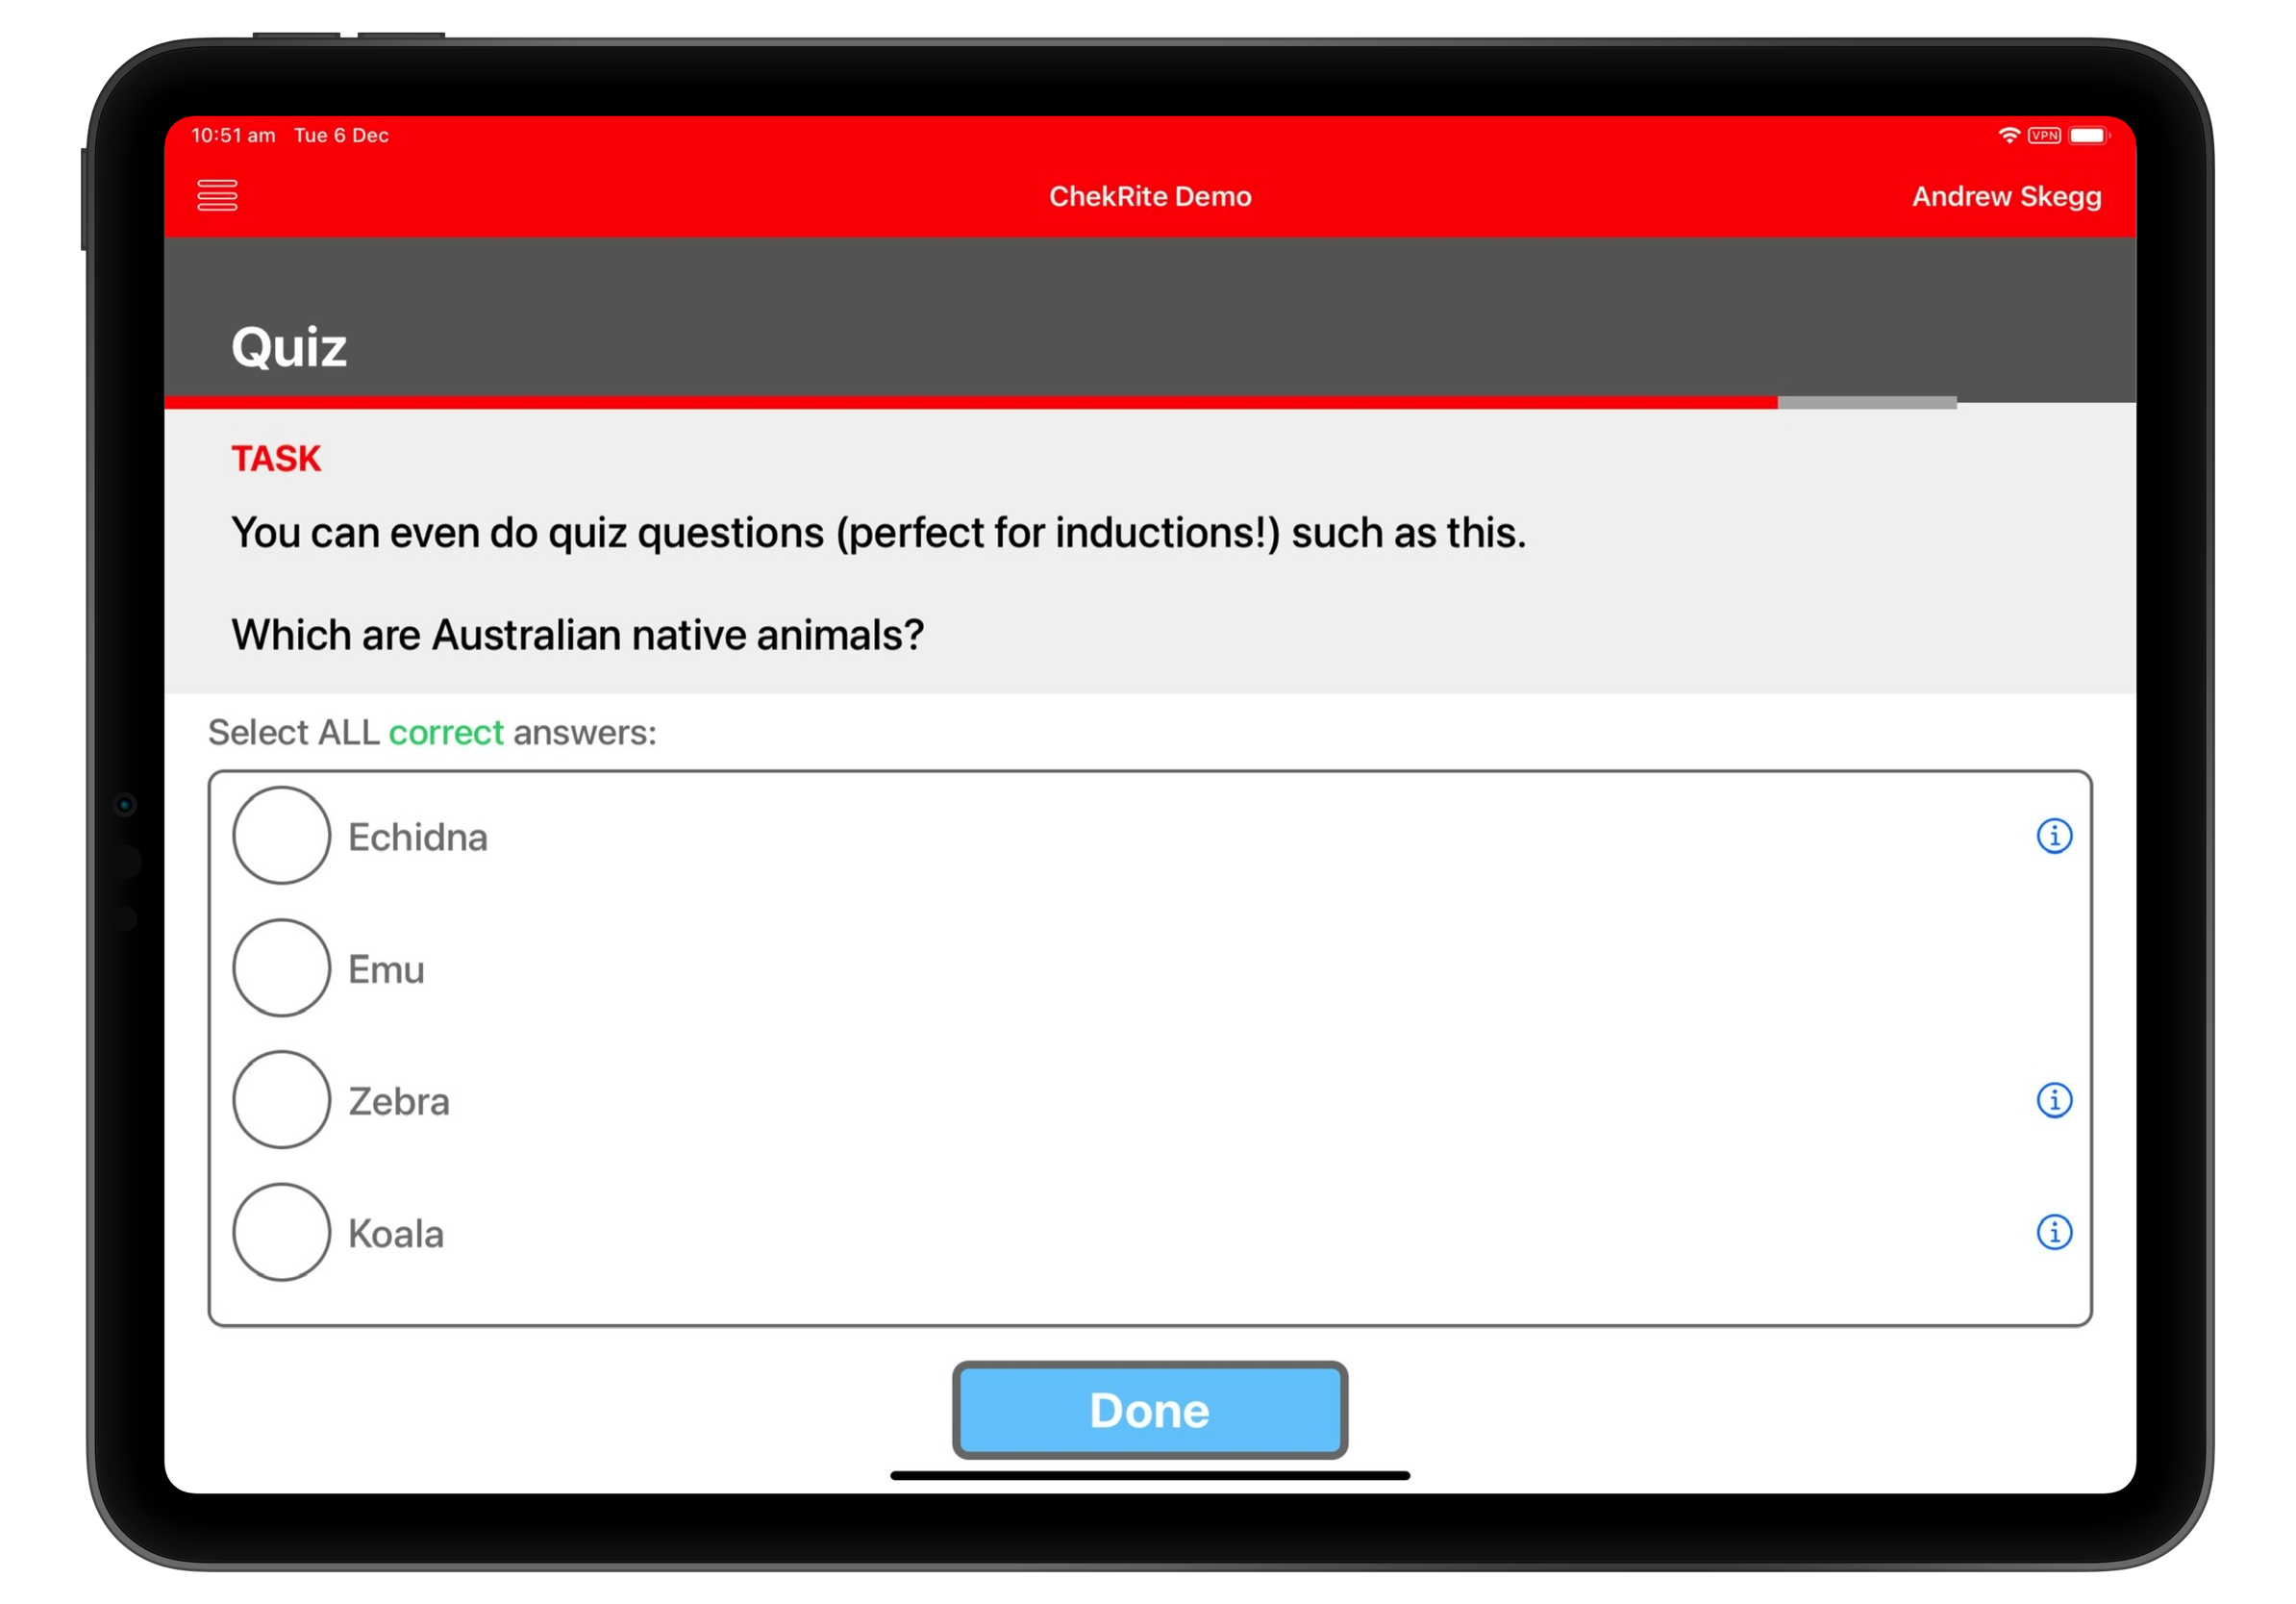
The Quiz response type is used to test user knowledge or comprehension during an inspection. It can be included in both asset-based and user-based checklists, making it ideal for applications like verifying understanding of safety procedures or assessing competency.
Quizzes support multiple configuration options:
- Define how many attempts a user has to answer correctly.
- Specify whether they must select all correct answers or a minimum number of correct answers to pass.
- Use it as part of a Verification of Competency (VoC) process or during safety inductions.
Quizzes help ensure users aren't just completing tasks, but also understand the why behind them.
Audio
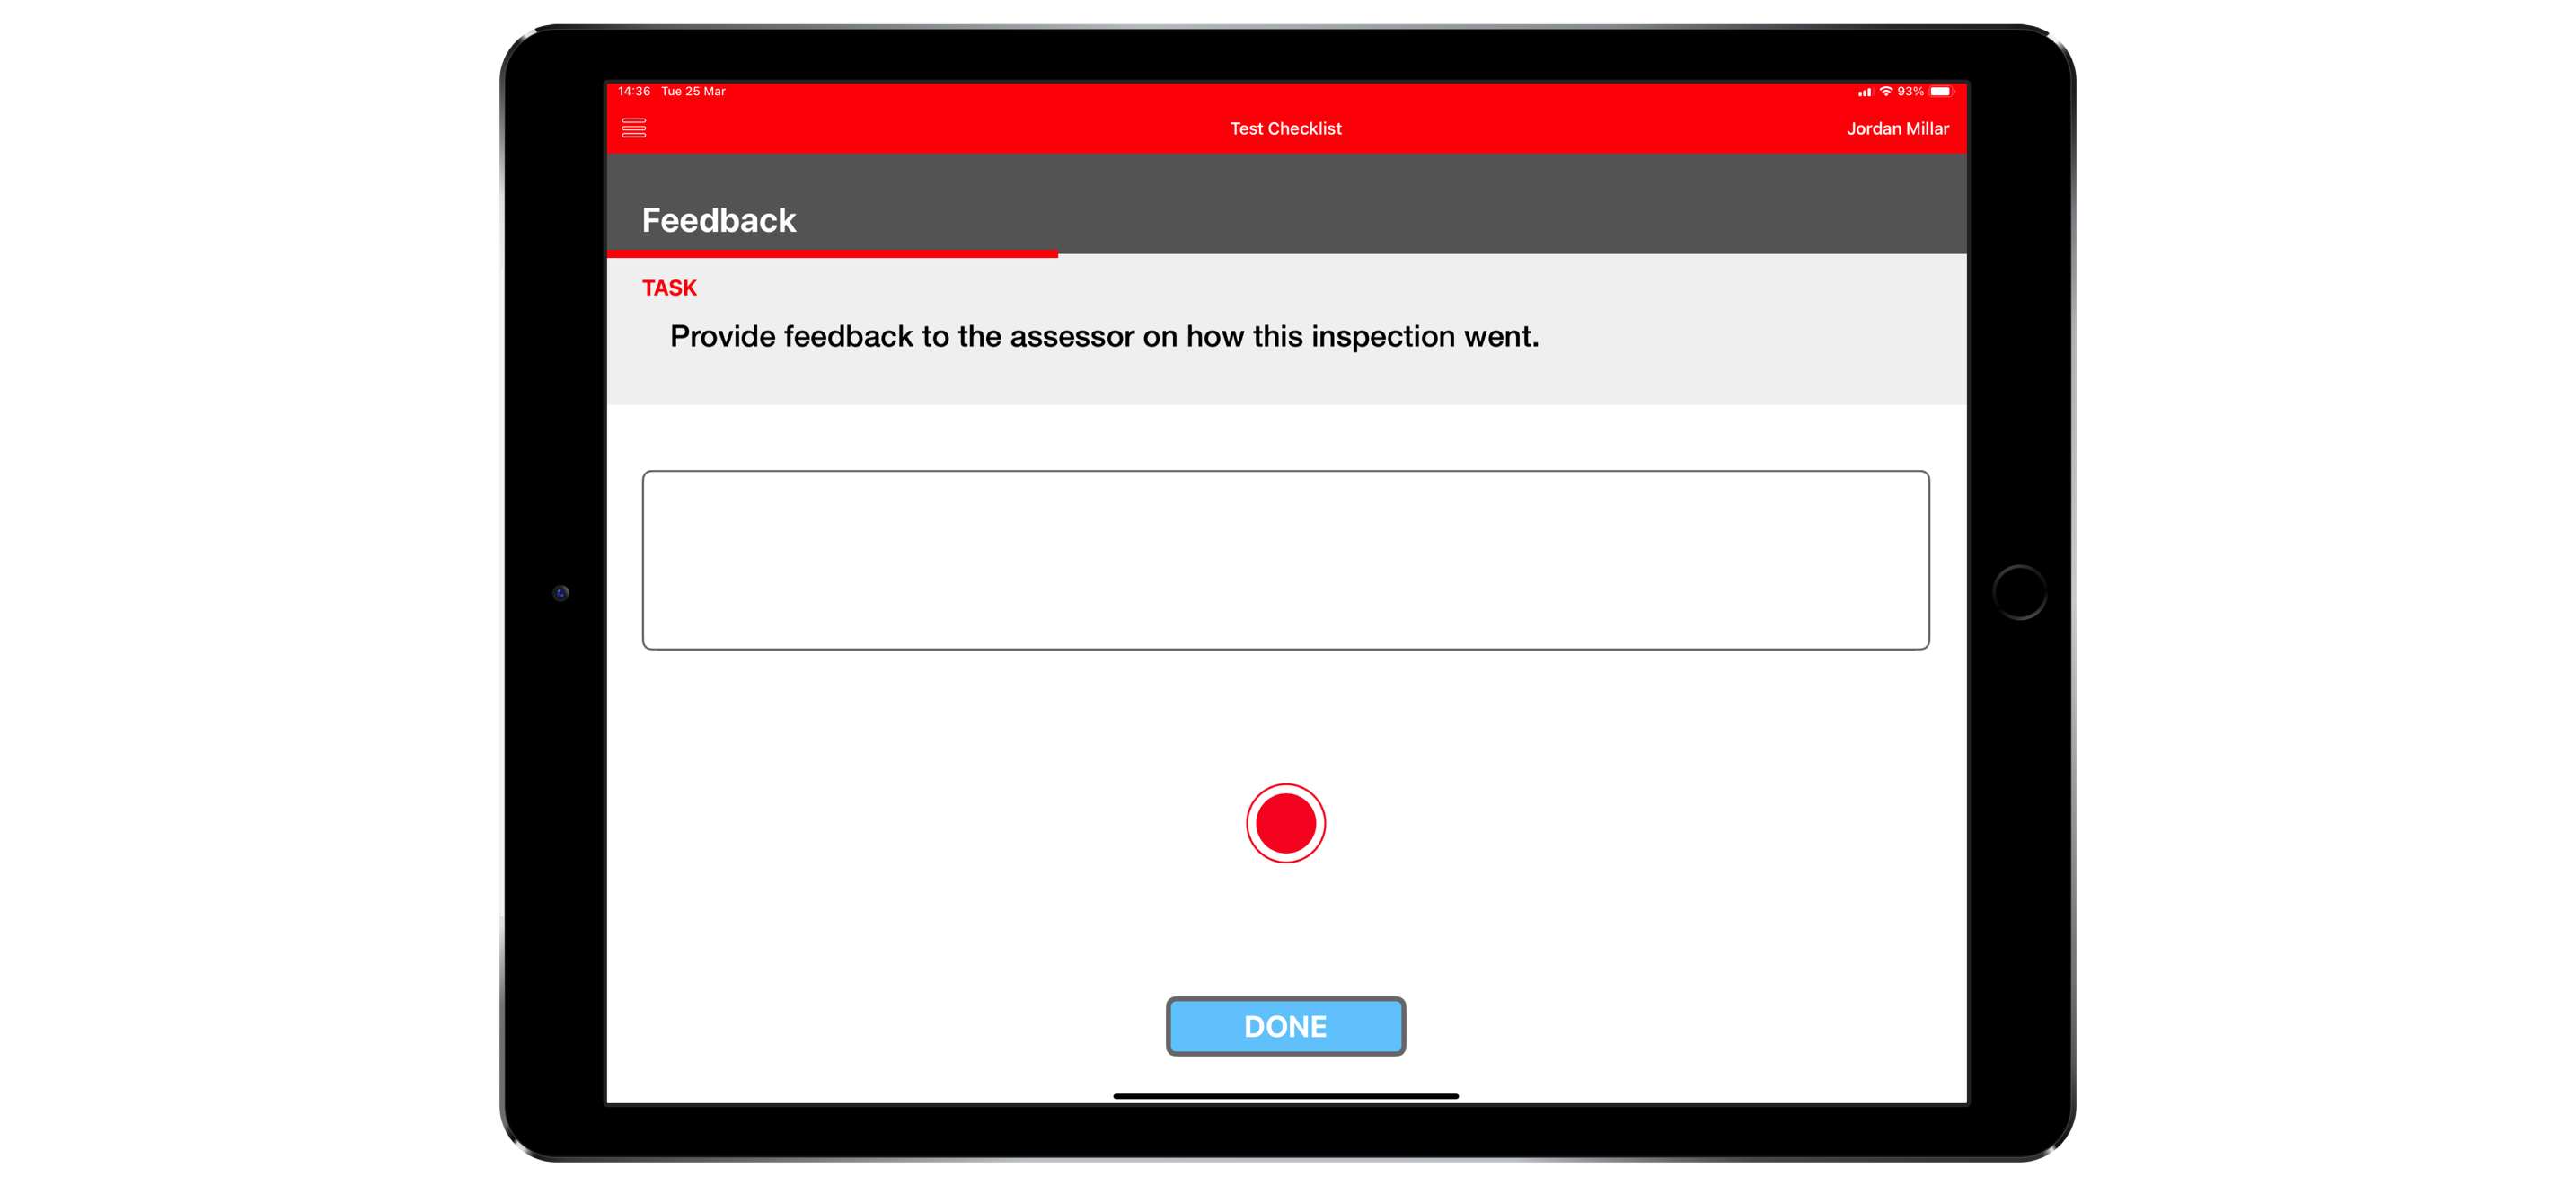
The Audio response type allows users to record a voice message directly within the checklist. While audio can also be added as supplementary input to other question types, using the Audio response type ensures that an audio recording is always required.
Recorded messages are automatically transcribed, making it easy to review and search through responses. This is especially useful for capturing feedback, observations, or detailed explanations in the user’s own words—without relying on typing.
Check-in
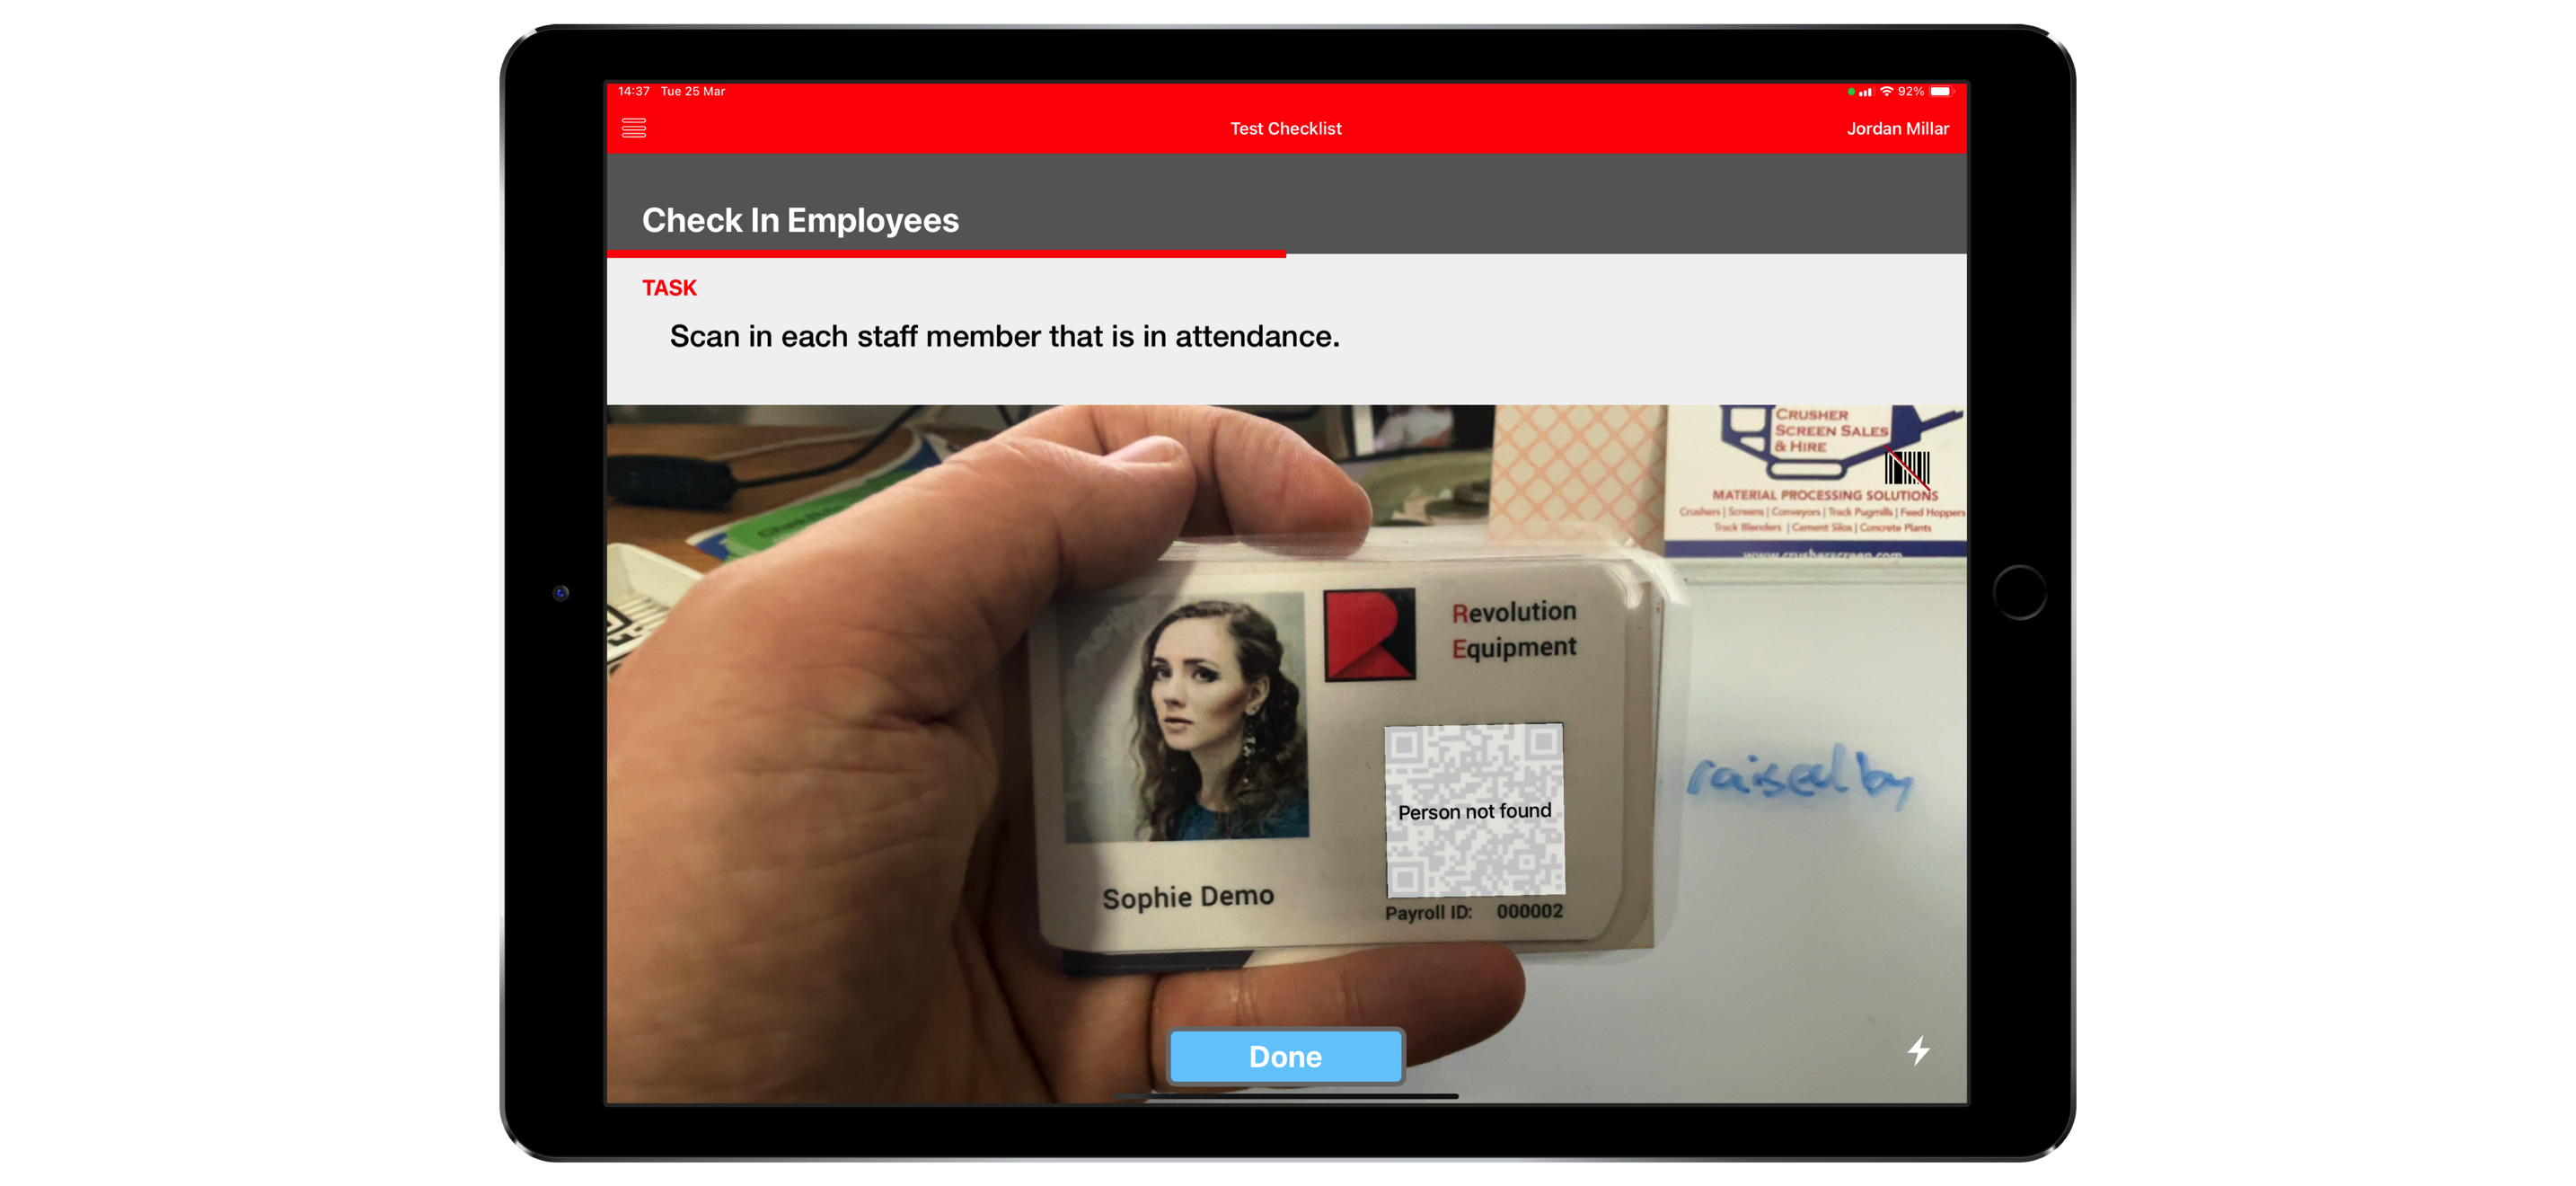
The Check-In response type is used to record attendance, typically for meetings, briefings, or toolbox talks. It's optimised for quick, high-volume use and is often paired with ID cards—users simply present their card, and a supervisor scans it to confirm attendance.
For users without an ID card (or who have forgotten it), the system also allows manual check-in by filtering and selecting the individual from a searchable list.
Check-In ensures an accurate, auditable record of who was present, making it ideal for compliance, inductions, or pre-start meetings.
Prerequisite
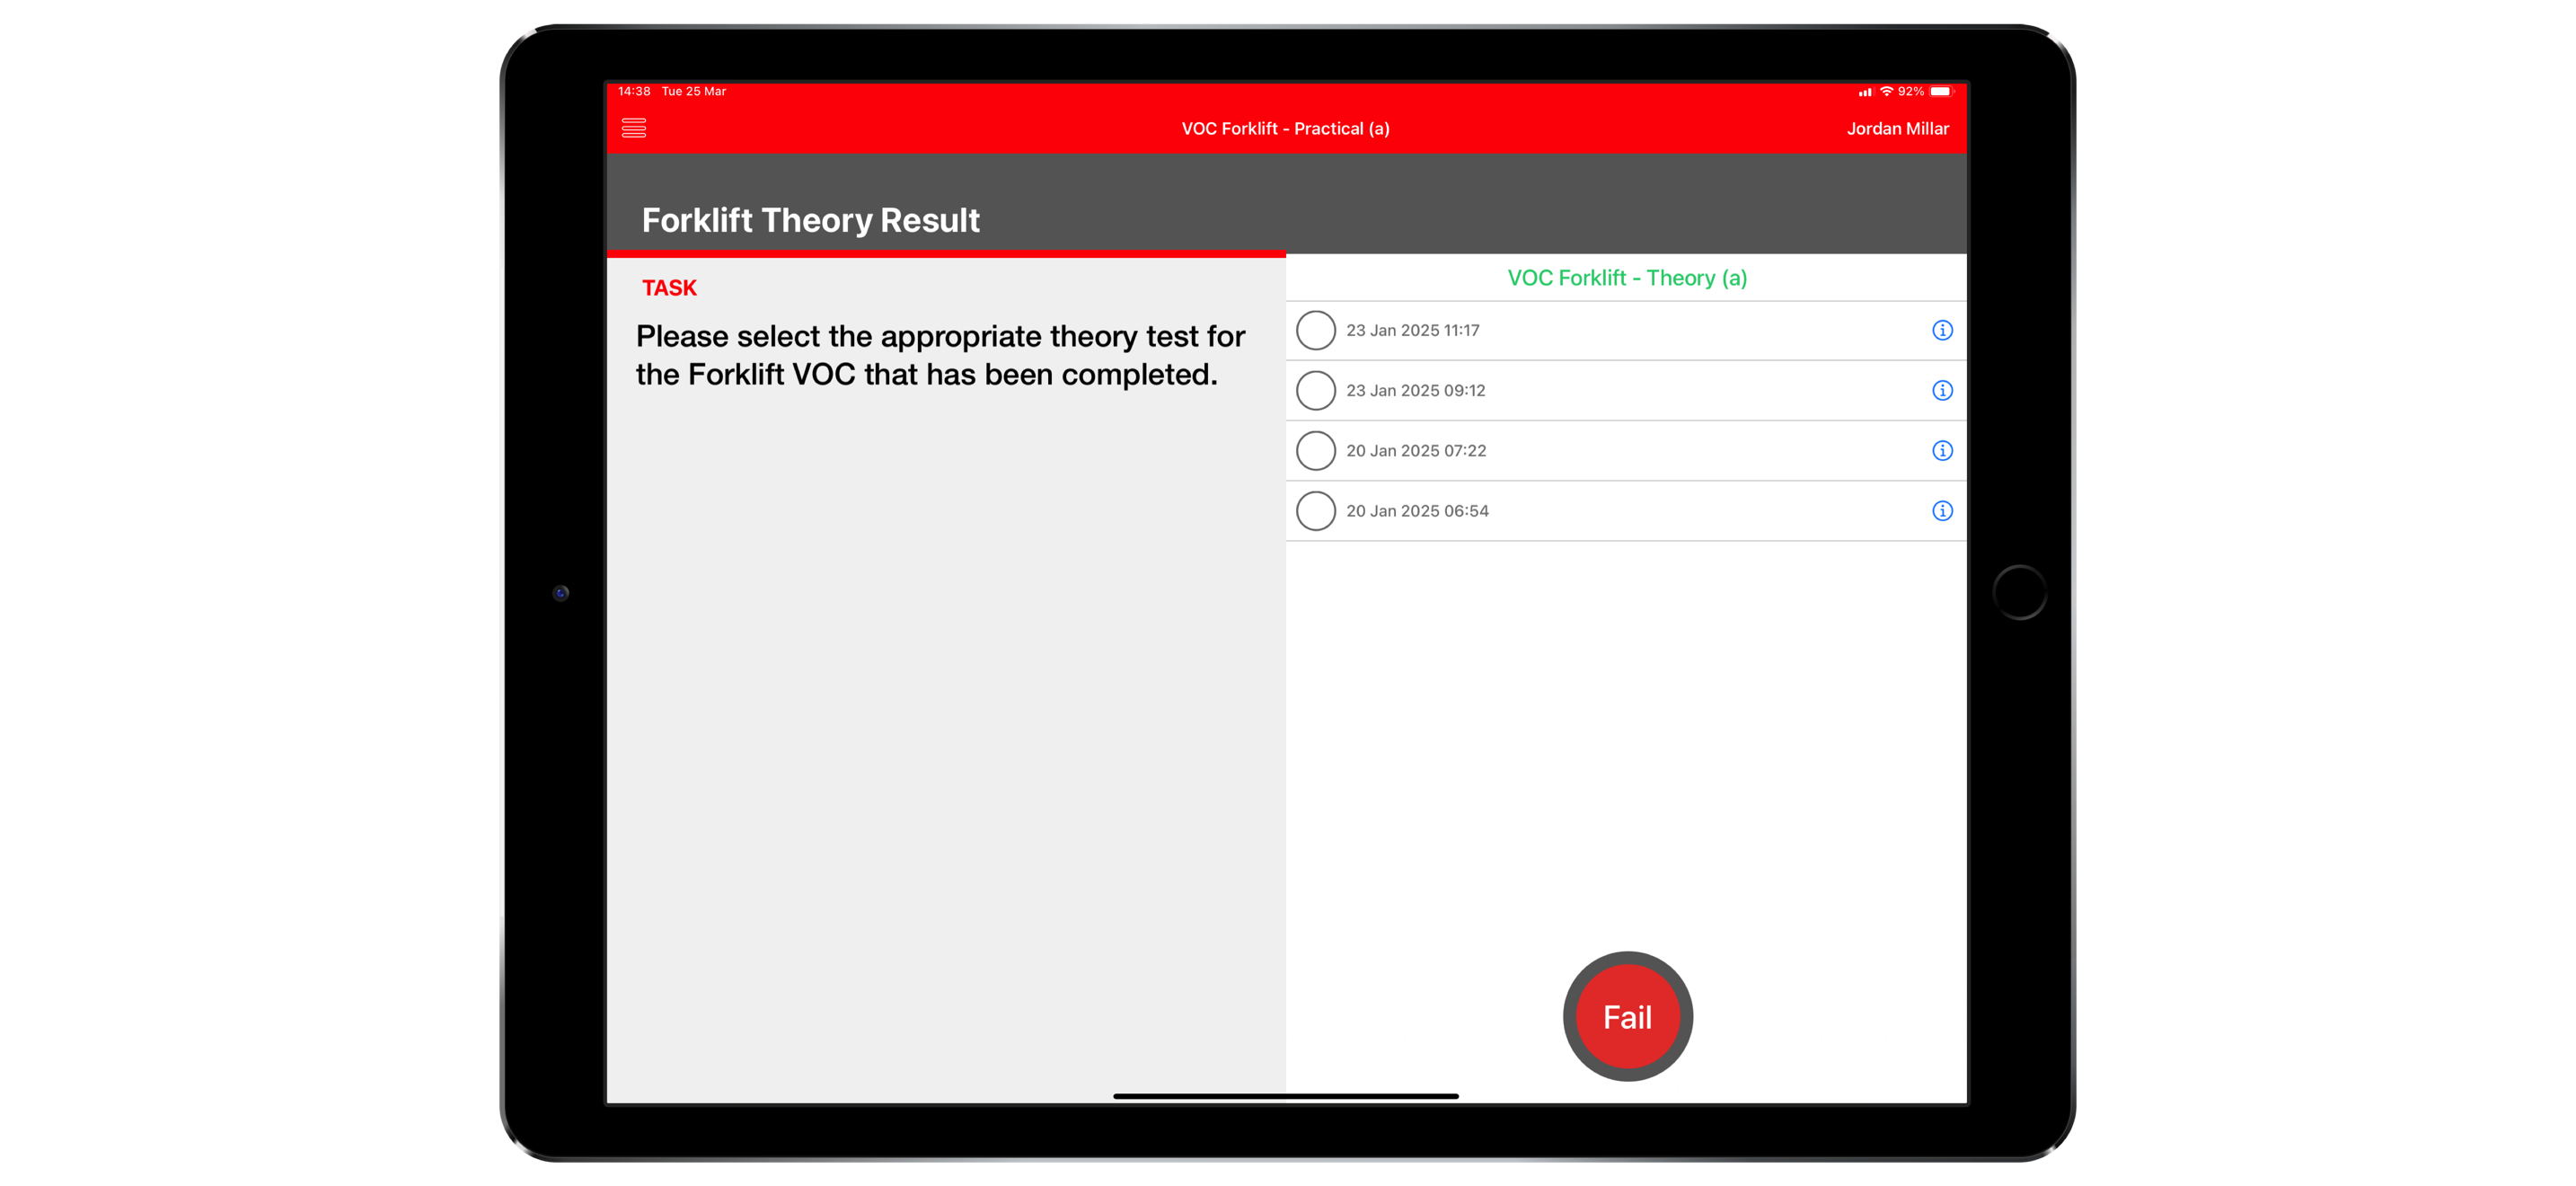
The Prerequisite response type is used to link related checklists, ensuring that certain conditions are met before proceeding. A common use case is in Verification of Competency (VoC) workflows—for example, requiring a user to have completed a theory checklist before starting a practical assessment.
When configuring a prerequisite, you specify:
- Which checklist must have been completed (e.g. "Clean Down Inspection")
- How recent it must be (e.g. within the last 7 days)
If no matching checklist is found, the user must fail the question. If valid records exist, the user can view and select the appropriate checklist, which will then be linked to the current inspection for traceability.