ChekRite Portal
Getting Started
Organisation
Logging In & Out of the ChekRite Portal
Managing Your Sites
Managing Assets
Managing Asset Documentation
Managing Users
User Roles and Access
Managing Your Devices
Managing Groups
Asset Utilisation
Checklists
8 Steps to Building a Checklist
Creating a New Checklist
Setting Up the Structure of Your Checklist
Extra Info
Sub-Checks
Fail Weights & Scores
Reviewing Your Checklist
Testing Your Checklist
Publishing Your Checklist
Assigning a Checklist to an Asset Class
Assigning Warnings & Manuals
Modifying a Checklist
Output
Issues
Customising ChekRite
Guides
ChekRite App
Getting Started
Downloading ChekRite on your Phone or Tablet
Updating ChekRite
Synchronising
Logging In & Out
ChekRite Dashboard
Welcome to your ChekRite Demo
Starting an Inspection
Adding assets on the fly
Resetting the ChekRite App
ChekMate App
Troubleshooting
Resources
- All Categories
- ChekRite Portal
- Checklists
- Assigning a Checklist to an Asset Class
Assigning a Checklist to an Asset Class
Once your checklist is published, there's just a few more steps to the finish line.
The next, is to assign it to the relevant asset classes so that it is available for selection within the ChekRite App after the user chooses an asset. The purpose of assigning checklists is to ensure that only the specific checklists relevant to specific assets are able to be selected by users - this ensures maximum compliance, consistency, and control.
How to assign a checklist to an asset class
- Go to Assignments > Assignments.
- Select the published checklist to be assigned from the Checklist drop-down menu.
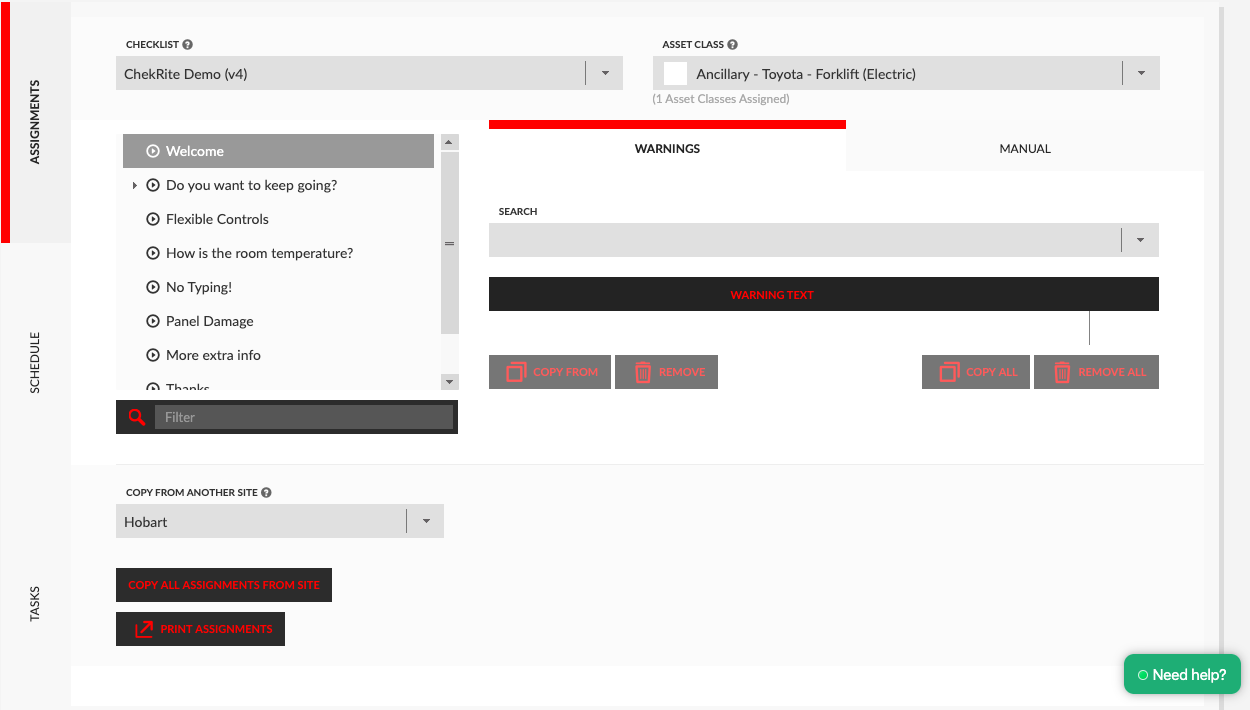
- From the Asset Class drop-down menu, tick the boxes of each asset class / sub-class that the selected checklist is to be available for.
- The number of Asset Classes / Sub-Classes the checklist has been assigned to appears below the Asset Class drop-down field.
As soon as you check the box beside the asset class/sub-class the checklist is considered assigned and will be synced down to the ChekRite app the next time the app is synced making it available for the user to use it.