Table of Contents
Managing Your Devices

Every device that wants to access your ChekRite environment must be registered and that registration is controlled by you. Different apps will require different information to be entered.
See the sections below for:
- ChekRite for iPhones, iPads and Android devices
- ChekMate for iPhones and iPads devices
- ChekTV for Apple TV devices
Registering Devices requires that you have Manager access or higher. You will not be able to do this if you have the Asset Manager, Issues or Reporting roles.
ChekRite App
The ChekRite app is the app that will be used by the vast majority of your users to undertake inspections. The ChekRite app is paired to a single site within your environment.
Registering a device for the ChekRite app
To register a device to be able to access your ChekRite environment you need to do the following:
- Ensure you are in the site that you want the device to be registered to.
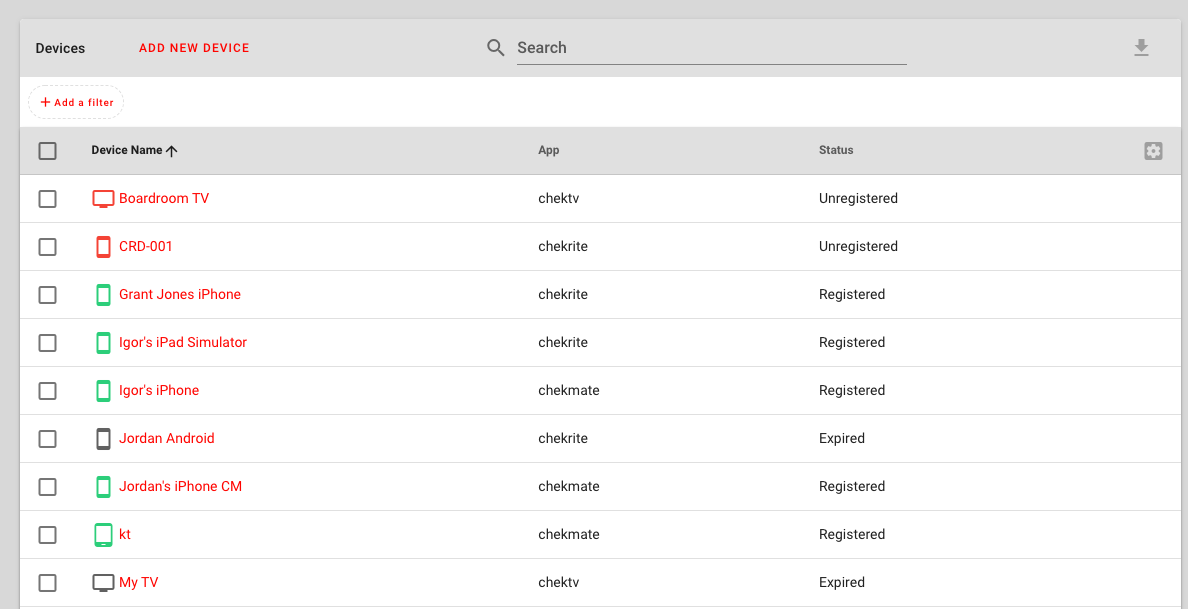
- Navigate to Organisation -> Devices
- Click on the Add New Device button
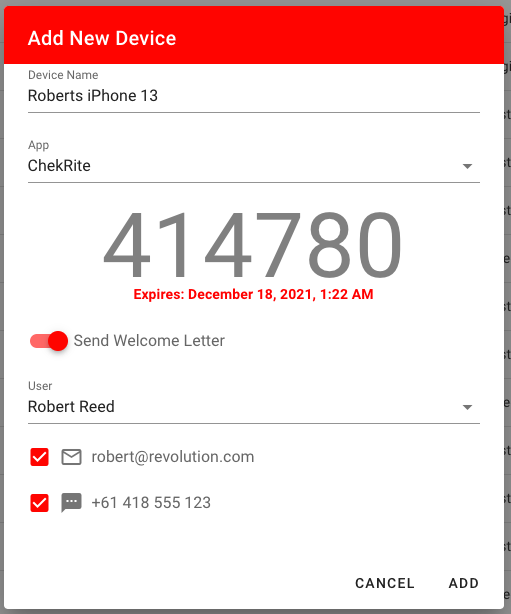
- Enter the Device Name of the device. This may be the name of the person who is assigned the device if you have personal devices at your company or it might be the asset number of the device. For example, at ChekRite our devices are labelled CRD-001, CRD-002, etc. This is what we put as the Asset Tag so that we know which device is which.

- Select ChekRite from the App dropdown list.
- Push the Generate Pairing Code button to generate a one time 6 digit pairing code. This is what will be entered into the device to pair it to this site in your environment. Pairing codes expire after 7 days if not used.
- Optional: You can have the system automatically generate a Welcome Letter for new users that gives them instructions on how to download the app and pair it in a PDF letter. To do this, slide the Send Welcome Letter switch to on and select the User that you will be sending this to so we can insert their details in the letter.
Deleting/Unregistering a ChekRite app device
If you delete or unregister a device you are doing so at the portal end. The next time the user launches the app on their device, it will check to see if they are still registered and if not, it will immediately wipe all ChekRite content from the device and return them to the setup screen.
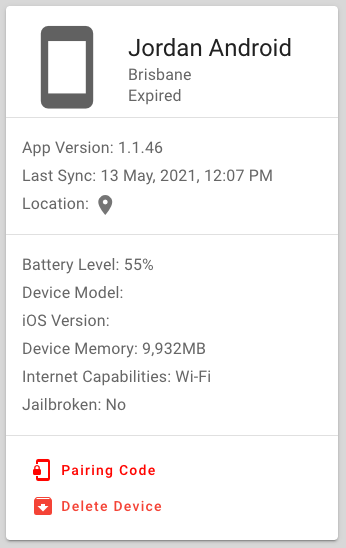
To delete a device:
- Navigate to Organisation -> Devices
- Select the device from the list that you want to delete
- Push the Delete Device button at the bottom of the panel on the left-hand side.
Unregistering a device will wipe the content of the device but still leave the record visible in case you want to pair it again at a later date.
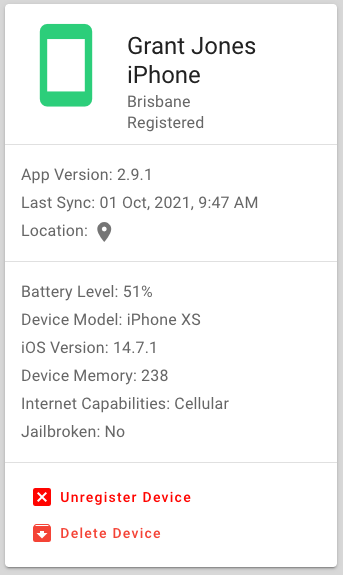
- Navigate to Organisation -> Devices
- Select the device from the list that you want to unregister
- Push the Unregister Device button at the bottom of the panel on the left-hand side.
Setting up a test device
The ChekRite app will only show published checklists on a device. But there might be times where, as an administrator or checklist creator, you will want to test out a checklist on a device before you publish it to see what it looks like.
When you set up a device as a test device it will need to download all its content again because by default, unpublished checklists and their associated records are not downloaded.
An unpublished checklist will not yet be assigned to an Asset Class so you won't be able to select it even if made available in the app. To get around this, you need to select the Asset Class you will be using for your testing. When testing an unpublished checklist you won't actually be submitting any data in ChekRite as you are just testing the checklist flow.
To make a device a testing device:
- Navigate to Organisation -> Device
- Select the device you wish to make a testing device from the list
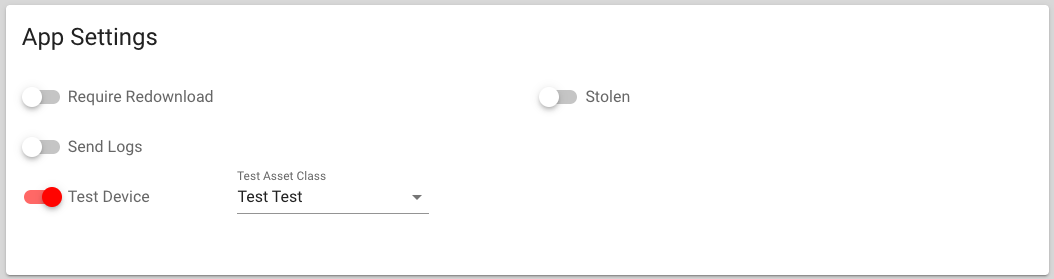
- Check the Test Device checkbox
- Select the Asset Class you will be using to test with from the drop down list. Your site will have been set up with a Test Asset Class when it was originally created. You should use this as your testing asset class but you can select any other asset class if you wish.
To start testing unpublished checklists on your ChekRite app, you should do the following.
- Launch the ChekRite app ensuring you are connected to a network. You will be informed that your app needs to download its data again. This may take up to a couple of minutes.
- Sign in to ChekRite
- Select New Check from the dashboard
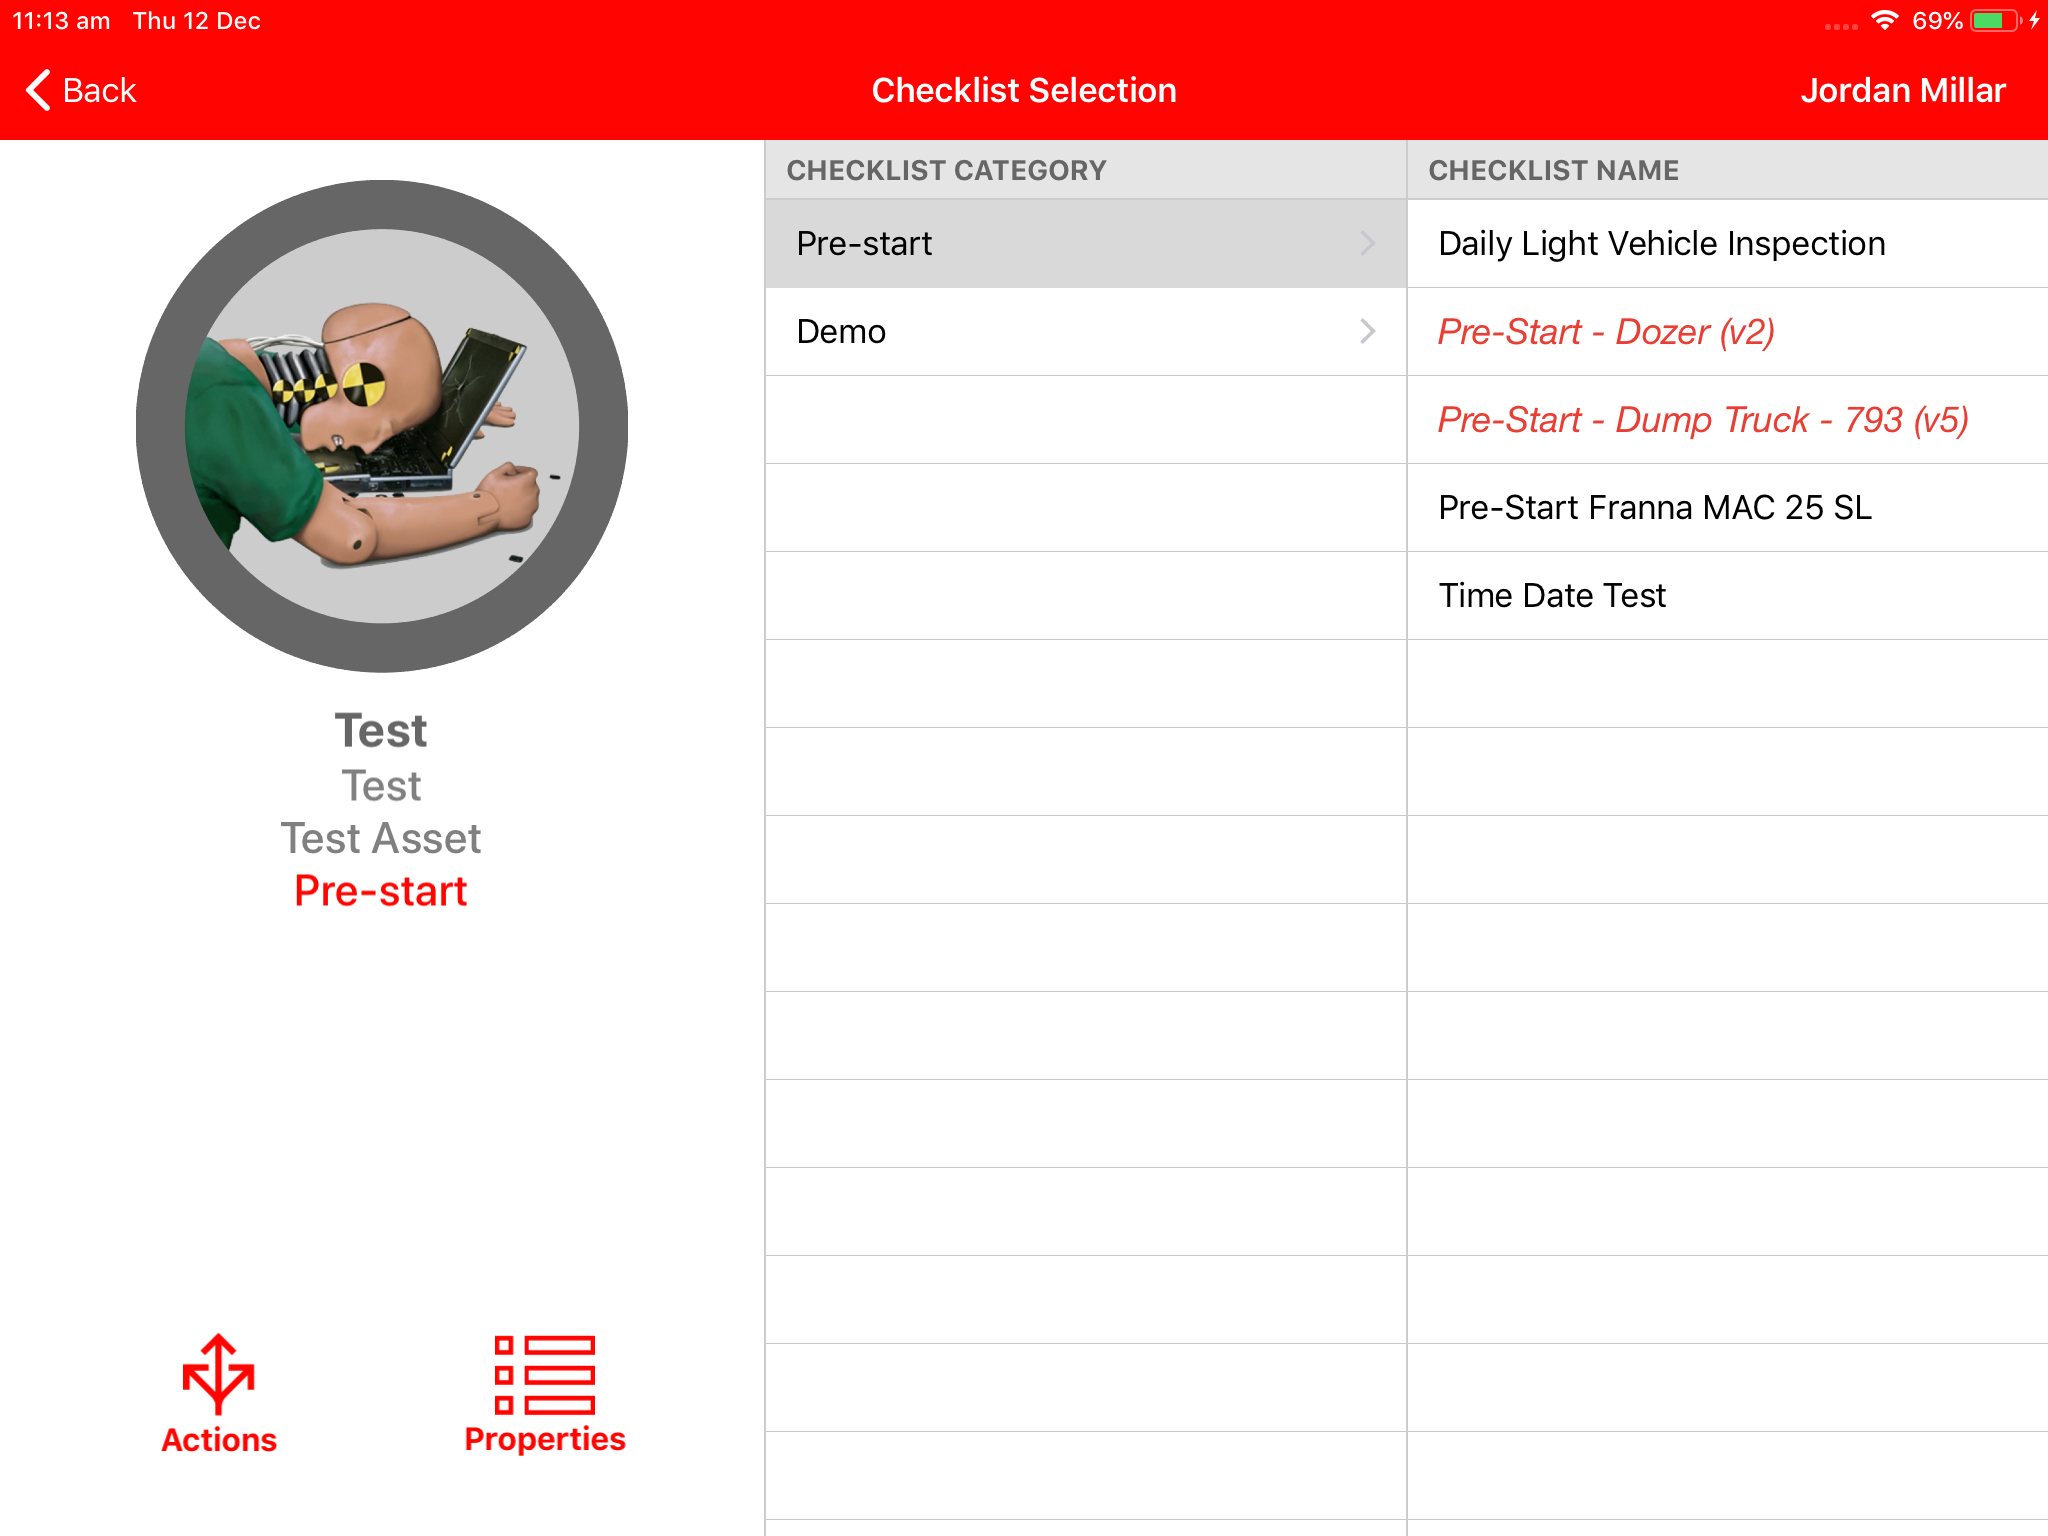
- Select an asset from your testing asset class that you chose above (e.g. Test)
- Unpublished checklist will now appear in red for you to play with.
Troubleshooting a ChekRite App device
The following are a few issues you may encounter with the ChekRite app. As always feel free to reach out to your ChekRite Administrator or us here at ChekRite if you have any issues.
Sending device logs from the Portal
If a user is having problems with their device, an administrator can decide to pull the logs from their device and automatically send them to the ChekRite Tech Support teams.
- Navigate to Organisation -> Devices
- Select the device from the list
- Slide the switch marked Send Logs in the App Settings
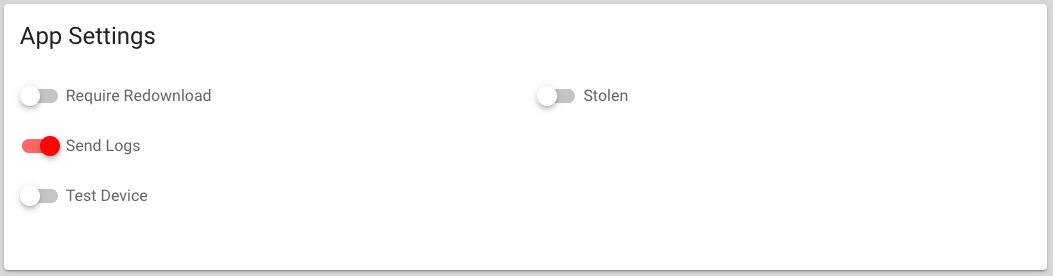
The next time the user launches the app, they will see a dialog box that tells them they are uploading logs to the server.
Sending device logs from the App
If you are having problems with your app, you may be asked by ChekRite staff to send us the logs of this app. This will allow us to look at exactly what your device was doing so we can find out how we can help you better.
- Open the Settings app on your device
- Scroll down until you see the ChekRite icon and app name and select that
- Slide across the switch that says Send Logs on Next Launch
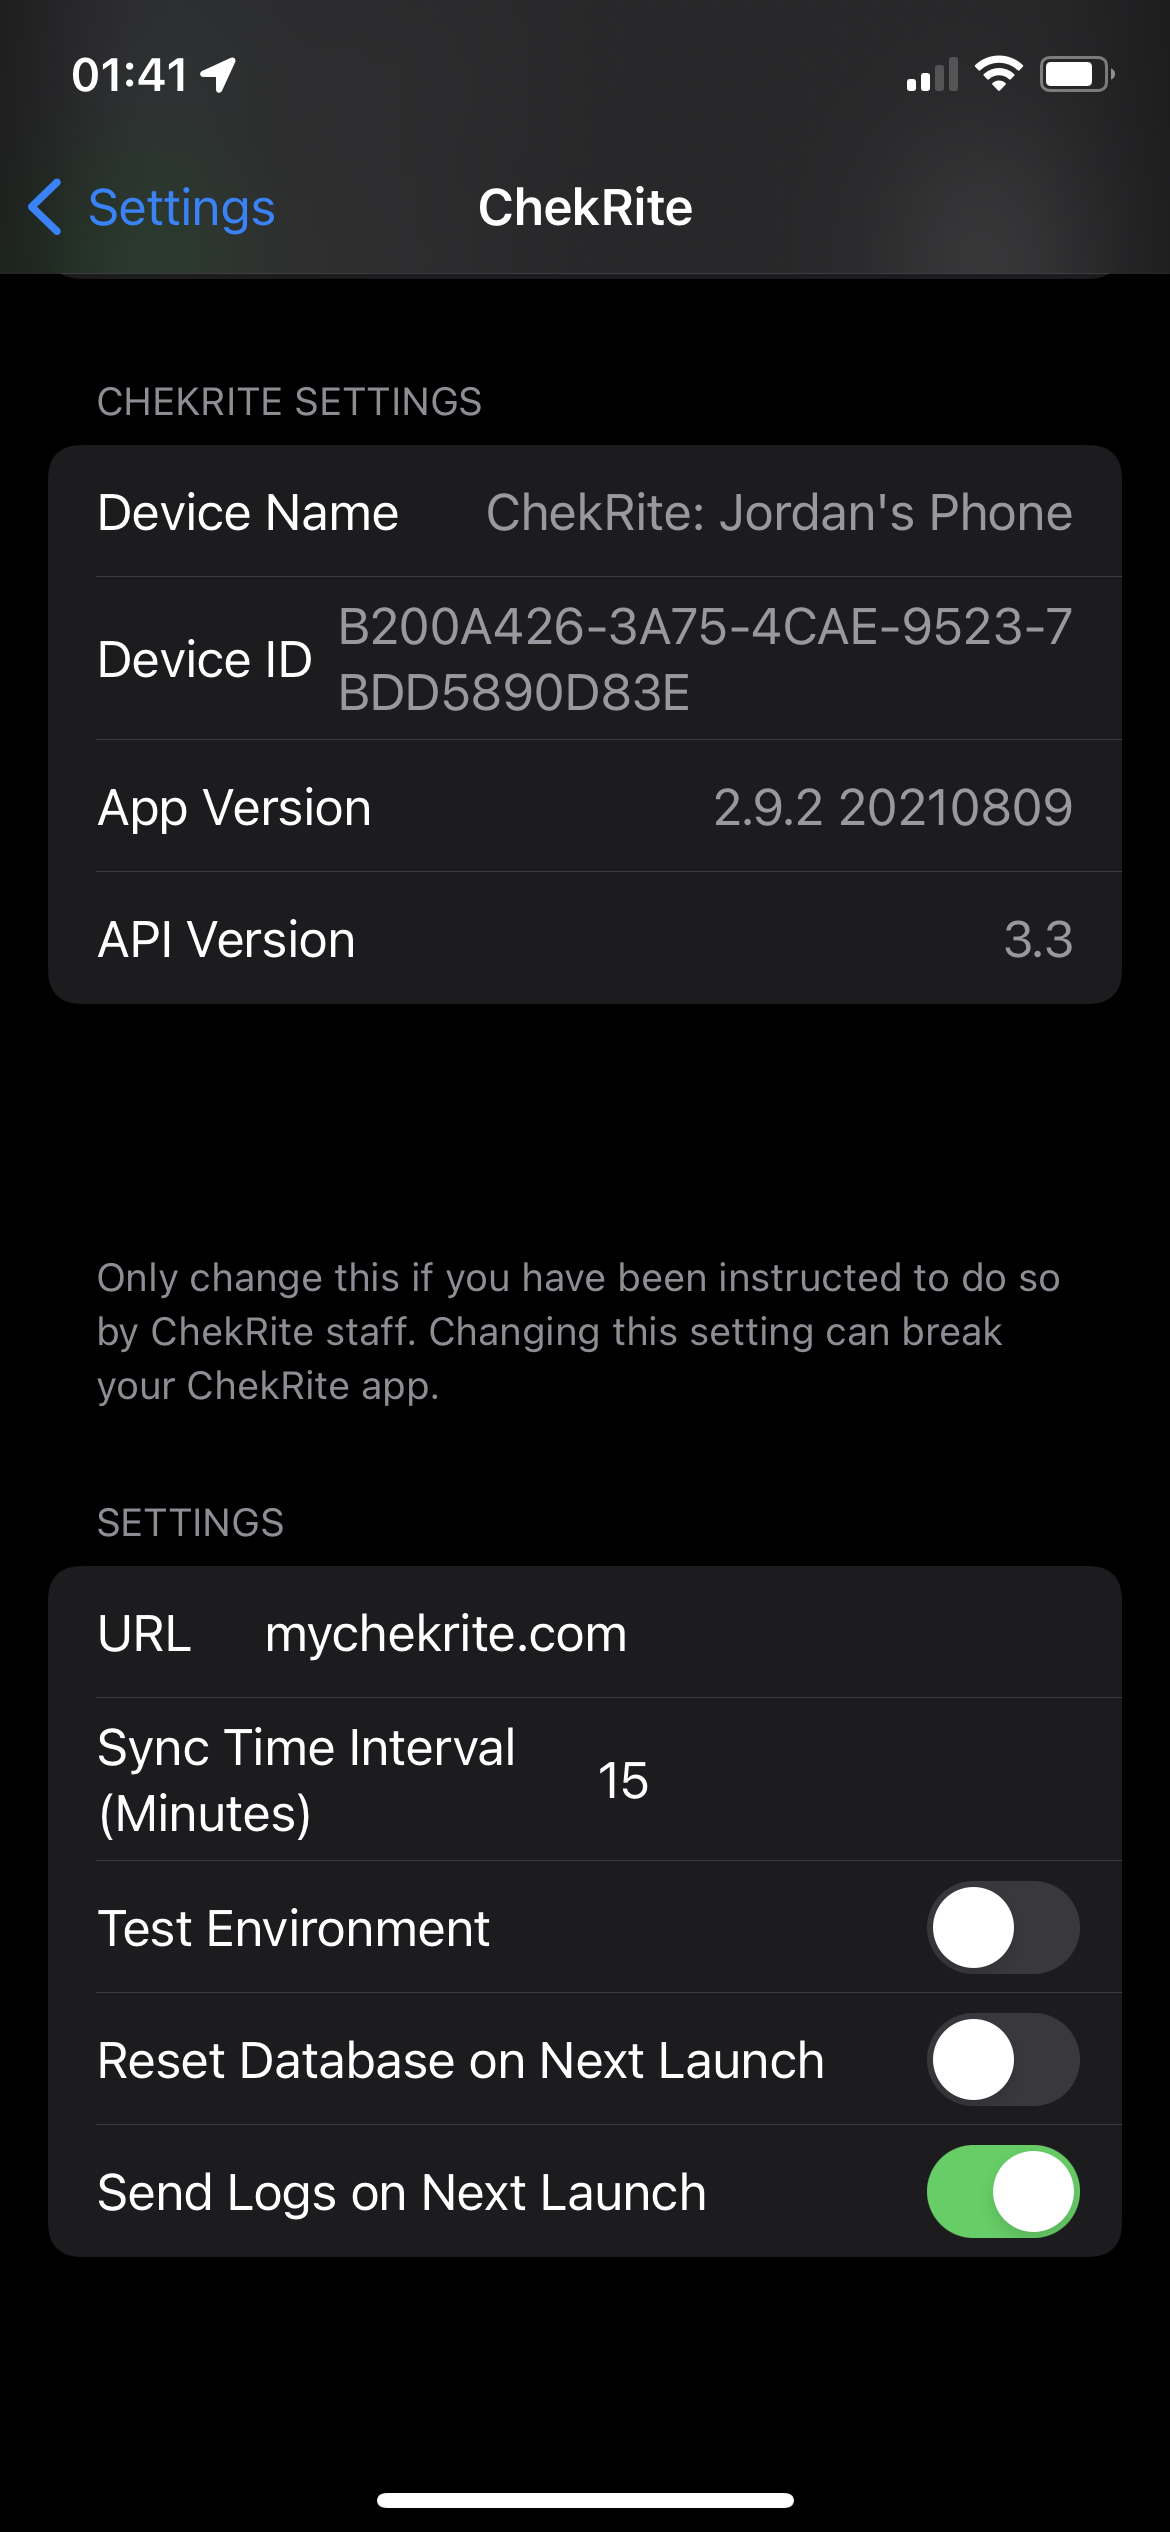
- Tap on the ChekRite app to open it again
After a few moments, you will see a dialog box that says, Sending logs along with a percentage complete. These logs are typically 15-30Mb so depending on your internet connection may take a little while to send. Please be patient and ensure that they are uploaded. When the logs are uploaded the system will automatically send a message to our support team telling us they have arrived.
Device Log Technical Information
When you send logs to ChekRite the app bypasses our normal API's in case there are any issues there and instead directly and securely uploads logs to a secure section of our AWS servers for our developers to access. To do this it does an HTTP Put command. Ensure that your firewall doesn't block this. The actual command is: PUT https://chekrite-app-logs.s3.ap-southeast-2.amazonaws.com
If the logs will not upload over wifi, try turning wifi off and syncing again to upload the logs. This will bypass any firewall settings on your local network.
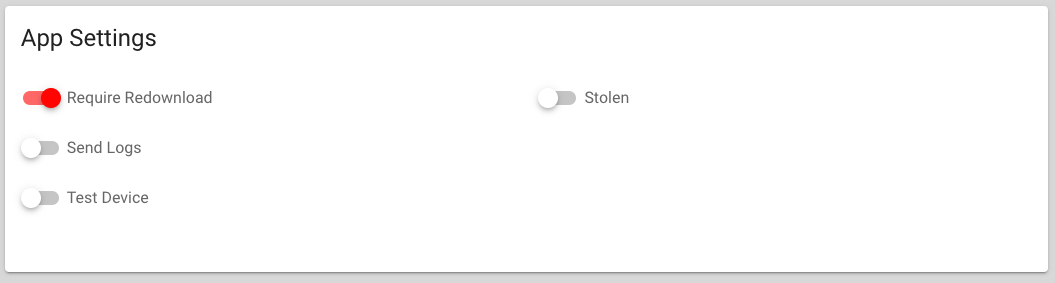
Downloading data again
On rare occasions you might decide that you want to completely download all the data for a device again. Of course you can delete or unregister it and pair it again but you can also tell the device to download its data again the next time it connects.
- Navigate to Organisation -> Devices
- Select the device from the list
- Slide the switch marked Require Redownload in the App Settings
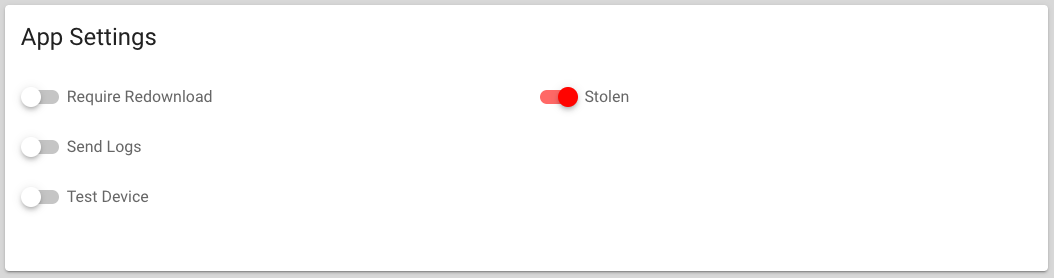
Marking a device as stolen or lost
If a device becomes lost or stolen, you can tell the portal so that the next time that the app is launched when connected to the internet it will immediately wipe the ChekRite content from the device, send through the location and other information that might help recover the device.
- Navigate to Organisation -> Devices
- Select the device from the list
- Slide the switch marked Stolen in the App Settings
Changing the site of a device
A ChekRite device is paired to a single site and syncs down all the data for that site. If you want to move a device from one site to another site, you can of course delete or unregister the app and register it in the new site but you can also tell the portal to move the device to a different site.
- Navigate to Organisation -> Devices
- Select the device from the list
- Select the new site that you want the device to be in from the Sites drop down menu.

The next time the user launches the app, they will be informed that their device needs to download its data again. This may take a few minutes depending on the speed of the network connection. Once complete the device will be in the new site with all the users, assets and checklists of that new site.
ChekMate App (iOS Only)
The ChekMate app is used by managers and administrators to monitor and manage your ChekRite environment on the go. Unlike ChekRite, ChekMate is assigned to a single user and there is no sign-in screen. Assigning it to a user is very important so that you know who is updating or changing records. It also means that authority level of that user is used. Also unlike ChekRite, the ChekMate app supports multiple sites so the user can switch to any of the sites they are authorised to manage.
Registering a device for the ChekMate app
To register a ChekMate device to be able to access your ChekRite environment you need to do the following:
- Navigate to Organisation -> Devices
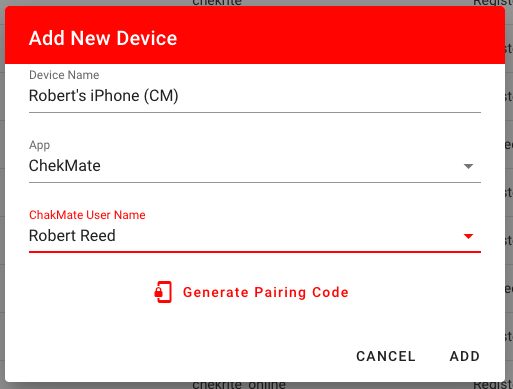
- Click on the Add New Device button
- Enter the Device Name of the device. This may be the name of the person who is assigned the device if you have personal devices at your company or it might be the asset number of the device. For example, at ChekRite our devices are labelled CRD-001, CRD-002, etc. This is what we put as the Asset Tag so that we know which device is which. For ChekMate devices we will often put (CM) at the end of the Asset Tag so that you can tell it is a ChekMate device for those users that have both ChekMate and ChekRite on their phone or tablet.
- Select ChekMate from the App drop-down list.
- Select the User this app will be registered to under the ChekMate User Name drop-down list. This user decides what authority the app will have. The functions that are displayed in the app will be determined by the users' authority.
- Push the Generate Pairing Code button to generate a one time 6 digit pairing code. This is what will be entered into the device to pair it to this site in your environment. Pairing codes expire after 7 days if not used.
- Optional: You can have the system automatically generate a Welcome Letter for new users that gives them instructions on how to download the app and pair it in a PDF letter. To do this, slide the Send Welcome Letter button and select the User that you will be sending this to so we can insert their details in the letter.
Deleting/Unregistering a ChekMate app device
If you delete or unregister a device you are doing so at the portal end. The next time the user launches the app on their device, it will check to see if they are still registered and if not, it will immediately wipe all ChekRite content from the device and return them to the setup screen.
To delete a device:
- Navigate to Organisation -> Devices
- Select the device from the list that you want to delete
- Push the Delete Device button at the bottom of the panel on the left-hand side.
Unregistering a device will wipe the content of the device but still leave the record visible in case you want to pair it again at a later date.
- Navigate to Organisation -> Devices
- Select the device from the list that you want to unregister
- Push the Unregister Device button at the bottom of the panel on the left-hand side
Troubleshooting a ChekMate app device
Sending device logs
If you are having problems with your app, you may be asked by ChekRite staff to send us the logs of this app. This will allow us to look at exactly what your device was doing so we can find out how we can help you better.
- Open the Settings app on your device
- Scroll down until you see the ChekMate icon and app name and select that
- Slide across the switch that says Send Logs on Next Launch
- Tap on ChekMate app to open it again
After a few moments, you will see a dialog box that says, Sending logs along with a percentage complete. These logs are typically 15-30Mb so depending on your internet connection may take a little while to send. Please be patient and ensure that they are uploaded. When the logs are uploaded the system will automatically send a message to our support team telling us they have arrived.
Downloading data again
On rare occasions, you might decide that you want to completely download all the data for a device again. Of course, you can delete or unregister it and pair it again but you can also tell the device to download its data again the next time it connects.
- Navigate to Organisation -> Devices
- Select the device from the list
- Slide the switch marked Require Redownload in the App Settings
Marking a device as stolen or lost
If a device becomes lost or stolen, you can tell the portal so that the next time that the app is launched when connected to the internet it will immediately wipe the ChekRite content from the device, send through the location and other information that might help recover the device.
- Navigate to Organisation -> Devices
- Select the device from the list
- Slide the switch marked Stolen in the App Settings
ChekTV App
The ChekTV app allows you to create dashboards with information you have entered in ChekRite and have them displayed on a TV with real-time updates.
Simply ensure your Apple TV is connected to the network either wired or wirelessly. Then download the ChekTV app from the App Store and follow the instructions below.
Registering an Apple TV for ChekTV
To register an Apple TV to be able to access your ChekRite environment you need to do the following:
- Ensure you are in the site that you want the device registered to
- Navigate to Organisation -> Devices
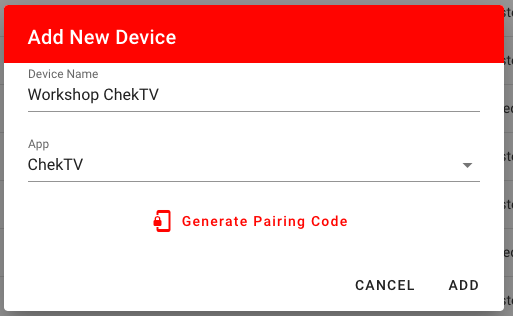
- Click on the Add New Device button
- Enter the Device Name of the device. This generally is the name of the Apple TV but if it has an Asset ID you would enter that here.
- Select ChekTV from the App drop-down list.
- Optional: Select the Refresh Interval from the drop-down list. This how frequently ChekTV will refresh that data used to display the dashboards.
- Push the Generate Pairing Code button to generate a one time 6 digit pairing code. This is what will be entered into the Apple TV to pair it to this site in your environment. Pairing codes expire after 7 days if not used.
Enter the pairing code into the ChekTV app and it will start syncing your data and showing the dashboards you have built in the Widgets system.
Deleting/Unregistering a ChekTV device
If you delete or unregister a ChekTV you are doing so at the portal end. The next time the app tries to sync, it will check to see if it is still registered and if not, it will immediately wipe all ChekRite content from the Apple TV and return them to the setup screen.
To delete a ChekTV device:
- Navigate to Organisation -> Devices
- Select the device from the list that you want to delete
- Push the Delete Device button at the bottom of the panel on the left-hand side.
Unregistering a device will wipe the content of the device but still leave the record visible in case you want to pair it again at a later date.
- Navigate to Organisation -> Devices
- Select the device from the list that you want to unregister
- Push the Unregister Device button at the bottom of the panel on the left-hand side.