8 Steps to Building a Checklist

Creating a checklist in ChekRite is a simple process that allows you to define the exact steps, data inputs, and checks required for any task, inspection, or process in your organisation. Here is a step-by-step guide to help you build an effective checklist.
- Plan your checklist
Before you even open the portal, think about what you're trying to achieve. What process are you digitising? Who will use this checklist—operators, supervisors, auditors? What type of responses do you want: Pass/Fail, Photos, Gauges, QR scans, etc.? A bit of planning upfront saves a lot of rework later.
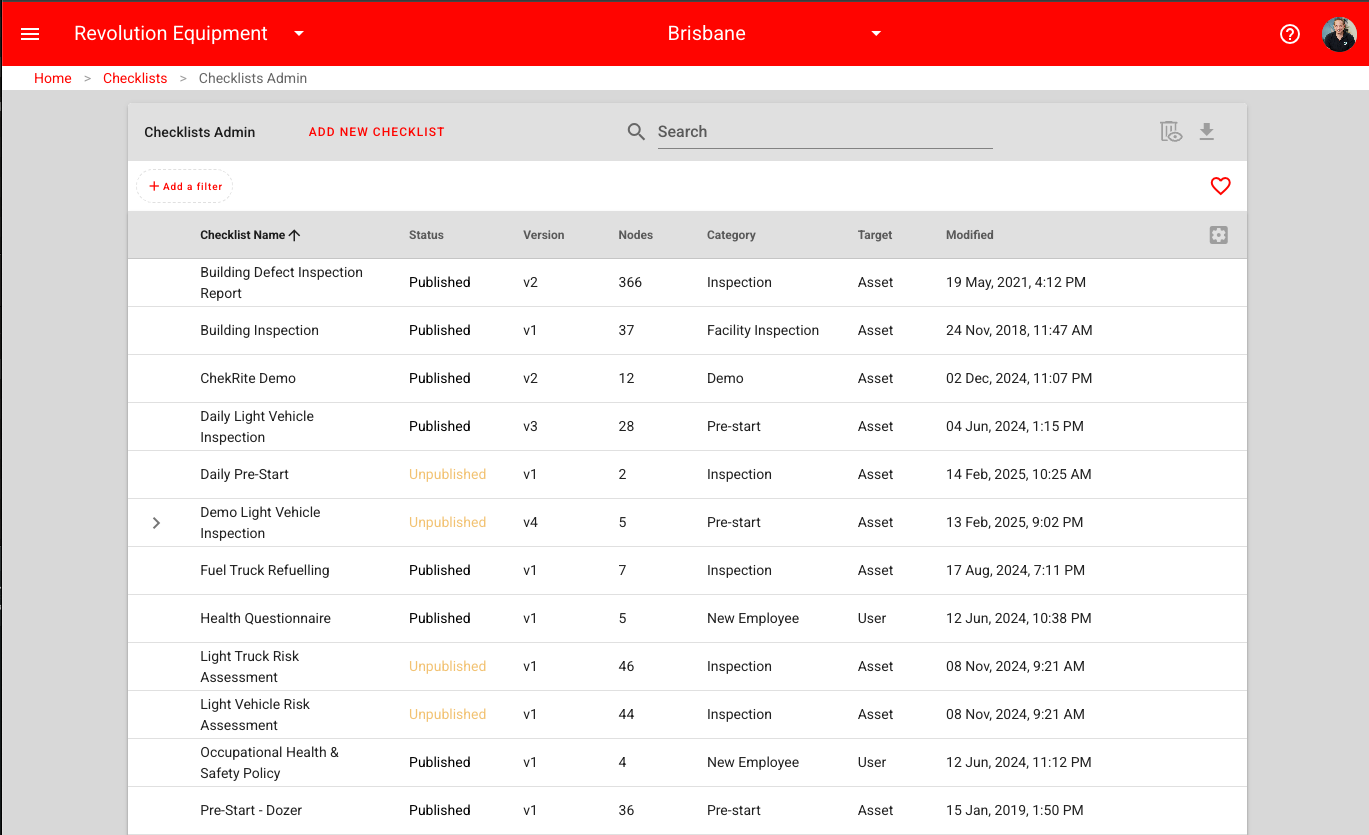
- Open the Checklist Admin Screen
In the ChekRite portal, navigate to Checklists > Checklists Admin. Here you’ll see a list of all existing checklists within your organisation, along with their current version, status, category, and last modified date. You can view, edit, or clone an existing checklist, or click Add New Checklist to start from scratch.
- Define the Structure
Once you've created your checklist, define its structure. Add the high-level questions that users will answer in the field. Each question can have a different response type—Pass/Fail, Yes/No, Gauge, Step, Quiz, etc.—depending on the kind of input you're looking for.
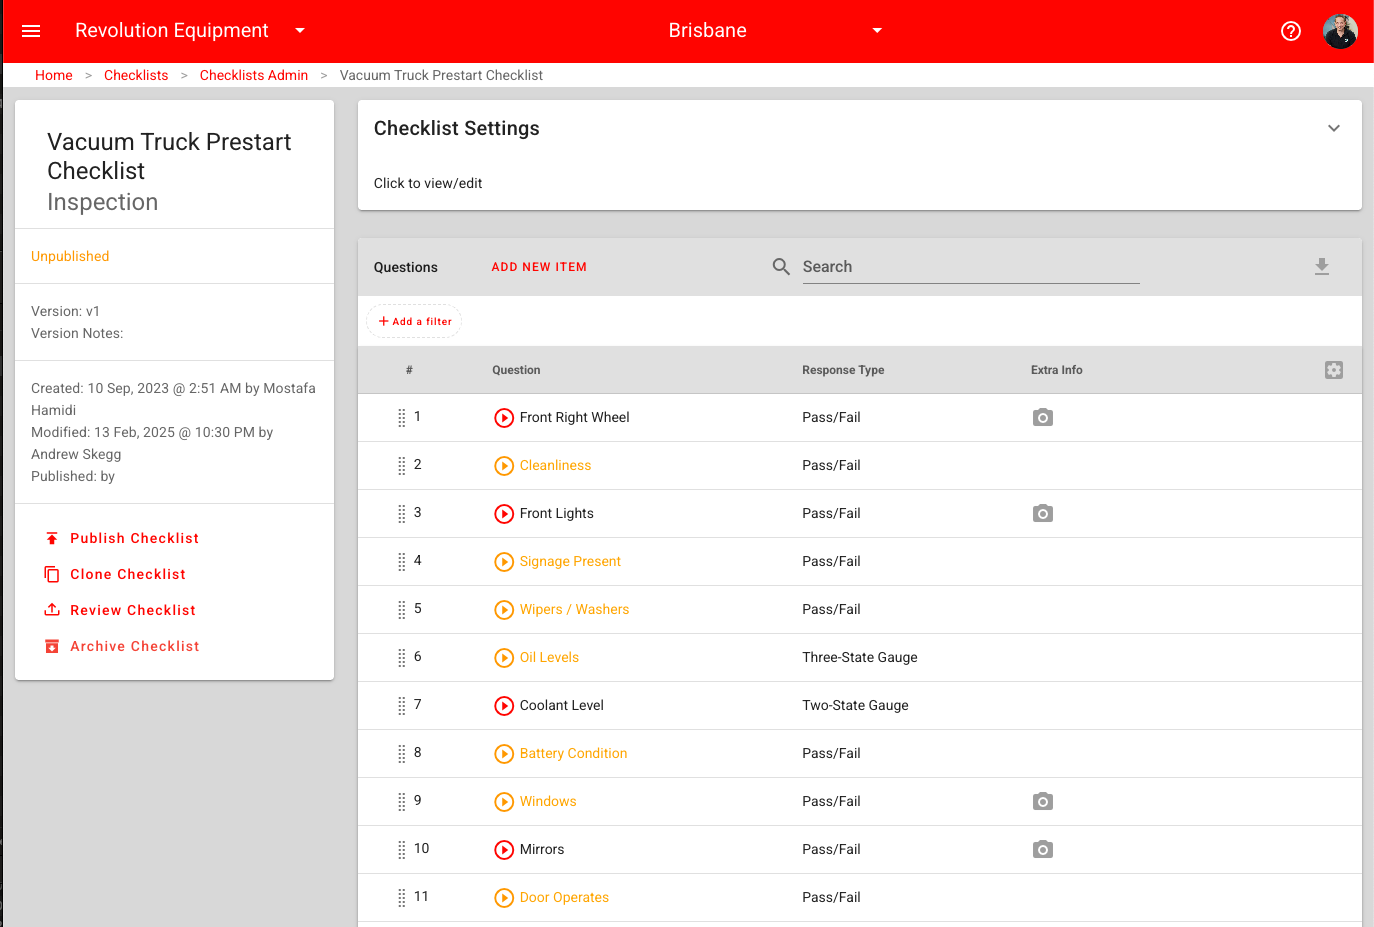
Use clear, actionable wording in your question titles and task descriptions. This is what your users will see when performing the checklist, so make it intuitive.
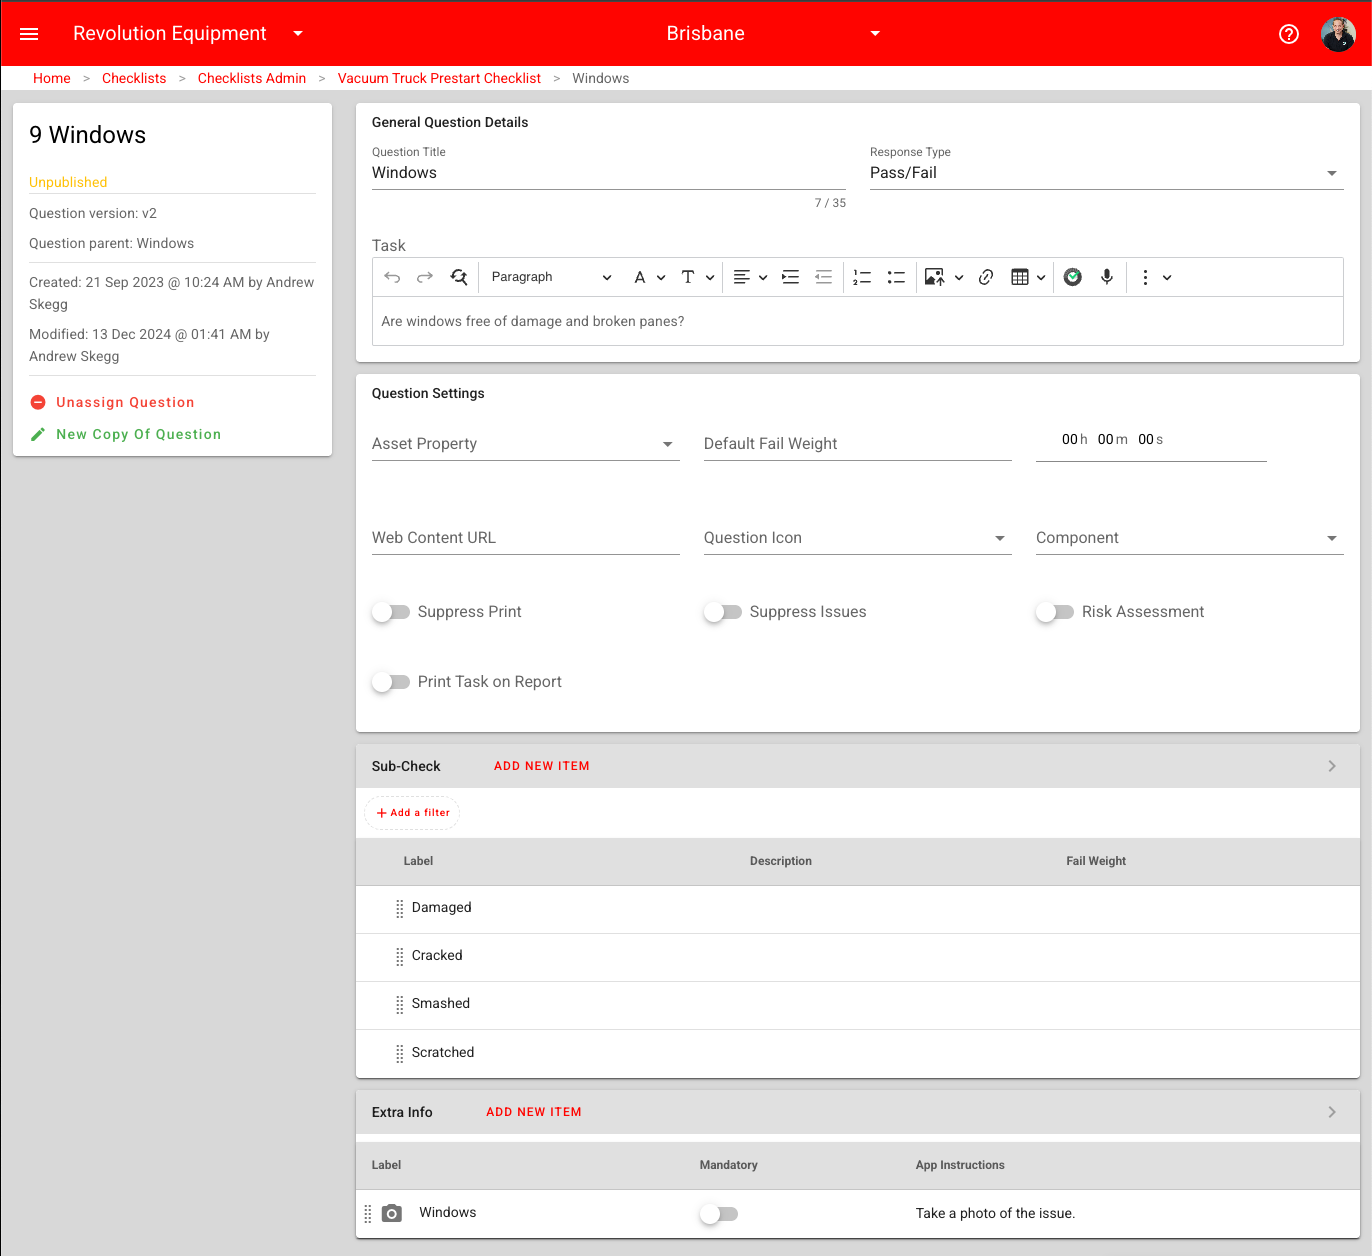
- Add Sub-Checks and Extra Info
For more detailed inspections, you can add Sub-Checks under a question to break down a component into multiple failure modes (e.g., Damaged, Cracked, Smashed).
You can also add Extra Info fields to prompt for specific data like photos, comments, dates, signatures, serial numbers, or custom values. These are triggered based on the user’s response and help capture deeper, more structured information.
- Review Your Checklist
Before publishing, it's important to review your checklist to ensure everything is working as intended. You can send it to another portal user for review, or test it yourself using a device set up as a testing device. You can also print the checklist to check layout and structure. This helps catch any issues before rollout.
- Publish the Checklist
When you're happy with the setup, hit Publish Checklist. Only published checklists can be assigned and used in the ChekRite app. You can still make changes by creating a new version.
- Assign the Checklist
Assign your checklist to specific assets by going to the relevant assignment screen. This determines who can see and use the checklist in the field.
- Set Up Notifications or Reports (Optional)
You can configure notifications or schedule reports to be triggered based on the completion of checklists or certain responses. This is useful for alerting supervisors or triggering workflows when something fails or needs attention.