Table of Contents
Notifications
Notifications are customisable, automated alerts that can be set to trigger based on any function of the data being collected. These can be in the form of an email, SMS, or phone call.
There are several different events that can be used to trigger a notification. These include:
Event | Description |
Test Submitted | The most common type of event. This is triggered once when an inspection is submitted to the server. You can use any of the information that is captured at the inspection level (but not question level) to define the rule. |
Response Submitted | This is triggered once for every question of an inspection that is submitted. You need to be a little careful with this one as you can inadvertently have an action fired for every single question in a checklist. Typically you use this event when you are looking for the response from a single question and the rules you put in place will qualify that down to a single question (usually through the question title). |
Issue Raised | This is triggered when an issue is first raised on the server based on a failed response being submitted. |
Issue Status Changed | If you change the status of an issue either through the portal or through ChekMate, this event will be triggered. You will often use the old status of the issue in the rules to make sure you are triggering this at the right point. |
Device Registered | Every time a new device is registered to the portal, this event will be triggered. |
Checklist Published | You can use this event to alert people when a checklist is published. This might be used to alert certain departments of changes made to checklists. |
Asset Property Changed | This event is triggered whenever an asset property is changed whether it be in the portal, ChekMate or ChekRite. This could be something like an hour meter being updated or it could be a change in registration date for an asset. This is quite a powerful event to monitor for your workflow. |
If a rule is created that is triggered multiple times within one inspection, the action associated with that rule will be carried out multiple times (eg sending an email for every match).
Rules
First you must define the rule and then you can define the action. The rule is condition or conditions that must be met for the action to be executed.
- Navigate to Notifications > Rules > General.
- Click New button.
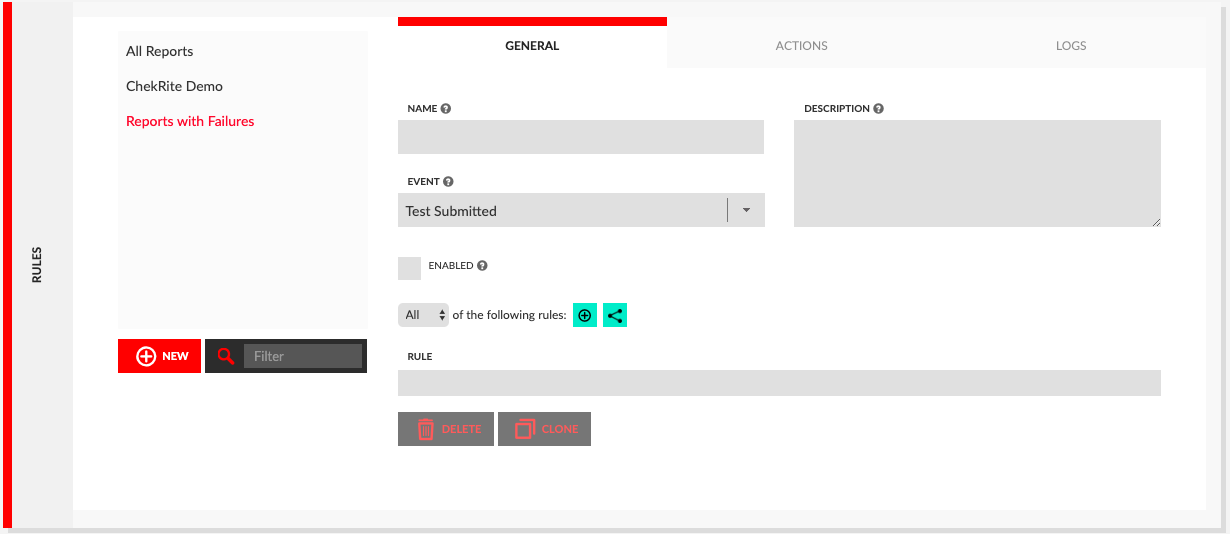
- Enter the name of the notification in the Name field and press enter for it to appear in the notifications list panel on the left. Notifications that are enabled (active) are grey whilst those that are not yet enabled are red.
- Select the type of event that is to trigger the notification from the Event drop-down menu.
- Build the rules that will be examined for this event. (See below for more information on how the rules builder works.)
- Press the Enabled box to activate this rule.
Building Rules
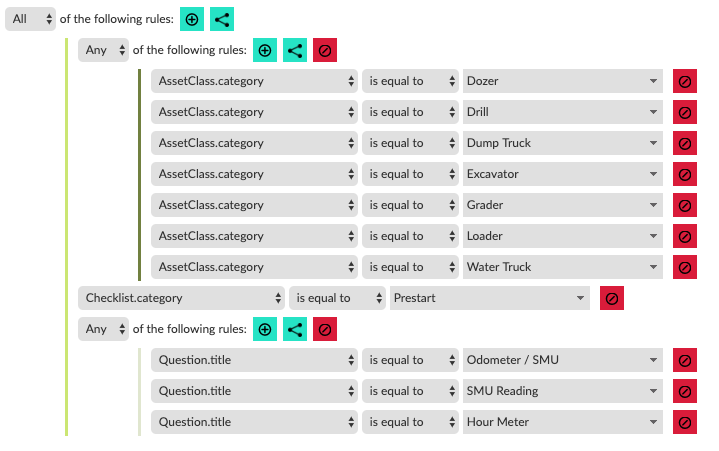
The rules builder in ChekRite is very powerful but also quite simple to understand. You start building the rules with the following basic controller.

On the left is a drop down that can be either All, Any or None.
All | Every rule condition underneath this at the same level must be true (Logical AND) |
Any | Any one or more conditions underneath this at the same must be true (Logical OR) |
None | None of the conditions underneath this rule at the same level can be true |
The next ➕ icon lets you add a new condition in this rule. A condition is made up of a placeholder for information the user has entered (or has been generated) and a comparison. An example might be, the checklist category is equal to "Pre-Start", or the user has selected a sub-check of "Damaged".
The last icon creates a branch. Think of these as being very similar to brackets.
Whilst most rules may be quite simple, you can build some fairly complex ones. Below is an example of a rule that was built of a Response Submitted event.
Whilst this might look complex, the use of Any and All means this rule is actually quite simple. This rule is saying if the Asset Category is one of the 7 asset categories listed AND the checklist category is a Pre-Start AND the question title is one of the 3 questions that captures meter readings, then the rule is true and the action will fire. In other words, the action will be triggered for each meter question of a Pre-Start inspection for one of these 7 asset categories.
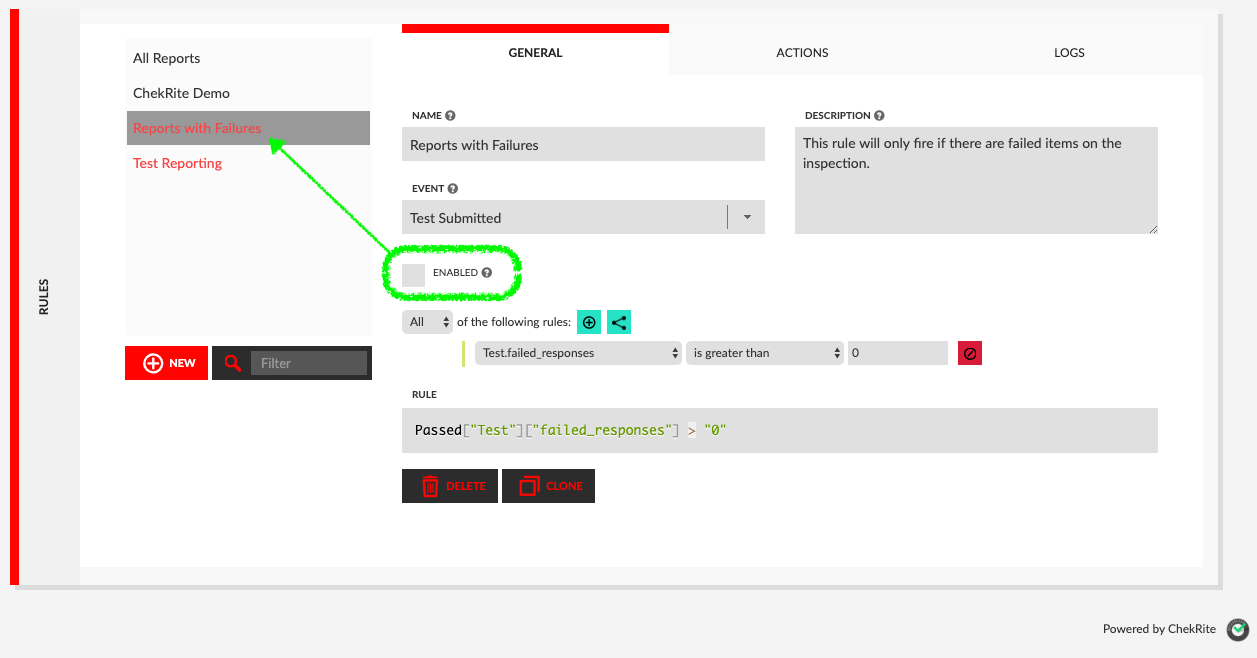
Disabling Rules
To disable a rule so that it no longer is checked and doesn't submit any of its actions, simply uncheck the enabled checkbox. This will change the colour of the rule to red. All red rules are disabled.
Actions
Actions are executed based on the conditions of rules being met. We use actions to send reports, update other systems or perform other sorts of workflow. ChekRite ships with a number of standard actions but you can also have custom ones in your environment developed either by your developers or ours. Please speak to us here at ChekRite if you would like to further integrate ChekRite into your other systems or processes.
Multiple different actions can be created for the one notification. For example, for the one notification rule you might have an email going to a certain set of users, a different email going to another set of users, and an sms going to another user.
These are the standard actions within every environment.
Action | Description |
Send an email message with or without attachments to one or more people. | |
SMS | Send an SMS or Text message to one or more people. |
Voice | Make a phone call and repeat a pre-defined or dynamic message over the phone. |
Cloud | Store PDF versions of reports in Cloud Storage systems like Google Drive. |
Asset Update (Site Change) | Move the Asset from one site to another. |
Custom Actions | Update another system or do something else that helps your business. |
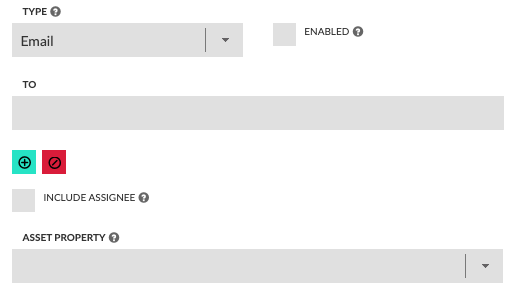
To send an email notification do the following:
- Navigate to Notifications > Rules > Actions.
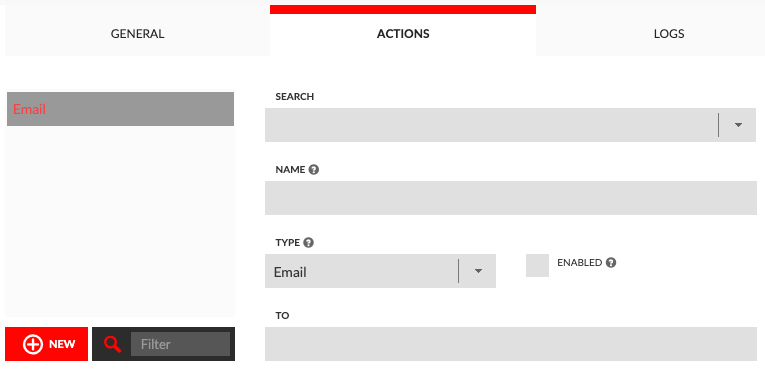
- Enter the name of the action in the Name field. This is usually the person or department that the notification is for.
- Select Email as the Type of notification from the Type drop-down menu.
- Enter the email addresses you want this notification to go to. If you check the Submitter checkbox, the notification will also go to the employee that submitted the inspection (if they have an email address entered for their profile). You can also send an email to an Asset Property if it has been defined as an email address and is populated. For example, if there is a customer associated with an asset, you can have their email address as an asset property on the asset and they can automatically receive notifications that you set up for that email address.
- Create the template for the email notification in the Message field. Use any of the font or formatting functionality provided. Most of these are quite standard although there is one special one which has the ChekRite logo as the button called placeholder.
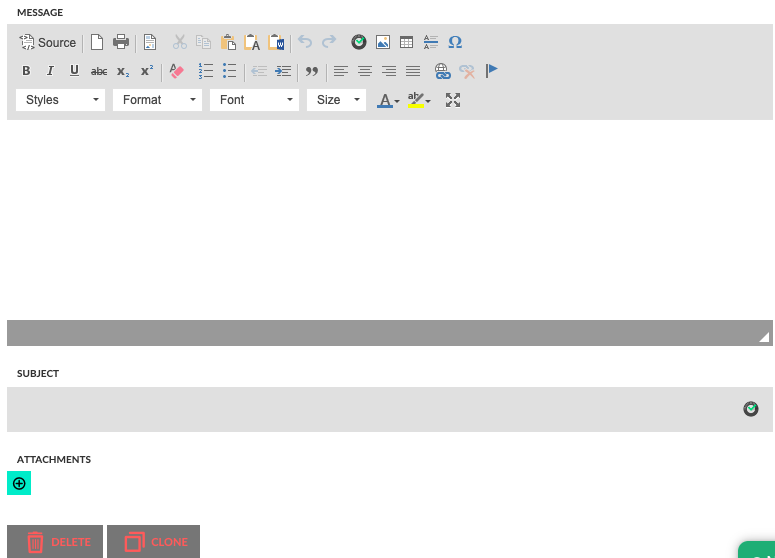
- Use the ChekRite placeholder icon in the template toolbar to have data fields automatically inserted. The placeholder data fields available in the list when you click the icon will vary depending upon what kind of Event the notification is based on. For example, if the event is based on Response Submitted you will have more placeholders available than Test Submitted because the placeholder list would include data pertaining to specific responses.
- Once you have set up the notification template, format the notification subject line by typing into the Subject field. You can also use the ChekRite placeholder within this field.
- Use the green/black “+” symbol to select which PDF reports to attach to the notification. The Audit Report is a summary of all responses no matter the status. The Exception Report is a summary of only the responses with a fail status or where extra information has been submitted. If the event is for an issue, you will also see issue reports in this list.
- Click the Enabled box to activate.
SMS
To send an SMS or Text notification do the following:
- Navigate to Notifications > Rules > Actions.
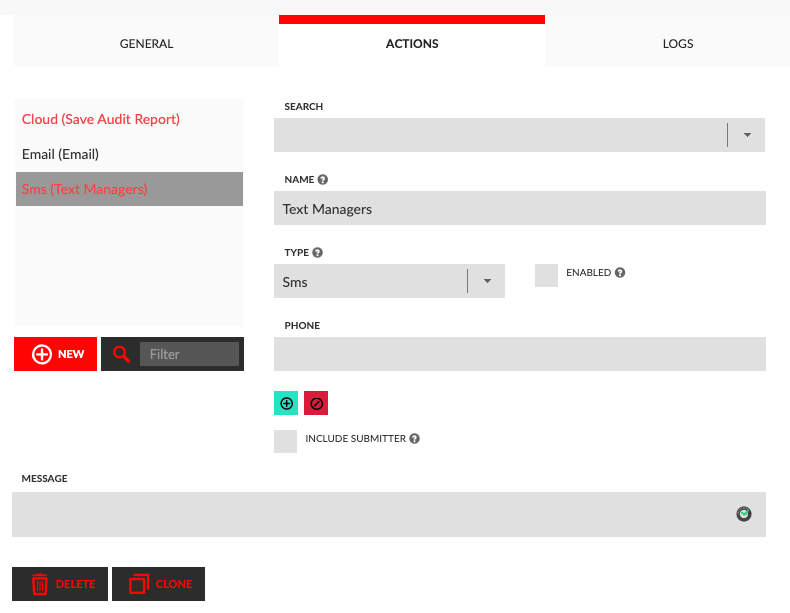
- Enter the name of the action in the Name field. This is usually the person or department that the notification is for.
- Select SMS as the Type of notification from the Type drop-down menu.
- Enter the phone numbers that you want the message to be sent to. Remember that SMS messages can only be sent to mobile phones. You must also enter the phone number in full international format. e.g. +61 447 555 123. If you check the Submitter checkbox, the notification will also go to the employee that submitted the inspection (if they have a phone number entered for their profile).
- Create the template for the SMS notification in the Message field.
- Use the ChekRite placeholder icon to the right of the message field to have data fields automatically inserted. The placeholder data fields available in the list when you click the icon will vary depending upon what kind of Event the notification is based on. For example, if the event is based on Response Submitted you will have more placeholders available than Test Submitted because the placeholder list would include data pertaining to specific responses.
- Click the Enabled box to activate.
Voice
ChekRite can make phone calls and speak a message as one of the notifications. This might be useful for very high priority notifications. You should be careful about using this too much and also be aware of when these phone calls might occur during the day if you are conducting inspections throughout the night.
- Navigate to Notifications > Rules > Actions.
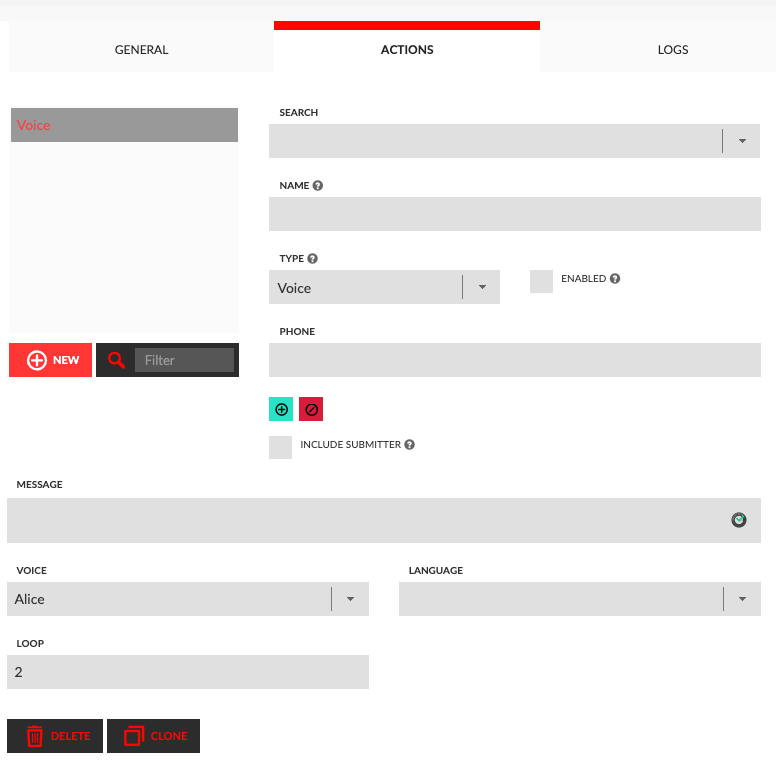
- Enter the name of the action in the Name field. This is usually the person or department that the notification is for.
- Select Voice as the Type of notification from the Type drop-down menu.
- Enter the phone numbers that you want the notifications system to call. You must also enter the phone number in full international format. e.g. +61 447 555 123. If you check the Submitter checkbox, the notification will also go to the employee that submitted the inspection (if they have a phone number entered for their profile).
- Create the template for the voice notification in the Message field.
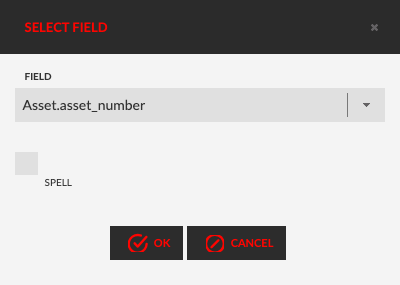
- Use the ChekRite placeholder icon to the right of the message field to have data fields automatically inserted. The placeholder data fields available in the list when you click the icon will vary depending upon what kind of Event the notification is based on. For example, if the event is based on Response Submitted you will have more placeholders available than Test Submitted because the placeholder list would include data pertaining to specific responses. For certain placeholders you will see the option to spell out the value rather than attempt to say it. This is usually handy for things like asset number.
- Click the Enabled box to activate.
Cloud
It is possible to have ChekRite automatically file reports in cloud storage after each inspection. You can customise both the file name and where it is stored, and even dynamically create folders and sub-folders.
There are two main steps involved in setting up Cloud Storage. Click on the links below to jump to these sections.
- Authorise your cloud storage service (e.g. Google Drive)
- Set up a Notification for Cloud Storage
Asset Update (Site Change)
This notification type is to move an asset from one site to another. This only works for the event type of Response Selected.
This action requires a specially formatted question. The Question needs to have as sub-checks the name of the sites that you can move the asset to and these sub-checks must be spelt exactly the same way as the site name. You should also set the question so that only one sub-check can be selected.
As part of the conditions on the rule, you will ensure you are selecting the particular question you have set up above. Then the action will look at which sub-check has been selected and will attempt to move the asset to a site with the exact same name as the sub-check, if it can't find one, then the asset will not be moved.
Custom Actions
If you would like ChekRite to do something unique or different like update one of your in-house systems, then this is something that can easily be done. Just contact us and we can work with your technical teams to have data from ChekRite automatically updating your ERP, Maintenance Systems, HR Systems, Safety Systems and pretty much any other place you want your data being sent.