Table of Contents
Reviewing Issues

After you triage issues they can be managed through the Review area. To get to the issue review area, tap on the Issues icon on the Dashboard then tap on the Review icon (pair of binoculars).
You will then be presented with a list of issues based on the filter options you choose. By default you will normally be shown issues that are in a Follow-up or Info Required status.
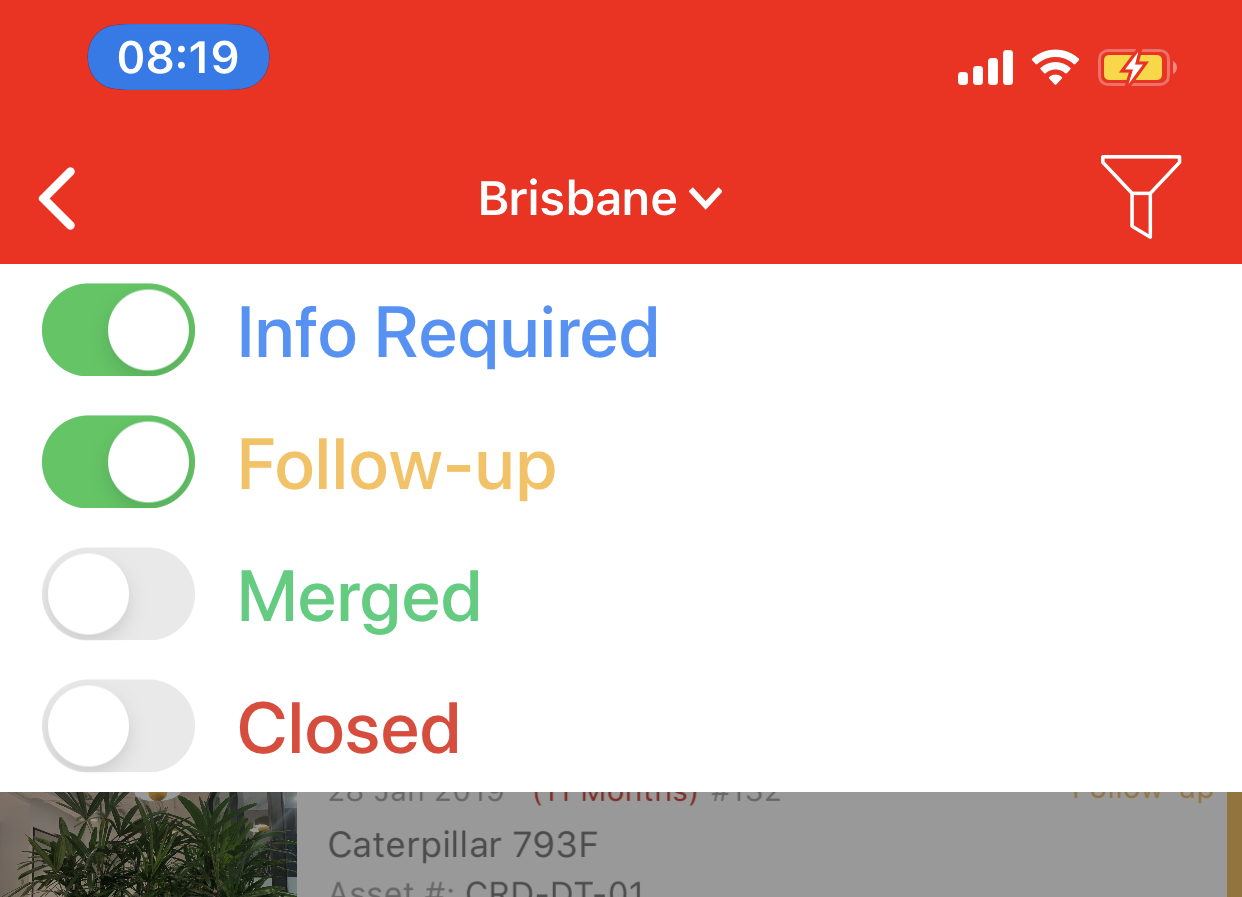
To change the filter options, tap the filter icon on the top right and turn on the filters you would like to see.
The issue list will display the list of issues that match the filter criteria. For each issue there will be a photo (if one is available) and then some key information on the issue. The issues are filtered with the oldest first. You can search for a specific issue by typing in any information in the search bar.
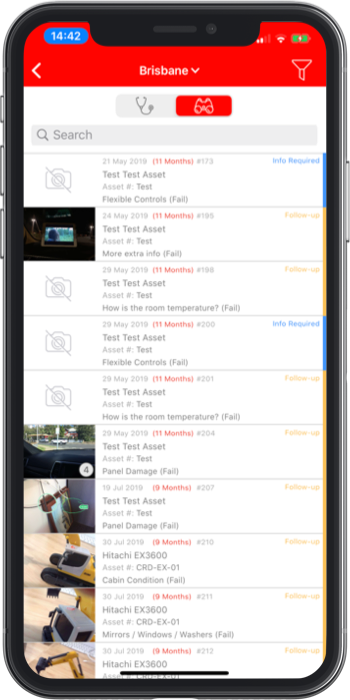
Tapping on an issue takes you to the Issue Review Card.
Issue Review Card
The issue Review Card is both a place to display and update information on the issue. Below is an example of an issue card.
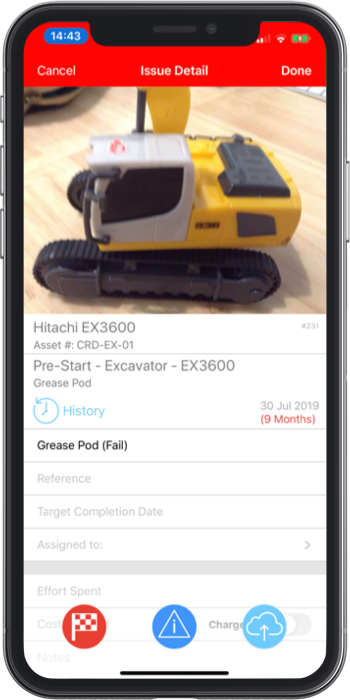
There are two types of information that are stored on the issue card. The Header information is those details that only appear once on the issue. For example, the issue can only have one title. However, the History information is those details that may have multiple entries on the issue. For example, you may add different notes to the issue. One note saying you have ordered parts and another note later saying that the parts have arrived and need to be installed. You can review this history information with the History button.
The Header information for an issue is:
Title | Be default this will be the name of the question and the status, eg. Cabin Condition (Fail). This can be updated with a more descriptive name of the issue. |
Reference | This is used to enter an external reference number for the issue. Perhaps you raised a work request for this issue in another system so this could be the work request or job number. |
Target Completion Date | This is the date that the issue should be resolved by. |
Assigned to | This will be the user or employee group that is responsible for this issue. |
The History information for an issue is:
Effort Spent | This allows you to quickly record effort spent in resolving the issue in days, hours or minutes. |
Cost Incurred | This allows you to record the cost that was incurred in resolving the issues. This could be the cost of parts needed to resolve the issue. |
Notes | You can leave multiple notes on an issue to describe activities that you have performed. Whilst you can type the notes in, it's often easier to tap the microphone and use dictation to automatically enter the notes in this field. |
Photo | You can add more photos to the issue. This might be photos that better highlight the problem or photos that show the issue as being resolved before you close it. Any photos that you add to the issue will be displayed in the large photo pane at the top of the issue card. You can swipe between the photos attached to the issues. |
Along the bottom of the issue card are buttons that enable you to change the status of the issue. Depending on the current status of the issue, you will see different buttons.
 | Close the issue |
 | Change the issue back to the Info Required Status. (Only available if the issue is in a Follow Up status) |
 | Save the issue and return back to the issue list. |
 | Send the issue back to be Triaged. (Only available if the issue is in a Info Required status) |