Table of Contents
Extra Info

The next step in building your checklist is to attach any extra information requirements. Not all questions require Extra Info, in which case you move on to Sub-Checks.
The Extra Info tab enables the user to capture extra information about the check they are currently performing. As the checklist creator, you need to determine (in conjunction with subject matter experts) what Extra Info options need to be included (if any) for each check.
There are quite a few to select from, of which Photo and Audio are the most commonly used. But what data you need to capture all depends on the nature of the check being undertaken. Here's a quick rundown of the types of extra information that ChekRite enables users to capture.
When is Extra Info triggered?
Extra Info prompts are configurable and typically activate based on the response type selected. For instance, in a "Pass/Fail" scenario, selecting "Fail" may trigger a request for additional details to elaborate on the failure. This ensures that more context is provided when an item doesn't meet the required criteria. For a visual guide on how different response types interact with Extra Info, refer to Visual Examples of Response Types.
Extra Info Fields
Let's take a couple of minutes to discover what fields are on the Extra Info and what their purpose. If you would like to see what these Extra Infos look like from an end-user perspective you can see that here.
Photo
Activates the device’s camera, allowing users to capture images pertinent to the inspection. Multiple photos can be taken, and annotations can be added to highlight specific areas.
Audio
Enables users to record audio notes, which are automatically transcribed for easy review and reference. This is useful for capturing verbal observations or explanations.
Numeric & Decimal
Prompts users to input numerical values, with the Decimal option allowing for fractional entries. These are ideal for recording measurements or readings.
Signature
Provides a panel for users or customers to sign using their finger or a stylus, confirming acknowledgment or verification of the inspection.
Bar Code
Prompts users to scan a barcode or QR Code related to the item being inspected, ensuring accurate identification and tracking.
Currency, Date, Time, & Duration
Allows users to enter financial amounts, select dates, input times, or record durations, depending on the context of the inspection.
Serial
Enables entry of alphanumeric codes, useful for recording serial numbers or unique identifiers.
Employee
Facilitates the selection of an employee from a filtered list, attaching the inspection data to a specific individual. This is beneficial when multiple personnel are involved.
Asset
Allows for the selection of a secondary asset, linking the inspection to multiple assets when necessary.
Calculated
Performs automatic calculations based on other Extra Info inputs within the same question, displaying the result to the user and in reports.
Location
Displays a map for users to drop a pin, capturing a specific location relevant to the inspection. This is particularly useful when reporting issues at different sites.
Dynamic List
Presents a customizable list that can be modified without updating the entire checklist. Users can add new items on the fly if permitted. Dynamic lists are maintained in the Table & Items section.
Stopwatch
Enables timing of specific events, automatically recording the elapsed time.
Allows users to enter an email address, which is automatically validated for correct format. This is useful when capturing contact details for notifications, follow-ups, or external recipients.
Phone Number
Prompts users to enter a phone number. Input is validated to ensure the number follows a recognised format, helping reduce errors when collecting contact information.
Project
If Projects are enabled in your organisation, this field lets users select a project to assign to the current inspection. You can configure it to show either active projects only or all projects, depending on the use case. This is ideal for tracking inspections by project.
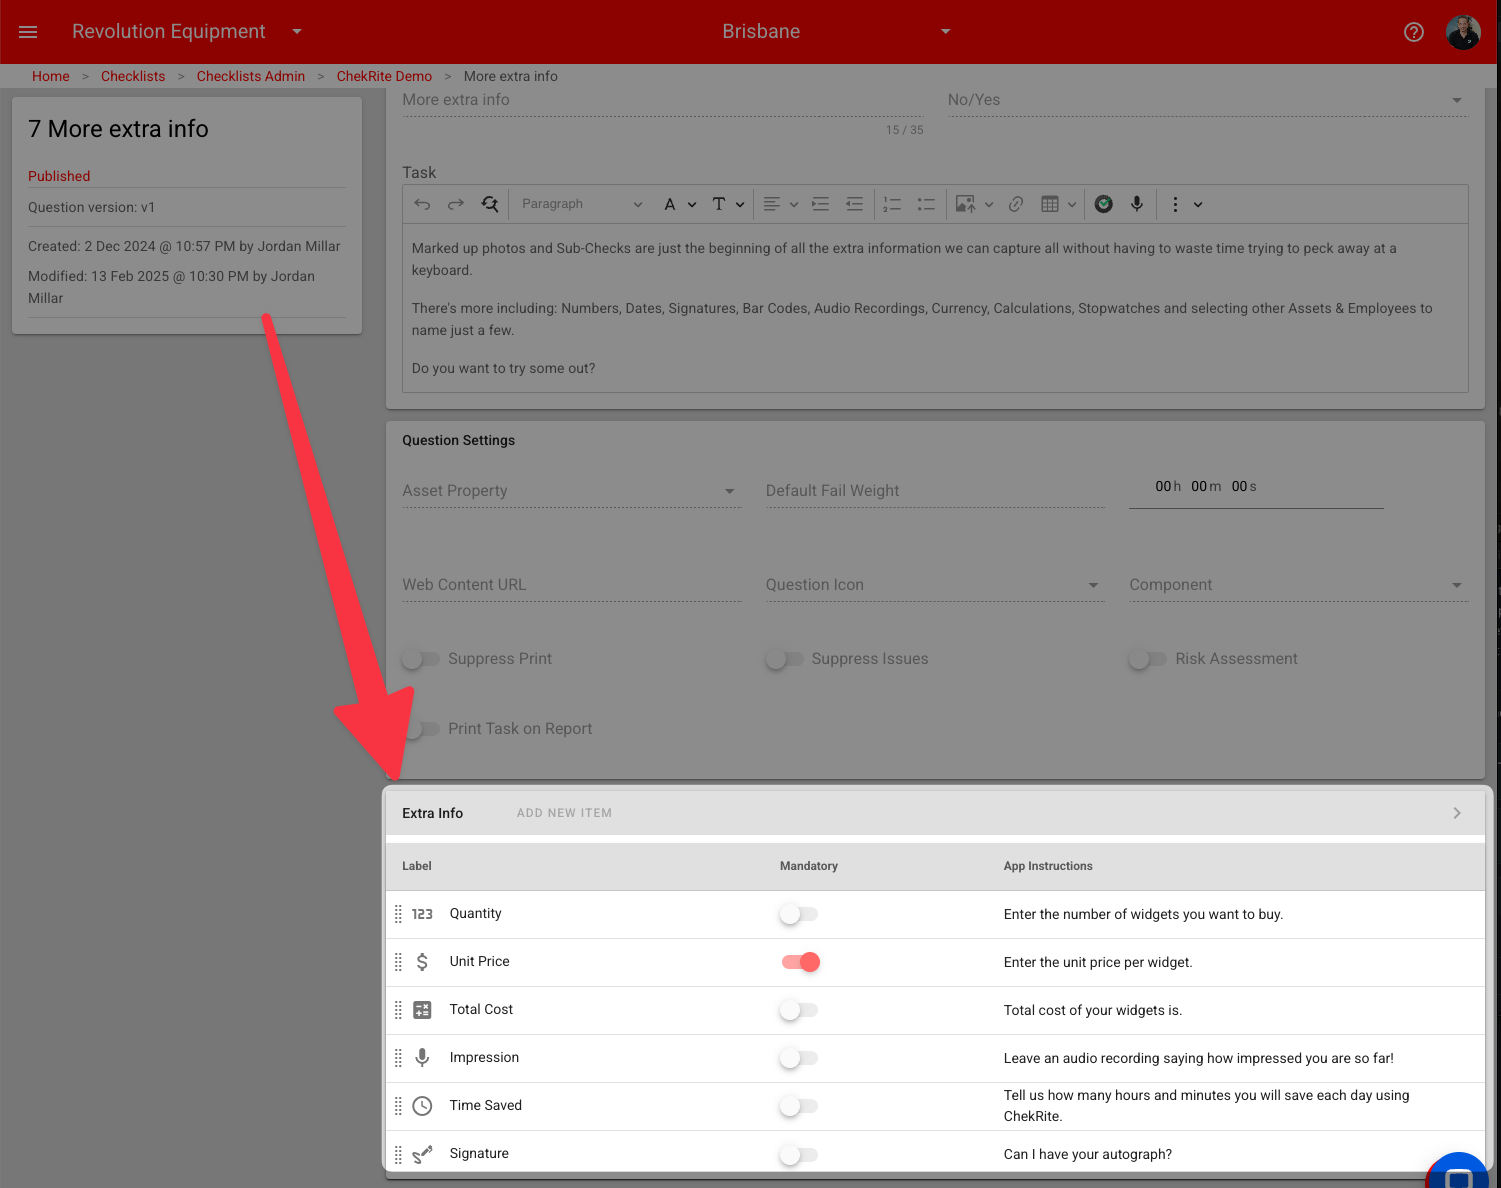
How to add Extra Info
- Go to Checklists > Questions > Extra Info. Push the Add New Item button in the Extra Info panel.
- Select the “Extra Info Type” to be attached from the drop-down menu.
- Enter the title of the Extra Info in the Label field. This is what will appear on the reports next to this Extra Info. In many cases, it is the same as the question title.
- Enter a direction for the user in the App Instructions field, eg. “Take photos of any issues.”
- Select the Mandatory box if the information must be captured. Unless completed, the user will not be able to progress further with the checklist.
- Select any other options that appear for this Extra Info. These will be based on the type of Extra Info selected. e.g. for a date Extra Info, you can choose the format of the date and whether or not a default date is presented, for a numeric you can choose whether or not there is a thousands separator shown in the report or if negative values will be allowed.
You may wish to change the order in which the Extra Info attachments appear or remove one altogether. If so, that's really easy. To change the order, just drag and drop the attachments into the desired order. And to delete just hover over the extra info to be deleted and click on the Delete button.
Asset Properties
Extra Info can be linked to Asset Properties, allowing the captured data to update corresponding asset records. For instance, a Date Extra Info can update an asset's registration expiry date. Only compatible types will be available for selection to ensure data integrity.
By effectively utilizing Extra Info fields, you can enrich your inspections with detailed, context-specific data, leading to more comprehensive reports and informed decision-making.