ChekRite Portal
Getting Started
Organisation
Logging In & Out of the ChekRite Portal
Managing Your Sites
Managing Assets
Managing Asset Documentation
Managing Users
User Roles and Access
Managing Your Devices
Managing Groups
Asset Utilisation
Checklists
8 Steps to Building a Checklist
Creating a New Checklist
Setting Up the Structure of Your Checklist
Extra Info
Sub-Checks
Fail Weights & Scores
Reviewing Your Checklist
Testing Your Checklist
Publishing Your Checklist
Assigning a Checklist to an Asset Class
Assigning Warnings & Manuals
Modifying a Checklist
Output
Issues
Customising ChekRite
Guides
ChekRite App
Getting Started
Downloading ChekRite on your Phone or Tablet
Updating ChekRite
Synchronising
Logging In & Out
ChekRite Dashboard
Welcome to your ChekRite Demo
Starting an Inspection
Adding assets on the fly
Resetting the ChekRite App
ChekMate App
Troubleshooting
Resources
- All Categories
- Resources
- Creating QR Codes
Creating QR Codes
Updated
by Jordan Millar
Many users want to create QR codes so that they can quickly identify assets or even start checklists. You can certainly go out to third-party printers and they will create these QR codes for you, but it's also very easy to do this yourself.
What to Put in a QR Code?
The main places that we use QR codes in ChekRite is identifying assets and users. You can also use it to identify an asset and start a checklist in a single QR code. There's nothing too clever about QR codes - all they are is a very fast way of typing. When the camera sees the QR code, it reads the text that's associated with it and inserts it into the appropriate place in ChekRite.
For example, if you scan the QR code for an asset on the Select Asset screen, it will search for that asset and then if it's found bring it up on the screen for you to select the checklist. The same applies for a select user.
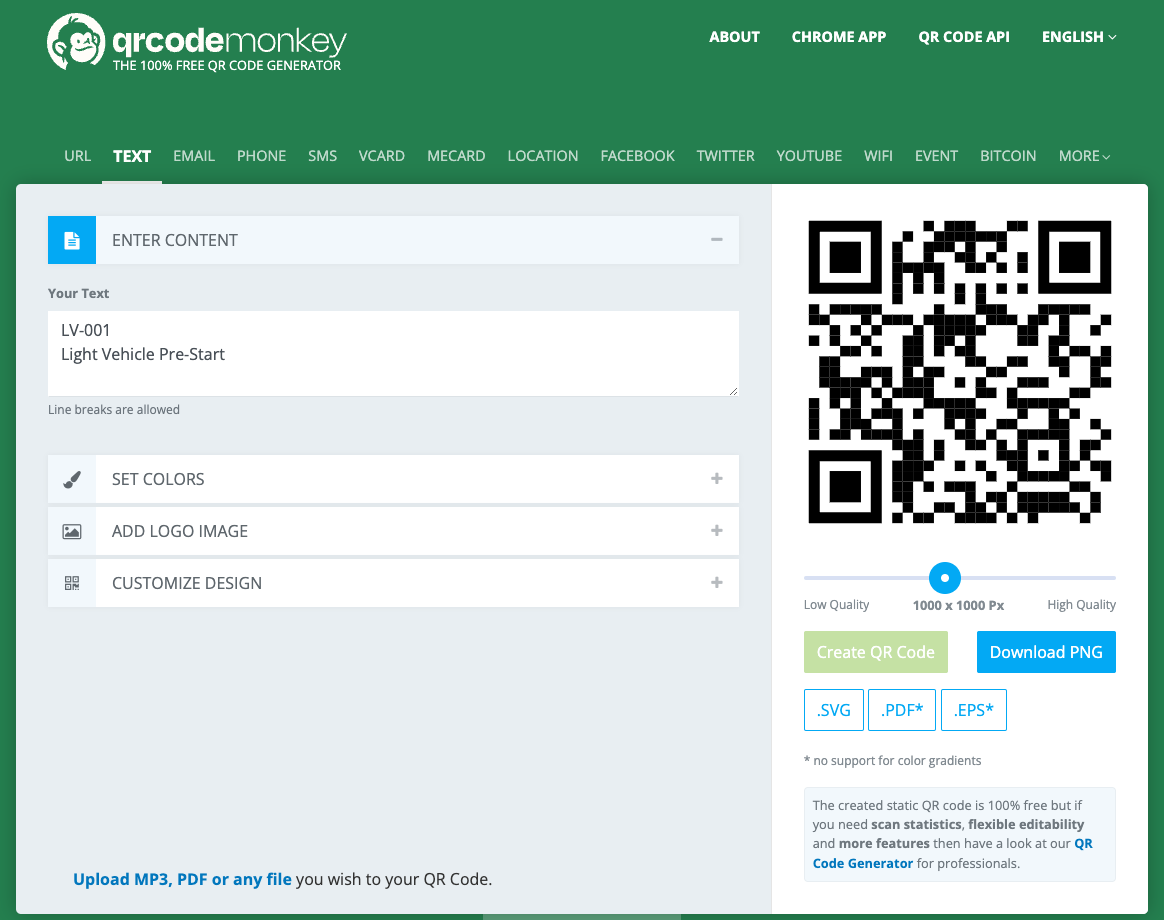
In most cases, people want to search assets. So if your asset is LV-001, then all you need to type in the QR code is LV-001. However, if you wanted the QR code to not only select the asset but go to a specific checklist and get that ready to start, you can put a return character and then the name of the checklist into the QR code. So you would enter something like below when generating the QR Code. By separating the two items on two different lines, it tells the system that the first line is the asset number to search for and the second line is the checklist to search for.
LV-001
Light Vehicle Pre-Start
QR Code Monkey
This is an excellent website that allows you to create QR codes for free. All you have to do is enter in the text that you want to be in the QR code and push 'Create QR Code' button and then download. QR Code Monkey is not only great for generating text-based QR codes like we use in ChekRite, but you can also use it to generate URLs, Wi-Fi passwords, and even a contact card so that people can scan that to copy your contact details directly into their phone's address book.
Here's a link to their website: https://www.qrcode-monkey.com/#text

