Table of Contents
Testing Your Checklist
You've built your checklist in the portal and now you can't wait to start using it.
✋🏻But hold on a minute!!!✋🏻 Step away from the Publish button!
Before you start using it, you need to make sure that it's exactly what you want and you don't have any spelling or logic errors. Why? Well it just makes sense to make sure it's right before you unleash your creation on others.
Testing on Paper (PDF)
The first thing to do is to use the PDF from the portal to check for spelling, and other common errors.
- Navigate to Checklists > Checklist
- Select the unpublished checklist you wish to create a PDF of.
- Push the Print button
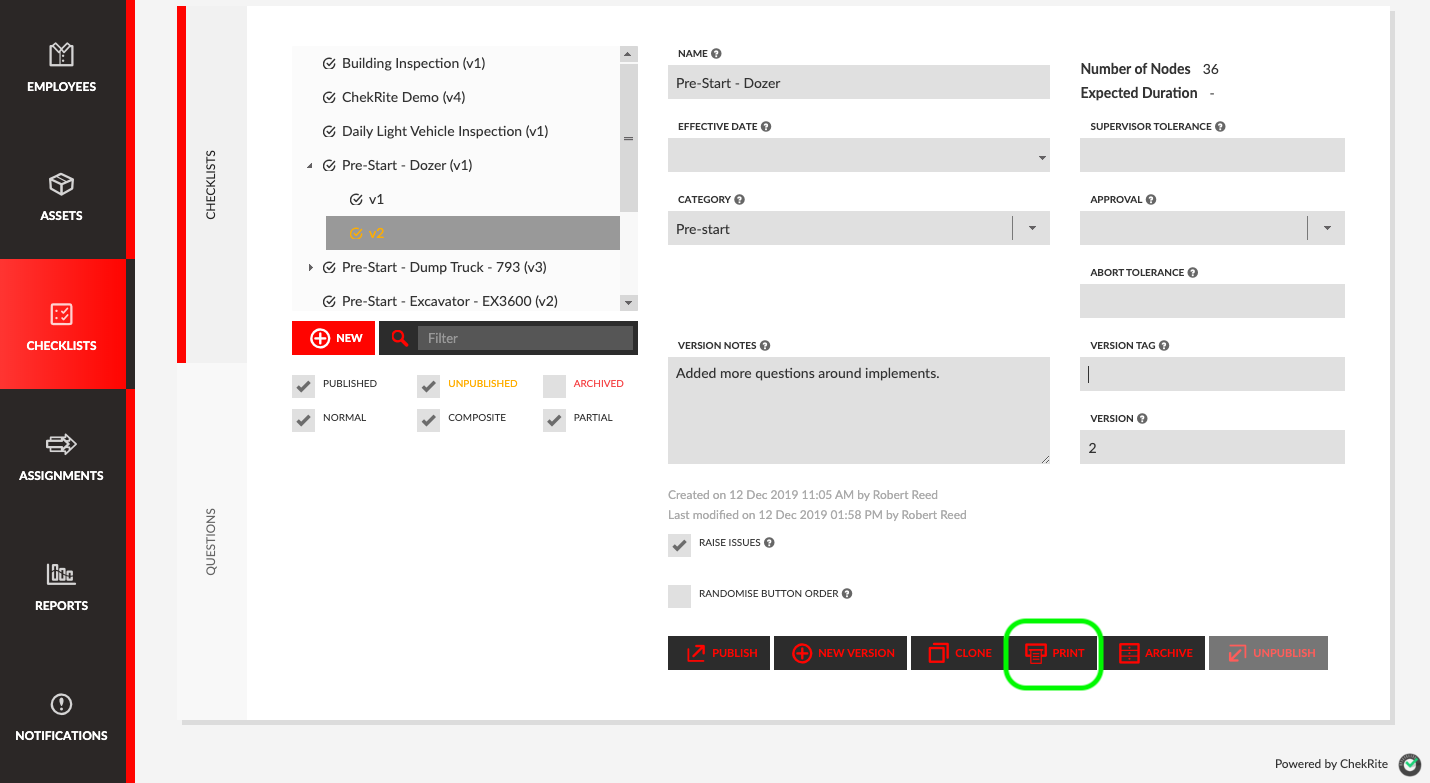
This will generate a PDF that you can then use to quickly review all the questions in your checklist. It will look similar to the one below.
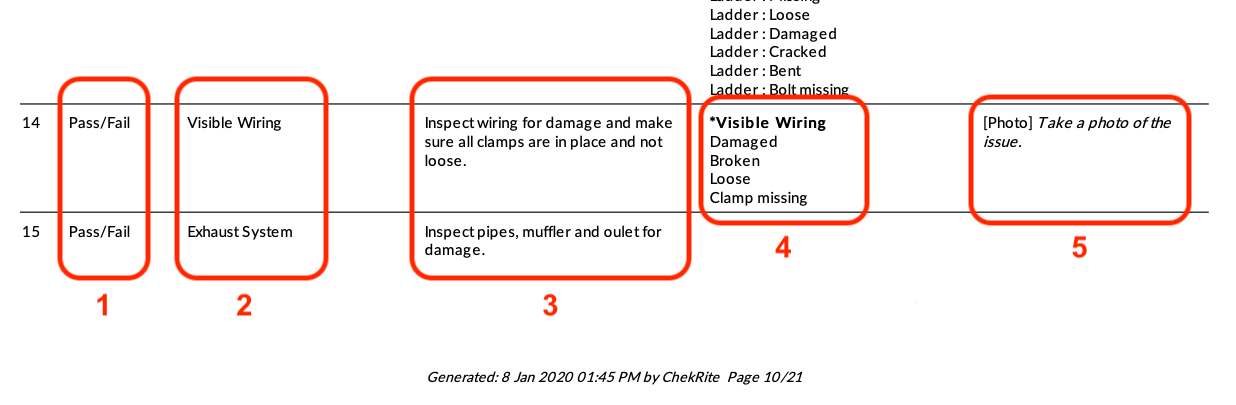
The various elements of the PDF are:
- Response Type: This is the control that is on the screen for the user to answer. It might be a button control like Pass/Fail or Yes/No or it could be a gauge control or even a meter reading such as odometer.
- Title: This is the title of the question and appears at the top of the screen in the checklist.
- Task: This is the task of the question that appears underneath the title telling the user what to look for or do in this question.
- Sub-Checks: These are the sub-checks that will appear if the question is failed. If there are nested items they will appear with colons between them. e.g. Ladder: Bent. If there is a long description, you will see the long description instead of the nested items. e.g. The ladder is bent. If it is mandatory to select a sub-check you will see a small * next to the heading of the sub-check.
- Extra Infos: If there are any extra infos to be entered such as photos, audios, numbers, dates, etc., these will be shown here. Again, the * beside the heading means that this extra info is mandatory.
What to check on the PDF
There are several things that you can easily check on the PDF to ensure your checklist is what you want.
- Spelling: make sure that there are no spelling errors in any of the items on the PDF.
- Consistency of Grammar: ensure that you using the same style of grammar and case throughout the whole checklist.
- Consistency of Language: try to ensure that you use a common and consistent language particularly when it comes to sub-checks. e.g. don't use Broken in one question and Damaged in another when they have virtually the same meaning.
- Correct Response Type: ensure that the response type for the question is the right one. Be especially careful if you are using Yes/No and No/Yes response types.
- Correct Order: ensure the order of the questions are correct and in the order that someone would normally encounter these questions when performing this inspection.
- Correct Extra Infos: ensure that you have the correct extra info and that you have them in all the right places. Particularly when it comes to photos you will want to make sure that you are taking photos for the questions that you really want to get photographic evidence for if they fail.
- Sub-Checks: it's really important to have sub-checks presented when a question fails so that you are getting more structured information about what has gone wrong. The time you invest in creating the right sub-checks will absolutely pay dividends when it comes to reporting and generally knowing a bit more about why things went wrong.
Testing on a Test Device
You've checked through the PDF and are confident you have picked up any spelling errors and other errors. Now can you publish? Not so fast. There is another quick test that you should do to make sure that this is really want you want.
You can actually test out your unpublished checklist on a device set up as a Test Device. You can read more about how to create a Test Device here.
To start testing unpublished checklists on your ChekRite app, you should do the following.
- Sign in to ChekRite
- Select New Check from the dashboard
- Select an asset from your testing asset class that you chose above (e.g. Test)
- Unpublished checklist will now appear in red for you to play with.
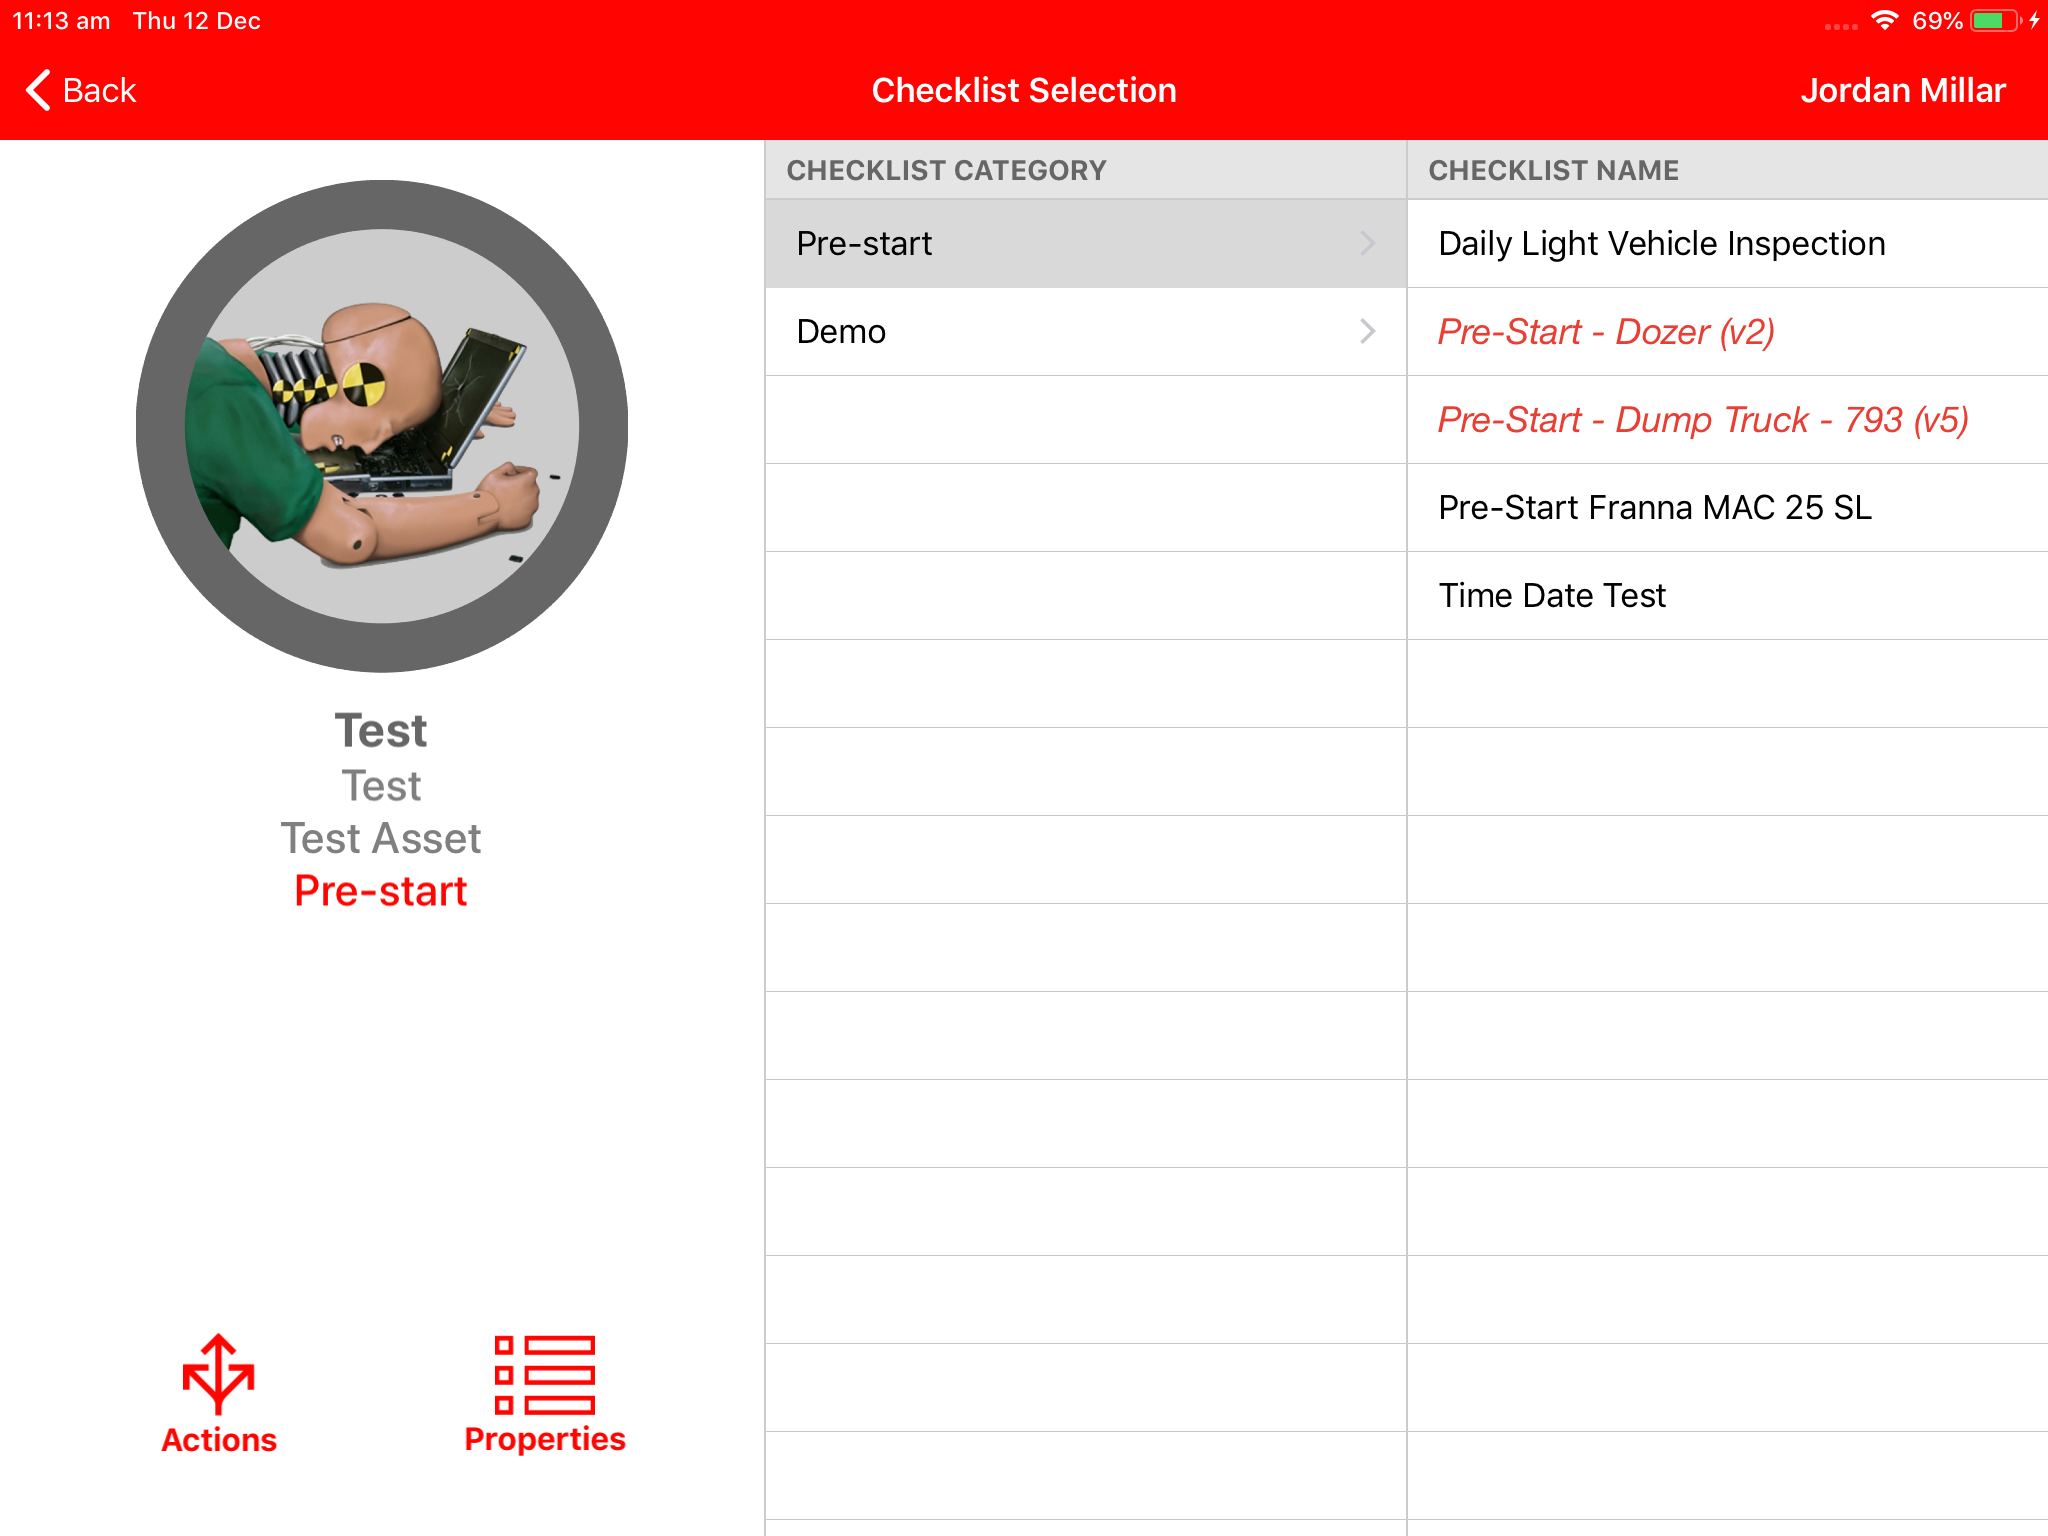
- Select the unpublished (red) checklist that you want to test.
- You will be warned that your results will not be saved as you are playing with an unpublished checklist.
Whilst you are going through the checklist on your test device, here are some of the things you will want to check:
- Spelling: Check it again to make sure there are no spelling mistakes
- Order: It's really important to get the order right for questions. They should be in the same order as the user would encounter items when doing an inspection.
- Response Type: Now that you can see the buttons/gauges/controls on the screen, make sure they are the right ones.
- Failing Questions: Ensure you "fail" questions to see that the sub-checks and extra infos are correct.
- Checklist Logic: If you are using loops and conditions in your checklists, make sure that these work as intended
Lather. Rinse. Repeat.
As you are going through the checklist, if you find an error, you can make that change directly in the portal to fix that error.
Then if you discard the checklist you are currently testing, you can hit the Sync Now button, and then start testing again.
Providing Feedback to the Checklist Author
By far the best way to provide feedback to the checklist author is to mark up the PDF for that checklist. This will allow you to note things like sub-checks that are missing or questions that are in the wrong order quite simply. Then you can scan that document in and send it to the checklist author.
If you are the checklist author, then going through the checklist on a testing device whilst you have that checklist open in the portal will allow you to make changes and corrections straight away.