Table of Contents
Managing Assets
ChekRite is an Asset-based system rather than a form-based one. This means that every inspection that you do in ChekRite is related back to an Asset. Assets are the items that the inspection is being done on or that the data capture process pertains to. This can vary significantly depending on your business, however, it can include anything from mobile equipment, fixed equipment, areas, facilities, buildings, processes, products, or even your labour force (human assets). It's important to think about this before you start creating assets.
Implement an asset naming structure that will be most functional towards:
(i) how users will be conducting the data capture process, and
(ii) what reporting requirement and output is needed.
Checklists are assigned at an Asset Sub-Class level. This means that for any Asset Number within a Sub-Class the user will be able to select from any checklist that has been assigned to that sub-class. As an example, if you had assets that included light vehicles that you needed to inspect, you would create and assign the checklist at the Make & Model (Asset Sub-Class) level, so you would assign the checklist at the Toyota Hilux level rather than a specific Toyota Hilux with the registration ABC123. Assigning it at the Asset Sub-Class level means that any new assets you create of the same type will inherit those checklists from their parent Asset Sub-Class.
How to add asset classes & asset sub-classes
To add a new Asset Class you will need to have Administrator privileges. If you don't have those privileges you can request a new Asset Class by first searching for it when you are adding the asset. If you can't find it, push Advanced Search. This will let you search for the Asset Class in more detail. If you still can't find it there is a Request Asset Class button that allows you to request a new Asset Class from the Administrator.
When adding Asset Classes and Asset Sub-Classes, look in the list to ensure that what you intend to add does not already exist. The list of Asset Classes and Asset Sub-Classes will show all that have been entered for your company (not just your site).
- Go to Organisation and select Asset Classes.
- Click the Add New Asset Class button to add a new Asset Class and Sub-Class.
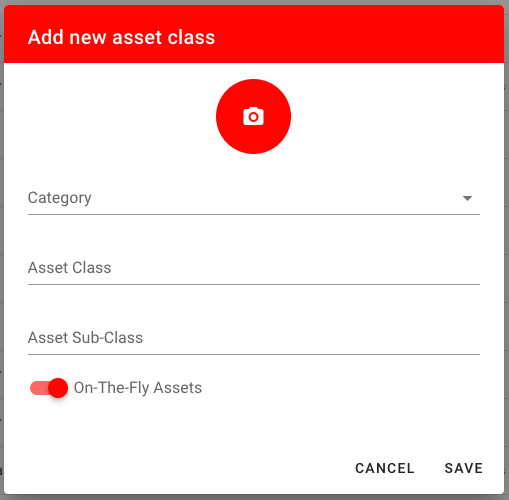
- Select the Asset Category from the Category drop-down menu. (This is a mandatory field)
- Type in the Asset Class and Asset Sub-Class fields.
- If you want end-users to be able to add new assets on the fly in the ChekRite app, tick the Enable on-the-fly Assets checkbox.
- To add a default image for the Asset Sub-Class, click the camera icon at the top and search for your image file on your computer to add this as an image for this Asset Sub-Class. Adding an image at the Asset Sub-Class level means that you won't have to add it at the Asset level as it will inherit the image of the Asset Sub-Class.
How to add assets
- Go to Organisation -> Assets
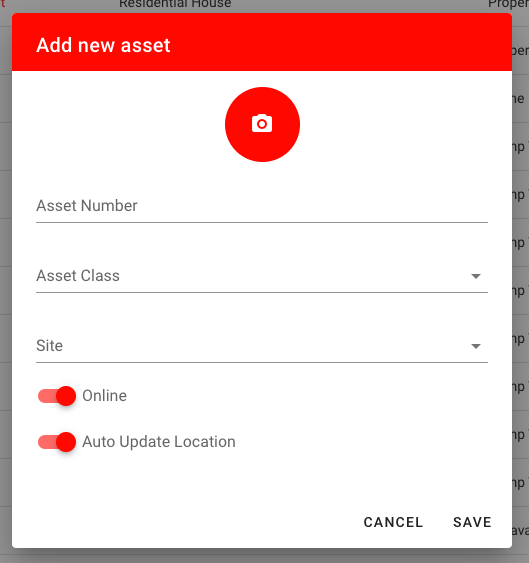
- Click Add New Asset button
- Type in the specific name of the asset in the “Asset Number” field. The Asset Number does not necessarily have to be a numerical number - it may be a specific name, address, location, product etc, however, it must be unique.
- Select the Asset Class / Sub-Class to be added to a specific asset from the drop-down menu. If you don't see the Asset Class you want, you may have to add it or request it to be added by your ChekRite Administrator.
- If you like, you can add a specific photo for this asset by clicking on the camera icon at the top of the window. If you don't add a photo, it will inherit the photo of the Asset Class.
- Decide if you want this asset to update its last known location by checking the Auto Update Location checkbox. (By default this is selected.)
Other Asset Information
Once an asset is selected you can modify the core information on it (such as asset number and asset class) as well as view or manage other information such as that below.
Asset Properties
From the Asset Properties panel, you can view the properties that have been set for that asset (including the historical values), set new properties or print out a list of properties.
To add a new Asset Property push the Add New Property button. You will then be able to select the property you want to add and set the value. Depending on the data type of the property (e.g. date, numeric, text, etc.) your options for entering the value may change.

If you hover over an Asset Property you will be presented with options you can select.
Add to Profile will add that Asset Property to the profile panel on the left so that every time you look at an asset, this Asset Property will be visible if it's set. This is really useful for Asset Properties you always want to see. This will apply to everywhere that the Asset Panel is displayed. Once added, the hover action will change to Remove from Profile.
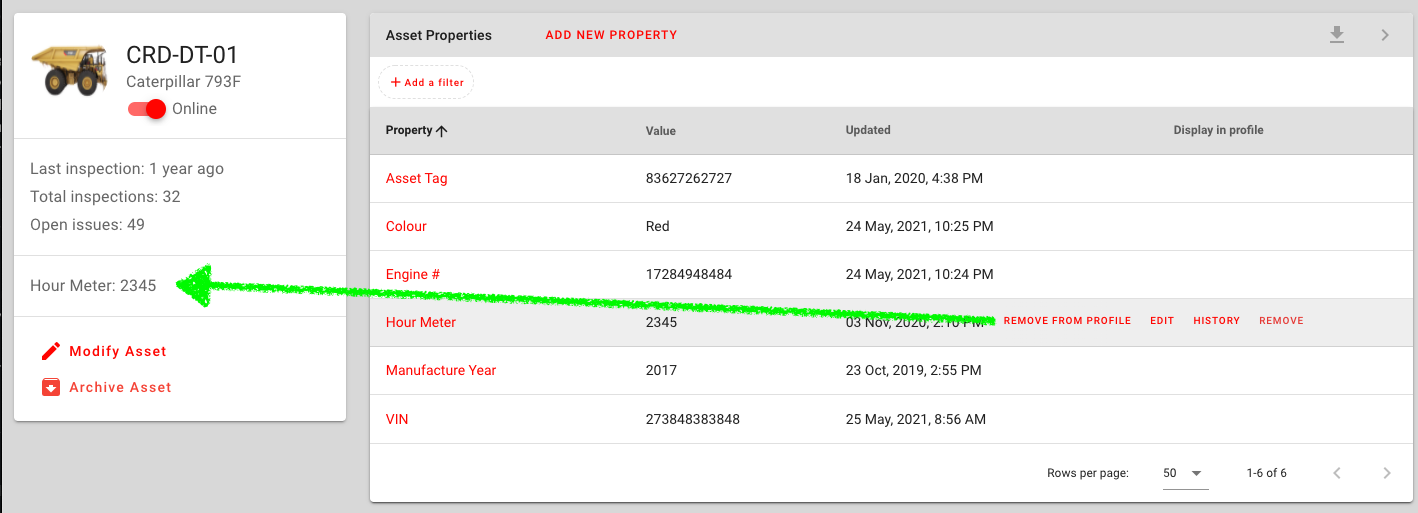
You can also look at the historical values of an Asset Property and see who changed it and when. Just click the History hover action and you will be presented with a window showing you all the previous versions of that Asset Property.

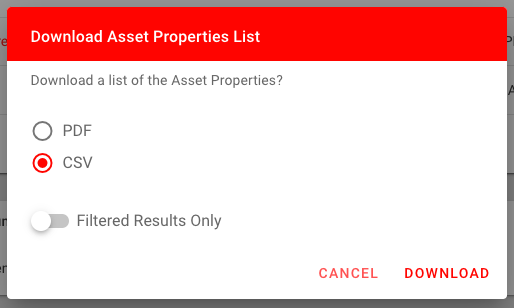
Another handy feature on the Asset Properties panel is the ability to download a list of the current values of all the Asset Properties for this Asset. To do this, push the download icon at the top right of the panel and you will be presented with the dialog box below. From here you can choose whether to have this list provided as a PDF or CSV file. You can also choose just to download the filtered results otherwise all the current values of the Asset Properties for this Asset will be included.
Asset Documents
Asset Documents are documents of files that you want to store for an asset that will be made available in the ChekRite and ChekMate apps. This could be things like user manuals but also insurance or registration documents. These documents are synced down locally to the device and users can view them whenever they need to and, if allowed, share them with others.
To add a new Asset Document:
- Go to Organisation -> Assets and select the asset you want to add a document for
- Click on the Asset Documents panel to open it and push the Add New Document button.
- Enter the required information on the document.
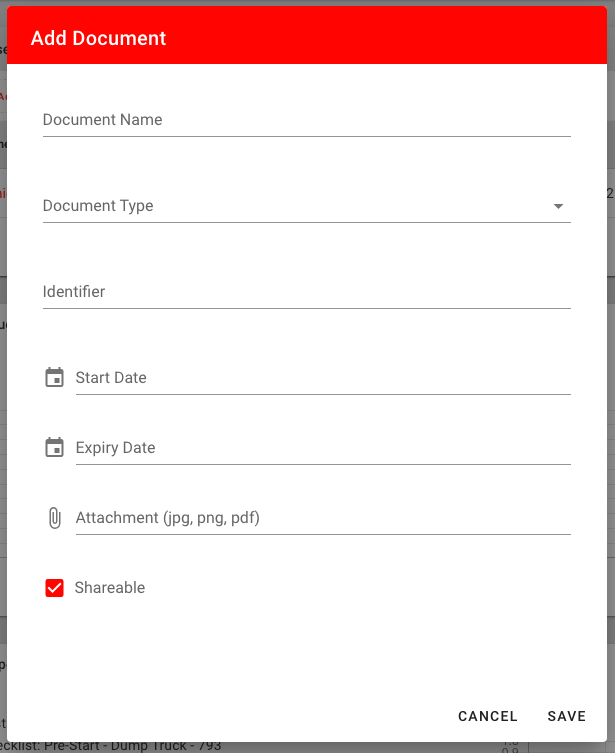
Document Name
This is what the document is. Use this to describe what the document is so that if there are several of the same type, you know what it is. E.g. Comprehensive Insurance Policy or CTP Insurance Policy.
Mandatory
Document Type
Select from the Drop Down list of valid document types. If you need to add a new document type, do it through the Advanced menu.
Mandatory
Identifier
If the document has a unique identifier such as a Policy Number or Registration number you should enter it here. Not all documents will have this though.
Optional
Start Date
If the document has a start date or effective date enter it here to be used in reporting.
Optional
Expiry Date
If the document has an expiry date such as an insurance policy enter it here so that you can report on documents that are approaching expiry.
Optional
Attachment
This is the document itself. It can only be in either a JPG, PNG or PDF format. Editable documents such as MS Word and MS Excel are not supported.
Mandatory
Shareable
If you want to allow users to be able to share this document with others. If ticked, they will have the option to send a public link to the document to others by email or text.
Optional
- Push the Save button.
Asset Document Date Validation
It is possible when defining Asset Document Types in the system for you to add some simple validation to these document date properties. Below are the options you can set for these dates.
Start Date |
|
End Date |
|
Asset Issues
This will display all the issues that have been raised for the asset. From here you can triage or review the issue. You can also print an issue worksheet or report once the issue is selected. You can add filters to only show certain issues or search by the issue title.
Asset Inspections
This will display all the inspections that have been submitted for this asset. From here you can view the inspection as well as share the PDF.
Adding new Asset Properties
By default in ChekRite, we require very little information on an asset: asset class, asset sub-class and asset number. However very often you will want to store more information on the asset. This will depend on the sort of business you are in and the sorts of assets you have. For example, if you had a vehicle you might want to store VIN or year of manufacture, or registration renewal date. These asset properties are completely customisable by you.
You can update the value of asset properties in the portal, in the ChekMate app, and even through a checklist. You can also display the value of an asset property in the task of a question.
First you need to define what these asset properties are and then you can enter them.
- Go to Home -> Settings -> Tables & Items
- Select the Asset Properties table.
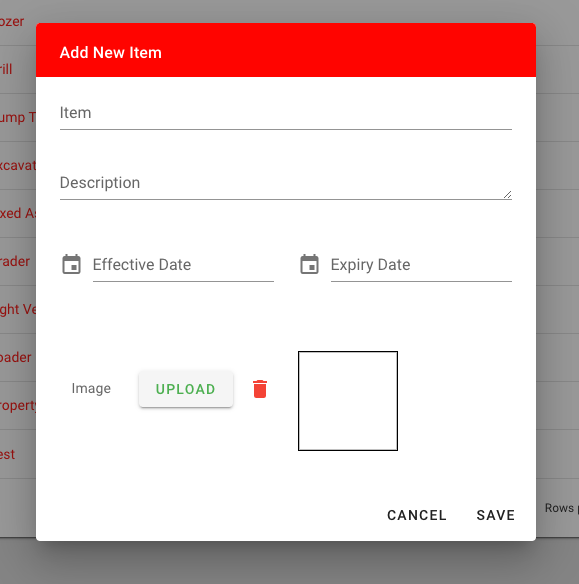
- Click on the Add New Item button and then type the name of the asset property in the Item field. You can optionally add a Description of this asset property.
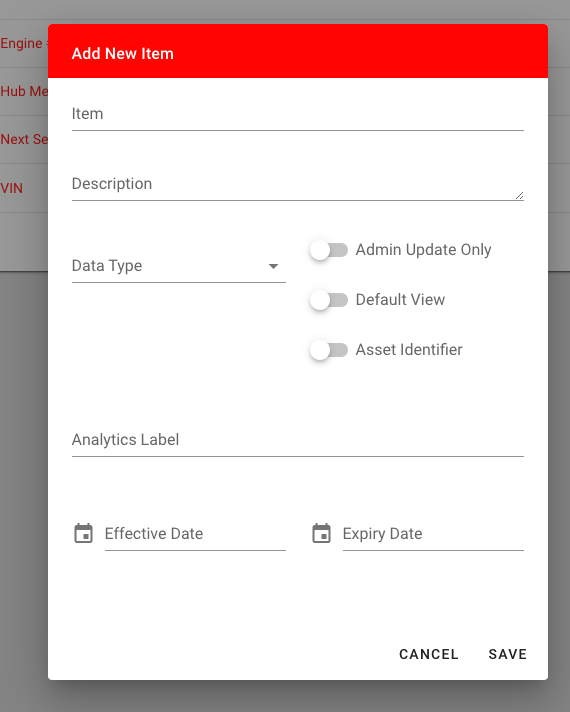
- Then select the Data Type of the asset property from the drop-down list. This helps decide how the user will enter that information and what validation will take place.
- If you want only Admins to be able to update this asset property in the portal then turn on the Admin Update Only switch. All users can still update Asset Properties by submitting inspections in the apps though.
- If you wish this Asset Property to appear by default in the assets list for new users (they can still customise this view themselves) then turn on the Default View switch.
- If you want to be able to search for this asset by this asset property then slide on the Asset Identifier switch.
How to update asset categories
- Go to Home -> Settings ->Tables & Items.
- Select the Asset Categories table. This will show you all the Asset Categories that have been added to your company
- Select the Asset Category that you want to update and modify it.
- You can add new Asset Categories here by clicking the Add New Item button and entering the name in. You are also able to upload a default photo for this Asset Category that will be used if there is no Asset or Asset Class photo.
Restoring Archived Assets
If you have deleted or archived an asset you can restore it back. You will need to have Administrator privileges to do this.
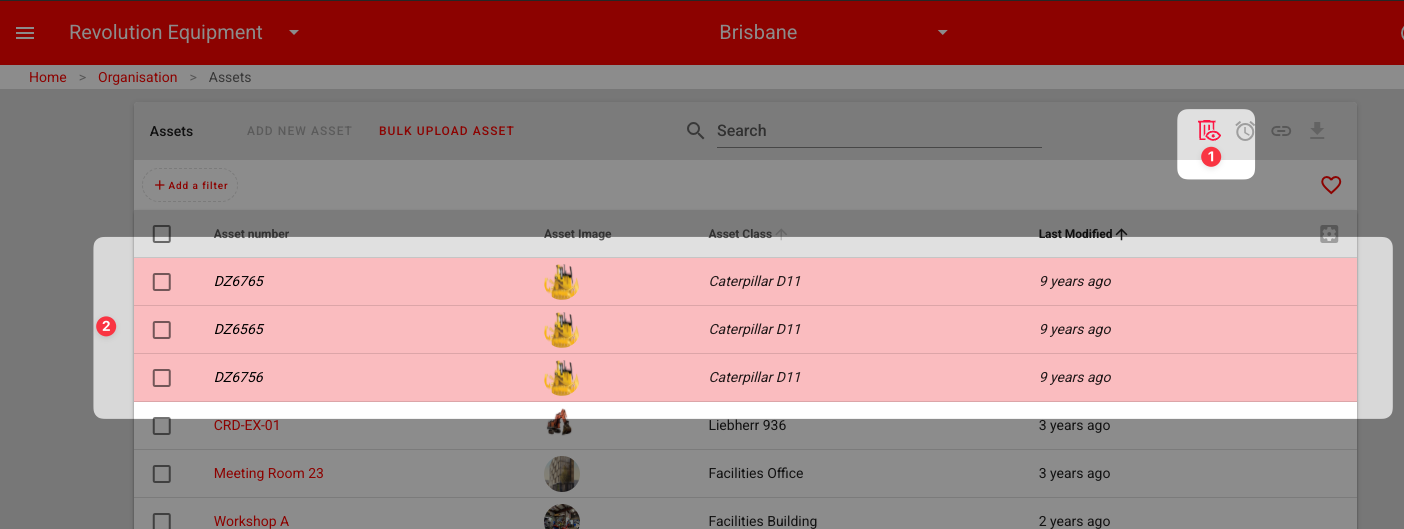
- Turn on the Show Archived Items mode with the small bin icon at the top right.
- All your archived or deleted items will be shown with a red background. Search for the one you want and click on it.
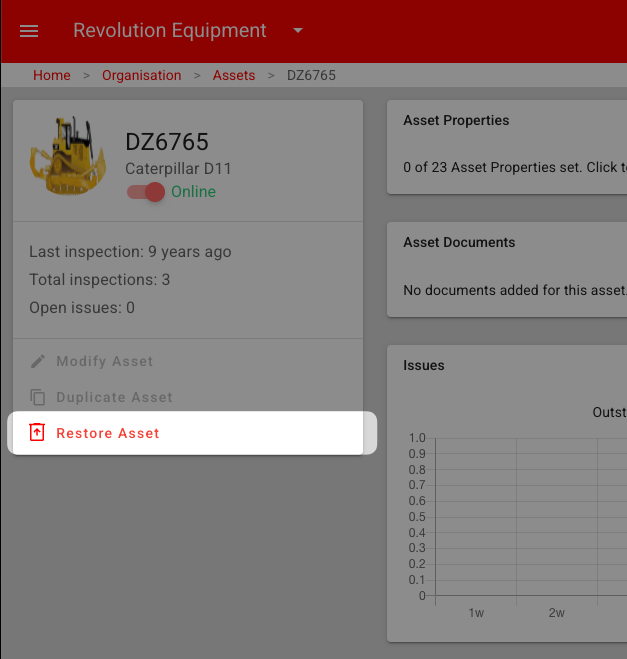
Once you have found the item that you wish to restore, on the left hand side you will see a Restore Asset button. This will restore the asset and any properties or documents associated with it.
Change the Site of one or more Assets
Several ways that you can change the site of an asset. These include:
- Changing the site for the individual asset in the portal
- Selecting multiple assets at once and bulk changing the site
- Using an inspection and notification to move the asset from one site to another
Changing the Site of a single Asset
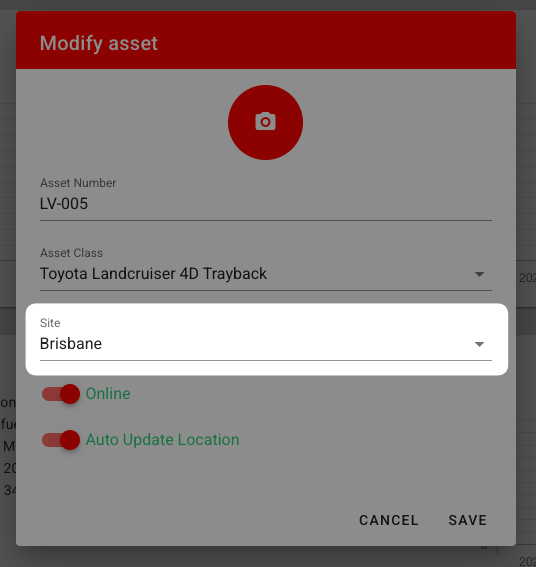
To change the site of a single asset, select the asset under Organization -> Assets and then press the Modify Asset button. Once you do that, you will see you will have the ability to select the site from the dropdown list. It should be noted that you can only change the asset to sites that you are allowed to see. So if you don't have access to a specific site, you will not be able to move the asset to that site.
Changing the Site for several Assets at a time
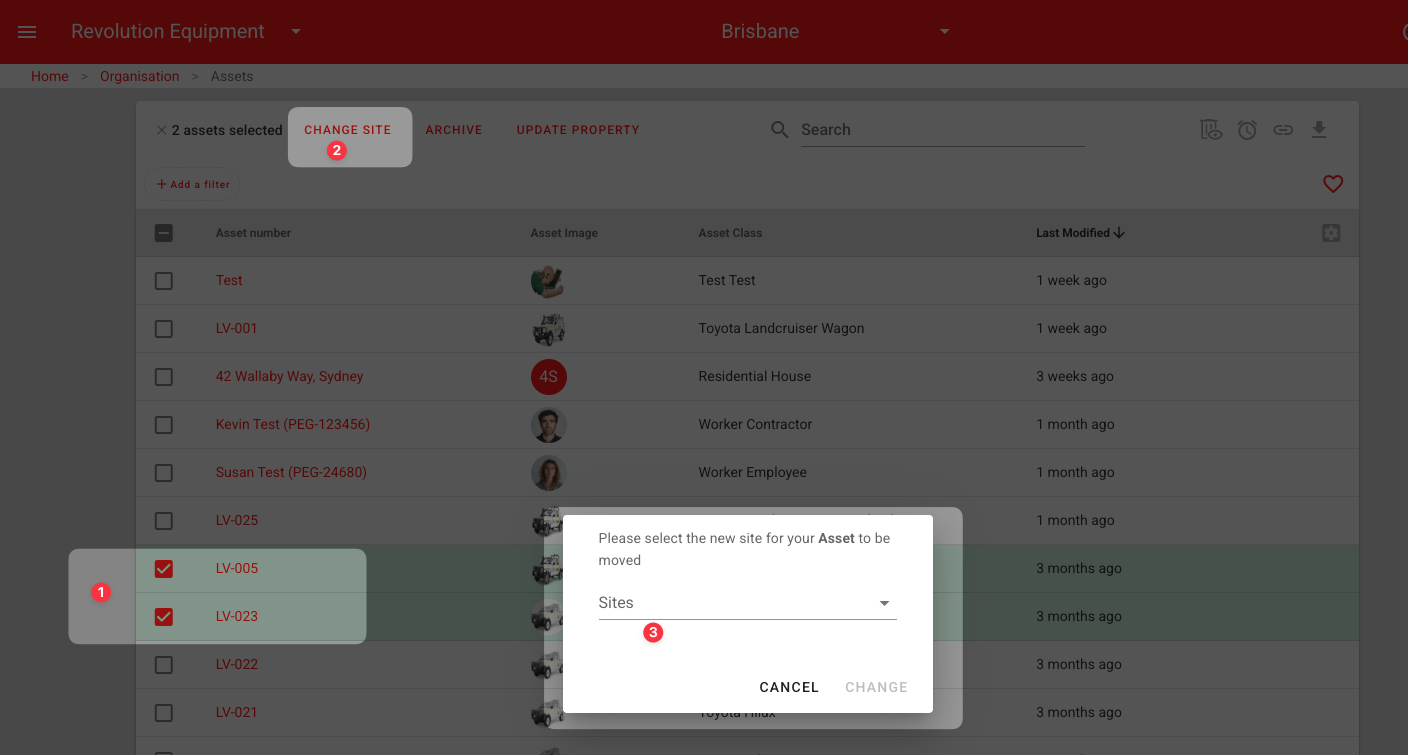
ChekRite has the ability to allow you to select multiple assets and change the site of those assets in bulk. Note that this is an administrator function, and if you cannot see this function, it's likely because you don't have access to it.
Firstly, select the assets whose sites you want to change. Then at the top of the screen, push the Change Site button. On the dropdown menu, select the site that you want to move those assets to. You will only be able to see sites that you have access to.
Changing the Site via an Inspection & Notification
In some cases, you may wish to change the site of an asset via an inspection and notification.
An example of this is when you are moving an asset from one site to another via a truck or low loader and you want to do an inspection to make sure that the asset has been securely loaded on the truck. Once that inspection is submitted, you want to move the asset automatically to the destination site.
This is something that can be easily accomplished in ChekRite. When you're designing that checklist for the inspection, ensure that you add either a sub-check or a dynamic list that contains the exact spelling of the destination sites. Ensure that selecting a site is mandatory and that only one site can be selected. Then set up a notification that looks at that specific question on that checklist and then uses a change site action to move the asset to the selected site.
Merging Duplicate Assets
CheckRite generally prevents you from creating duplicate asset numbers, as you can't add the same asset number twice. However, if you have made a duplicate with a very slight difference in asset number, you may want to try and merge these two assets together. Unfortunately, there is no easy way to do this in the system. However, it is possible to transfer inspections from one asset to the other, provided that the assets are in the same site and have the same access to the same checklists.
If you have accidentally created a duplicate asset, find the asset with the least amount of information (Properties, Documents, and Inspections) and then move those items to the one asset with the most information. Now if you select the Inspections, you will see an option to Transfer Inspections and then you can move those inspections to another asset. Note that this is an administrative task only and you will need the privileges to be able to do this.
Move Inspections from one Asset to Another
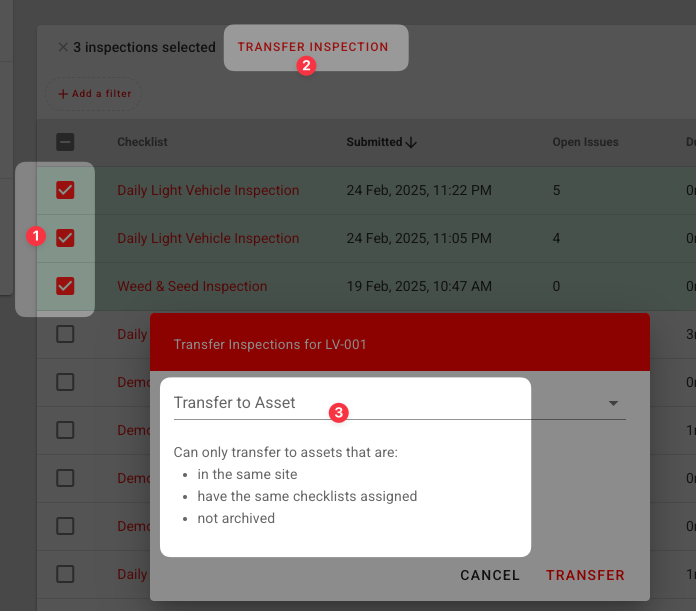
Note that this is an administrator-only function. If you accidentally do an inspection on the wrong asset, or you have created a duplicate asset and want to move the inspections from one asset to another, there is the ability for administrators to transfer inspections from one asset to another. There are some caveats:
- You can only transfer to assets that are in the same site
- Have the same checklist assigned
- Are not archived
To transfer inspections from one asset to another follow the instructions below:
- Select the inspections on the asset that you wish to transfer
- Push the Transfer Inspections button
- Select the new asset you want to transfer these inspections too
Bulk Changing Asset Properties
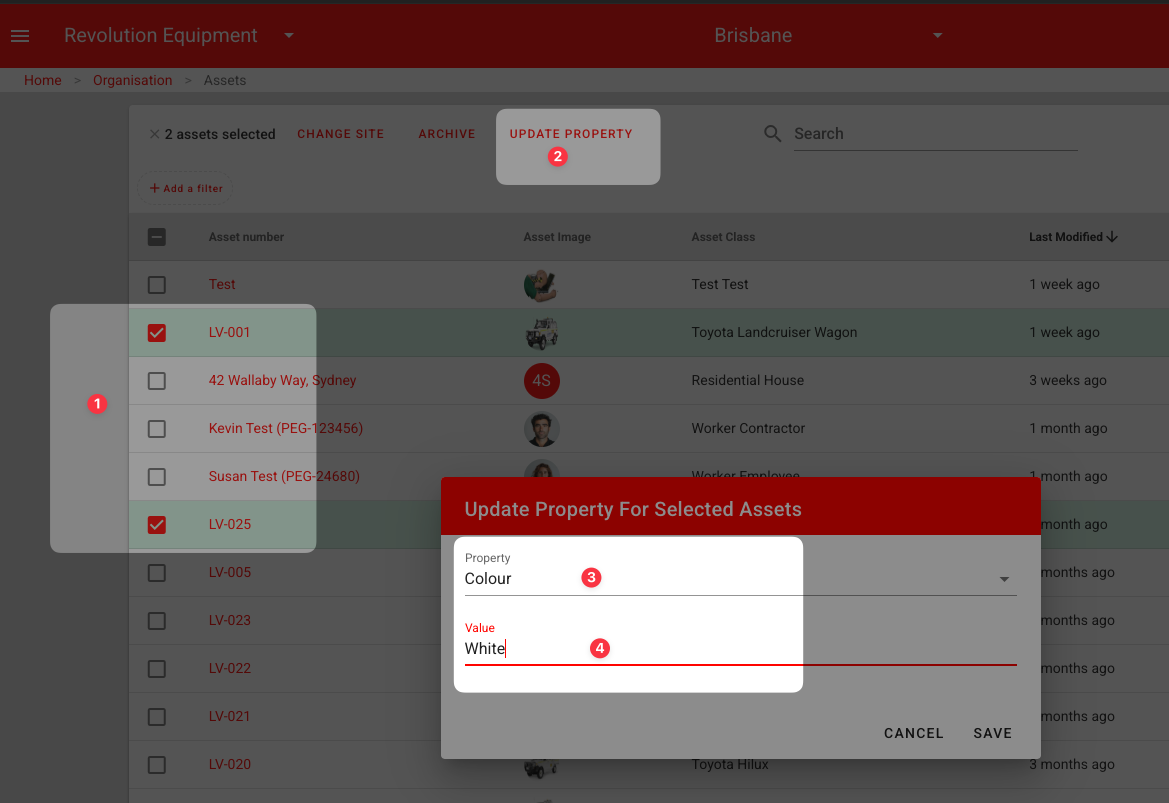
Note that this is an administrator only function. If you would like to change a single asset property to the same value of multiple assets, you can do that in the portal by following the instructions below:
- Select the assets whose property you want to update
- Push the Update Property button
- Select the Property you wish to change
- Enter the value you want all the selected assets to have for that property